TERMOVENTILATORE MURALE CERAMICO 2000W - MODELLO: TZR06N - MANUALE D'USO
←
→
Trascrizione del contenuto della pagina
Se il tuo browser non visualizza correttamente la pagina, ti preghiamo di leggere il contenuto della pagina quaggiù
TERMOVENTILATORE MURALE
    CERAMICO 2000W
                     MODELLO: TZR06N

                      MANUALE D’USO
  Leggere attentamente questo manuale di istruzioni. Conservalo per riferimento futuro.
MANUALE DI ISTRUZIONI
Vi ringraziamo per la preferenza accordata avendo scelto questo prodotto.
Vi preghiamo di leggere attentamente le informazioni contenute in questo manuale, in quanto Vi
aiuteranno a sfruttare al meglio le caratteristiche del prodotto.
Il presente libretto è parte integrante dell’apparecchio e deve essere letto attentamente prima dell’utilizzo
perché fornisce importanti indicazioni riguardanti la sicurezza di installazione, d’uso e di manutenzione.
Conservare quindi con cura.
Cordialmente
Lange Distribution Srl
AVVERTENZE GENERALI
1. Rimuovere l’unità dall’imballaggio e assicurarsi che sia intatta. In caso di dubbio, non utilizzare
l’unità e contattare un centro assistenza qualificato. Non lasciare che materiali e accessori
dell’imballaggio, come ad esempio pellicole, vengano a contatti con bambini.
2. Questo prodotto è destinato ad un uso esclusivamente domestico come stufa per riscaldamento
.Non utilizzare per scopi diversi da quelli descritti da questo manuale. Ogni uso improprio può
costituire un pericolo.
3. Non utilizzare all’esterno. Non lasciare il prodotto esposto agli agenti atmosferici
4. Attenzione: per evitare il surriscaldamento non coprire l’apparecchio.
5. L’apparecchio non deve essere posizionato appena al di sotto di una presa di corrente
6. L’uso di apparecchi elettrici comporta il rispetto di alcune regole fondamentali per prevenire
rischi di scariche elettriche. Leggere attentamente le istruzioni.
7. Questo prodotto e’ previsto per esclusivo impiego domestico.
8. Prima di procedere alla manutenzione e pulizia disconnettere l’apparecchio dall’alimentazione.
9. Non usare nebulizzatori spray (es: insetticidi, spray per capelli ecc) potrebbe creare danni
all’involucro.
10. Nel caso in cui si verificassero situazioni anomale spegnere immediatamente l’apparecchio e
contattare il rivenditore o il servizio di assistenza.
11. Non utilizzare prese di corrente volanti oppure cavi danneggiati.
12. Non utilizzare prolunghe per alimentare il prodotto.
13. Quando si stacca la spina tenerla saldamente per evitare shock elettrico, corto circuito o
incendio.
14. Non fissare interruttori di sicurezza con nastro adesivo, per pericolo di incendio.
15. E’ assolutamente vietato smontare o riparare l’apparecchio per pericolo di shock elettrico; se
necessario rivolgersi al rivenditore o centro assistenza.
16. ATTENZIONE: non installare questo apparecchio in prossimità di vasche da bagno, doccia,
piscina.
17. Evitare di toccare il prodotto con mani umide o bagnate o a piedi nudi.
18. Non appoggiare oggetti sull’apparecchio per pericolo di incendio.
19. Non usare l’apparecchio vicino a oggetti infiammabili quali tende, drappeggi ecc.
20. Non inserire oggetti metallici nelle fessure dell’apparecchio
21. Prima di collegare l’apparecchio alla rete elettrica accertarsi che la tensione sia corretta secondo
quanto riportato sulla targa del prodotto e che l’impianto sia conforme alle norme vigenti.
22. Non toccare la connessione all’alimentazione con mani umide23. Non usare il prodotto per scopi diversi da quelli per cui e’ stato costruito.
24. Non utilizzare prese multiple ma solo prese con singola uscita con potenza specifica.
25. Non installare il prodotto appena sotto una presa elettrica
26. Se il cavo di flessibile esterno e’ danneggiato esso deve essere sostituito da personale qualificato
al fine di evitare incidenti.
27. I bambini devono essere sorvegliati per sincerarsi che non giochino con l’apparecchio.
28. I bambini con età inferiore ai 3 anni dovranno essere tenuti lontano dall’apparecchio se non
continuamente controllati.
29. I bambini con età compresa tra i 3 e gli 8 anni potranno unicamente spegnere/accendere
l’apparecchio posizionato o installato nella sua posizione normale di funzionamento e siano
controllati o istruiti su come utilizzare l’apparecchio in modo sicuro e siano consapevoli dei rischi
possibili. I bambini con età compresa fra i 3 e gli 8 anni non dovranno inserire la spina di
alimentazione alla presa di corrente, regolare l’apparecchio e pulirlo o comunque operare
qualsiasi manutenzione.
30. L’apparecchio può essere utilizzato da bambini di età non inferiore a 8 anni e da persone con
ridotte capacità fisiche, sensoriali o mentali, o prive di esperienza o della necessaria conoscenza,
purché sotto sorveglianza oppure dopo che le stesse abbiano ricevuto istruzioni relative all’uso
sicuro dell’apparecchio e alla comprensione dei pericoli ad esso inerenti.
31. I bambini non devono giocare con l’apparecchio. La pulizia e la manutenzione destinata essere
effettuata dall’utilizzatore non deve essere effettuata da bambini senza sorveglianza.
32. ATTENZIONE: alcune parti dell’apparecchio possono diventare molto calde e causare
bruciature. Una attenzione particolare deve essere data qualora siano presenti bambini e
persone vulnerabili.
33. L’apparecchio deve essere installato ad almeno 1,8metri dal suolo;
34. Questo termoventilatore è stato progettato per l’installazione a muro, a 1,8 m dal pavimento e
almeno 50 cm dai due lati del muro. Non utilizzarlo appoggiato sul pavimento. Mantenere tutti
gli oggetti ad almeno 1 metro dal fronte, dai lati e dal retro dell’apparecchio.
35. L’apparecchio deve essere installato in modo che gli interruttori o altri dispositivi di comando
non possano essere toccati da una persona che si trovi nella vasca da bagno o nella doccia;
36. Non utilizzare questo apparecchio collegato a programmatori, temporizzatore, sistema di
comando a distanza separati, timer o qualsiasi altro dispositivo che possa accenderlo
automaticamente in quanto esiste il pericolo di incendio nel caso in cui l’apparecchio sia coperto
o posizionato in modo non corretto.
37. Non coprire il termoventilatore con alcun oggetto e non utilizzarlo per asciugare i panni.
38. Non toccare le superfici calde dell’apparecchio. Maneggiarlo utilizzando solo le apposite
maniglie.
39. Per proteggersi dal rischio di scosse elettriche, evitare il contatto del prodotto con acqua o altri
liquidi.
40. E’ necessaria la supervisione di un adulto quando l’apparecchio e’ usato alla presenza di un
bambino.
41. Scollegare il cavo di alimentazione quando l’apparecchio non e’ in uso o quando si deve
procedere alla pulizia.
42. Aspettare che l’apparecchio si raffreddi prima di eseguire qualsiasi intervento.
43. Nel caso in cui si verificassero situazioni anomale spegnere immediatamente l’apparecchio e
contattare il rivenditore o il servizio di assistenza.
44. Quando si stacca la spina tenerla saldamente per evitare shock elettrico, corto circuito o
incendio45. E’ assolutamente vietato smontare o riparare l’apparecchio per pericolo di shock elettrico; se
necessario rivolgersi al rivenditore o centro assistenza
46. L’uso di accessori non raccomandati dal produttore potrebbe causare danni.
47. Quest’apparecchio e’ destinato esclusivamente all’uso domestico e non deve essere
assolutamente usato all’esterno.
48. Evitare che Il cavo di alimentazione entri in contatto con fonti di calore;
49. Installare sempre l'apparecchio lontano da tende, tessuti o materiali infiammabili, e in luoghi
dove ci sia un’adeguata ventilazione.
50. Prima di collegare l’apparecchio alla rete elettrica accertarsi che la tensione sia corretta secondo
quanto riportato sulla targa del prodotto e che l’impianto sia conforme alle norme vigenti
51. Non utilizzare prese di corrente volanti oppure cavi danneggiati. E evitare l’uso di prolunghe.
52. Spegnere sempre l’apparecchio prima di scollegare il cavo di alimentazione.
53. Pericolo di Lesioni: non usare il prodotto per scopi diversi da quello per cui è stato costruito. Non
fare uso errato dell’apparecchio.
54. Nel caso in cui si verificassero situazioni anomale spegnere immediatamente l’apparecchio e
contattare il rivenditore o il servizio di assistenza.
55. Quando si stacca la spina tenerla saldamente per evitare shock elettrico, corto circuito o
incendio.
56. Il prodotto deve essere posizionato in modo tale che un utilizzatore nel bagno o nella doccia non
possa raggiungere pulsanti o comandi del prodotto.
57. ATTENZIONE: Non usare il prodotto in stanze piccolo occupate da persone incapaci di lasciare
l’ambiente per conto proprio, a meno che una costante supervision sia assicurata.SPECIFICHE TECNICHE
Modello Potenza max Tensione Frequenza
Classe II
TERMOZETA TZR06N 2000W 220-240V~ 50-60Hz
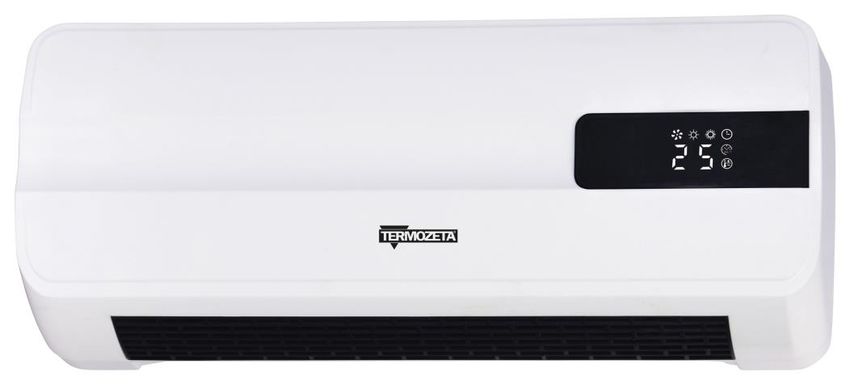
DESCRIZIONE
CARATTERISTICHE:
1. Guscio in plastica di alta qualità e lunga durata.
2. Elementi riscaldanti in ceramica PTC, riscaldamento ad alta efficienza, riscaldamento rapido, silenzioso, inodore, non
inquinante, nessuna fiamma e non consuma ossigeno.
3. Impostazione del calore a due livelli, è possibile fissare la temperatura come desiderato.
4. Esiste un fusibile di temperatura per evitare il surriscaldamento e protezione da surriscaldamento del motore. Spegne
automaticamente la macchina quando l'uscita della ventola è bloccata e riaccende la macchina quando gli oggetti
vengono rimossi.
5. Si può selezionare: Vento naturale /vento caldo. La funzione riscaldamento può essere arrestata in estate; la
macchina soffierà vento freddo.
6. Termostato di sicurezza. Protezione da surriscaldamento.
INSTALLAZIONE
Praticare due fori nel muro e mantenere una altezza superiore a 2,0 m dal suolo, il diametro del foro deve essere
sufficient per contenere il tassello, che ha un diametro di 6 mm. Dopo aver infilato il tassello, fissare il gancio di
espansione sul tassello con la vite. Assicurarsi che il gancio sia inserito nella parte inferiore. Vedere il disegno
sottostante per una migliore comprensione. (vedi l'immagine)
Utilizzare i componenti della macchina (viti e tubo di espansione) fissati al muro come nella figura seguente, quindi
montare la macchina
1 、 La distanza tra il prodotto e il soffitto (e il lato) deve essere ≥30
cm.
2 Dimensioni dell'installazione del prodotto, vedere la Figura.
3 、 Nota: quando il prodotto è installato, il gancio (vite) è allineato
con il foro "A" sul prodotto. Dopo averlo appeso, deve essere spostato
sulla "B", al fine di fissarlo saldamente.
Quando si rimuove il prodotto, deve essere spostato da "B" a "A",
quindi estratto.UTILIZZO
1. Assicurarsi che l’alimentazione sia 220-240V~, 50-60Hz.
2. Inserire la spina nella presa a muro.
3. Accendere la macchina e fissare la funzione desiderata
“0” è “SPENTO”. “I”: è “ACCESO”.
4. Utilizzare la macchina in base ai tasti sul telecomando a infrarossi. (I tasti del telecomando sono rappresentati qui
di seguito).
1 、 Accendere l'interruttore di alimentazione, il display a LED
mostra Temperatura ambiente, l'apparecchio è in standby.
2 、 Sul lato destro della base dell'apparecchio è presente un
interruttore, premere “START / STOP”, riscaldamento elevato,
premere di nuovo, l'apparecchio si spegnerà.
3 、 Tutte le funzioni devono essere gestite dal telecomando.
4 、 La ventola continua a funzionare per 30 secondi quando si
spegne l'apparecchio (dopo il riscaldamento)
Nota: l'indicatore si illumina quando la funzione corrispondente è
attiva
Descrizione dei simboli sul display:
: VENTILATORE
: Basso riscaldamento 1000W
:Alto riscaldamento 2000W
:Timer
: Timer settimanale
:Luce accesa fissa:
Selezione del modo di temperatura,
temperature tra 18-45℃
Luce lampeggiante:
Avvio rilevamento finestre aperte.
Telecomando:
Premere “ ” come segue: ON (Vemtola in funzione), OFF (La ventola continua a funzionare
Acceso per 30 secondi quando si spegne l'apparecchio).
Premere “ ” per selezionare: Basso calore, alto calore, funzionamento della VENTOLA.
Riscaldamento
Premere “ ” to selzionare timer come segue: 1H,2H,3H.....8H. Quando si avvia il timer
Timer settimanale, non è possibile impostare questa funzione timer.Selezione 1、Premere “ ”,la modalità temperatura è in attesa, Premere “+” “-” per impostare la
temperatu temperatura, La Temperatura si può impostare tra: 18-45℃.
re
Premere “-”,
Seleziona la temperature uguale o Inferiore a quella ambiente, si arrest ail
Temperature Luce riscaldamento.
accesa Premere “+”,
Fissa la temperatura 1-2 ℃ più alta della temperature ambiente, Basso
riscaldamento
Fissa la temperature uguale o maggiore di quella ambiente di +3 ℃ , Alto
riscaldamento.
2、Premere OK o dopo che il LED ha lampeggiato per 5 secondi, si avvia la modalità di
impostazione della temperatura.
Rilevamen 1、Il rilevamento della finestra aperta può essere avviato solo quando l'apparecchio è in
to di modalità riscaldamento (non può essere avviato quando l'apparecchio funziona solo con
finestre la ventola) o in modalità temperatura impostata.
aperte
2、Premere “ ”, per attivare o disattivare il Rilevamento finestra aperta
3、Avvio del rilevamento della temperatura dopo 1 minuto dall'avvio del rilevamento della
Luce finestra aperta.
Rilevamento lampeggia Per 10min, ciclicamente ogni 5 min, viene rilevata la temperature.
di finestre nte I dettagli sono indicate nella tabella sotto riportata.
aperte
Ciclo Tempo Descrizione
Min: s Min: s
00:00 - 01:00 0:00 Inizio rilevamento finestra aperta
01:00-11:00 1:00 Inizio rilevamento temperatura
Punto di controllo iniziale del rilevamento
della temperatura
6:00 Punto di controllo 1 di rilevamento della
temperatura (punto di controllo di
rilevamento rapido della temperatura)
.1、Il punto di controllo 1 del rilevamento
della temperatura si riduce dal punto di
controllo iniziale del rilevamento della
temperatura ≤8 ℃, l'apparecchio mantiene
il riscaldamento e il rilevamento della
finestra aperta continua a funzionare.
2、Il punto di controllo 1 del rilevamento
della temperatura si riduce dal punto di
controllo iniziale del rilevamento della
temperatura> 8 ℃. L'apparecchio smette di
riscaldarsi e resta in attesa, Rilevamento
finestra aperta stop (Vedi Note)
3 、 Punto di controllo rilevamento
temperatura 1 (** ℃) ≥ Punto di controlloavvio rilevamento temperatura,
l'apparecchio mantiene il riscaldamento e il
rilevamento della finestra aperta continua
a funzionare
** ℃: temperatura massima di rilevamento
51 ℃ (vedere protezione di spegnimento)
11:00 1、Punto di controllo rilevamento
temperatura 2 (punto di controllo
rilevamento rilevamento rallentamento
della temperatura)
2、La temperatura a questo punto è la fine
di questo ciclo e l'inizio del ciclo
successivo.
3、 Per 10 minuti come un round, in un
round, rileva la temperatura una volta ogni
5 minuti
4、 Al punto di controllo del rilevamento
della temperatura 2, il metodo di prova è
lo stesso del punto di controllo del
rilevamento della temperatura 1.
(confrontare con il punto di controllo
iniziale del rilevamento della
temperatura)
1、Quando l'apparecchio smette di riscaldare, l'allarme dura 5s e
Osservazioni la ventola continua a funzionare per 30s, quindi resta in attesa,
imposta il lampeggiamento della spia della temperatura e la
visualizzazione del LED OFF e il lampeggiamento.
1.1Premere per ripartire nello stesso stato di
funzionamento prima dello spegnimento.
Dopo il riavvio, il rilevamento della finestra aperta inizia un nuovo
ciclo.
1.2Premere per spegnere l’apparecchio, il display
mostrerà la temperature ambiente e la macchina si mette in
attesa.
Il timer settimanale può essere avviato solo quando l'apparecchio è in modalità riscaldamento
(impossibile avviare quando l'apparecchio funziona solo con la ventola) o in modalità temperatura
impostata.
Prima volta per l'avvio (avvio dopo l'interruzione dell'alimentazione), è
necessario impostare l'ora corrente.
Metodo di impostazione:
Tempo Prima a、Imposta il giorno della settimana: se il display mostra 01, è lunedì,
iniziale accensione premere + o - per regolare il giorno attuale, 01-07, è da lunedì a domenica.
Premere OK per terminare l'impostazione.
b、Imposta ore: se display 00, è 0H, premere + o - per regolare l'ora, da
00 a 23, da 0H a 23H. Premere OK per terminare l'impostazione.
c、Impostare i minuti: se display 00, è 0min, premere + o - per regolare ilminuto attuale, da 00 a 59, da 0min a 59min. Premere OK per terminare
l'impostazione.
Timer Nota:
settimanale 1、se non si preme OK entro 10 s dopo la regolazione, l'impostazione Ora
corrente non è riuscita.
2、Interrompere prima l'alimentazione, quindi per ripristinare l'ora corrente.
Ora attuale LED mostra P1
impostata
P1
Premere , LED mostra P1, premere OK, selezionare P1 Mode.
(Se non si preme OK entro 10s l’impostazione non è riuscita)
P2
Modalità Premere , LED mostra P2, premere OK, selezionare P2 Mode.
predefinite (Se non si preme OK entro 10s l’impostazione non è riuscita)
P3 (vedere i
dettagli Premere , LED mostra P3, premere OK, selezionare P3 Mode.
nella (Se non si preme OK entro 10s l’impostazione non è riuscita)
P4 tabella
delle
Premere , LED mostra P4, premere OK, selezionare P4 Mode.
modalità) (Se non si preme OK entro 10s l’impostazione non è riuscita)
P5
Premere , LED mostra P5, premere OK, selezionare P5 Mode.
(Se non si preme OK entro 10s l’impostazione non è riuscita)
P6
Premere , LED mostra P6, premeres OK, selezionare P6 Mode.
P6 è una modalità libera.
(Se non si preme OK entro 10s l’impostazione non è riuscita)
LED mostra 1, press + or _, da 1 a 7, imposta da Lunedì a Domenica.
Premere OK Modalità preimpostata al lunedì
il display mostra 00, premere + o - per
LED mostra impostare da 0H a 24H, quindi premere
Modalità 1 e OK, ora di inizio impostata completata.
libera lampeggia L'apparecchio inizia a funzionare in
(Lunedì) questo momento.
b 、 Display LED 00, premere + o - per
impostare da 0H a 24H, quindi premere
OK, tempo di arresto impostato
completato.
c 、 L'ora di inizio impostata è 00, l'ora
di fine è 00, l'arresto predefinito della
Modalità preimpostata.
Lampeggia Non impostato in 5 secondi, Modalità
5s preimpostata allo spegnimento del
lunedì e passa a 2 (martedì)
LED mostra Il metodo per impostare da 2 a 7 è lo stesso che per2-7 1.
1 、 Giornalmente è possibile impostare solo un ciclo di
Note orario di lavoro (dall'inizio alla fine)
2 、 Si può impostare solo le ore e non i minuti.
3 、 Per la modalità preimpostata si deve impostare l'ora
di inizio e di fine.
4 Per la Modalità preimpostata tutte le sezioni da 1-7
devono essere impostate altrimenti si attiva lo shutdown
preimpostato, dopo aver impostato il 7, il timer
settimanale inizia. La spia del timer settimanale è
accesa.
Impostazione 1 、 LED 1-7 lampeggia, premere + o - per regolare e
veloce premere OK per selezionare il giorno dal lunedì alla
domenica, se non si seleziona il giorno interviene lo
spegnimento predefinito (inizio: 00, fine: 00). È
necessario impostare l'ora di inizio e fine al punto 7
(impostare l'inizio: 00, interrompere: 00 se è necessario
arrestare al punto 7 (domenica), quindi premere OK), il
timer settimanale è avviato.
2 、dopo aver impostato il timer settimanale I parametric
vengono memorizzati (anche se si annulla il timer
settimanale, l'impostazione è registrata)
L’eliminazione dei dati avviene dopo l'interruzione
dell'alimentazione.
Spegniment /
o del timer Premere sette volte , per spegnere il Timer settimanale.
settimanale
1 Il Display mostra Temperatura ambiente dopo l'impostazione, la spia del timer
Descrizione settimanale e la spia della funzione corrispondente sono accese.
del Display 2 Modalità riscaldamento (Bassa temperatura o Alta temperatura, non impostata la
modalità di temperatura), quando si imposta il timer della settimana, il display mostra
la Temperatura ambiente e la spia del timer della settimana è accesa, mentre quella
della Bassa o Alta temperature lampeggia. Impostare la modalità temperatura,
quando si imposta il timer settimanale, la spia Imposta modalità temperatura è
accesa.
3 、 Oscillazione, riscaldamento ridotto, riscaldamento elevato, temperatura
impostata, funzione di rilevamento della finestra aperta possono essere attivate in
modalità timer settimanale o normale.
4 、 La spia è accesa quando la funzione corrispondente è attiva..Tabella Modalità:
Mo Lunedì Martedì Mercoledì Giovedì Venerdì Sabato Domenica
do
P1 8:00-17:00 8:00-17:00 8:00-17:00 8:00-17:00 8:00-17:00 8:00-17:00 8:00-17:00
a a a a a a
P2 18:00-7:00 18:00-7:00 18:00-7:00 18:00-7:00 18:00-7:00 18:00-7:00 18:00-7:00a
P3 8:00-17:00 8:00-17:00 8:00-17:00 8:00-17:00 8:00-17:00 OFF OFF
a a a a a
P4 18:00-7:00 18:00-7:00 18:00-7:00 18:00-7:00 18:00-7:00 OFF OFF
P5 OFF OFF OFF OFF OFF 00:00-23:59 00:00-23:59
P6 Modalità Modalità Modalità Modalità Modalità Modalità Modalità
libera libera libera libera libera libera libera
N a: P2/P4 Mode, l'ora di fine è al secondo giorno
ot P6: Intervallo di tempo impostato, 00-24H, l'ora di inizio deve essere precedente al tempo di
e arresto, altrimenti viene rilevato un errore
Annulla
1、Durante l’impostazione, premere per annullare.
Imposta
la
2、Dopo che l’impostazione della temperature è completa, occorre premere
modalità
di e poi premere per annullare.
temperat 3、Quando la modalità Basso riscaldamento è impostata, dopo l’annullamento la
macchina torna su Basso riscaldamento.
ura
Quando la modalità Alto riscaldamento è impostata, dopo l’annullamento la
macchina torna su Alto riscaldamento..
Annullare
4、Premere , per spegnere la modalità di impostazione della temperatura.
Annullar
e il Timer 1、Durante l’impostazione, premere per annullare.
settiman
ale 2、Dopo che l’impostazione del Timer è complete occorre premere e poi
premere per annullare.
3.1 L’impostazione della temperature nel Timer settimanale, se annullata, imposta la
macchina per funzionare in Alto riscaldamento.
3.2 In riscaldamento (impostazione della temperature non presente) su Basso
riscaldamento, dopo l’annullamento del timer, la macchina torna su Basso
riscaldamento.
In riscaldamento (impostazione della temperature non presente) su Alto
riscaldamento, dopo l’annullamento del timer, la macchina torna su Alto
riscaldamento.
Protezione di Avvio La temperatura massima di rilevamento è di 51 ℃, l'arresto dell'apparecchio quando la
spegnimento predefinito temperatura rilevata raggiunge 51 ℃.PULIZIA E MANUTENZIONE
1. Non avvicinare ad una fiamma per evitare che la macchina cambi i colori o si distorca.
2. Se non usi la macchina per molto tempo, pulisci la superficie. Attendere che la macchina si raffreddi ed estrarre la
spina, quindi pulirla. Pulirla con un panno o un detergente. Non lavare mai direttamente con acqua, non far cadere
acqua nella macchina. Non pulirla mai con acidi, diluenti chimici, benzina, benzene etc.
3. Prima di riutilizzarla, si prega di controllarla e assicurarsi che l'uscita dell’aria non sia ostruita
.
Avvertenza: non toccare la macchina funzionante e non coprire l'uscita e l'ingresso dell’aria.
Conservare l’apparecchio in un luogo asciutto.
PRECAUZIONI BATTERIE DEL TELECOMANDO
1. Se l’apparecchio non è usato per un lungo periodo, si consiglia di rimuovere le batterie dal vano batterie.
2. Le batterie non devono essere esposte a fonti di calore come fuoco, sole o simili fonti;
3. Rimuovere le batterie se iniziano a scaldarsi oppure sapete di non utilizzare l’apparecchio per un lungo
periodo.
4. Le batterie devono essere installate in modo corretto nell’apposito vano batterie;
5. Quando rimuovete le batterie perché a fine vita o danneggiate; smalti tele secondo le regolamentazioni
nazionali vigenti e di seguito riportate.
6. In caso di perdita di liquido della batteria, rimuovete tutte le batterie, evitando che il liquido fuoriuscito vada a
contatto
7. con la pelle o vestiti.
8. Se il liquido dalla batteria viene a contatto con la pelle o indumenti, lavare la pelle con acqua
immediatamente. Prima di inserire nuove batterie, pulire accuratamente il vano batterie con un panno o
tovagliolo di carta e seguire le raccomandazioni del costruttore della batteria per la pulizia.
9. ATTENZIONE: Pericolo di esplosione se la batteria viene sostituita con un tipo non corretto. Usare e
sostituire solo batterie con la stessa dimensione e tipo.
10. Un uso improprio delle batterie può causare perdite di liquido, surriscaldamento o esplosione. Tale liquido è
corrosivo e può essere tossico. Può causare ustioni della pelle e degli occhi ed è nocivo da ingerire.
11. Per ridurre il rischio di infortunio:
12. Tenere le batterie fuori dalla portata dei bambini.
13. Non riscaldare, aprire forare, tagliare o gettare le batterie nel fuoco.
14. Non mischiare batterie vecchie e nuove o batterie di diverso tipo (ad esempio, il carbonio-zinco e batterie
alcaline).
15. Non lasciare oggetti metallici che possono andare a contatto con i terminali della batteria e quindi possono
riscaldarsi e/o provocare ustioni.INFORMAZIONI PER GLI APPARECCHI PER IL RISCALDAMNENTO DI AMBIENTE LOCALE ELETTRICI
Dato Simbolo Valore Unità Dato Unità
Potenza Termica Tipe di potenza termica, solo per gli apparecchi per il riscaldamento
d’ambiente locale elettrici (indicare una sola opzione)
Potenza termica Pnom KW Controllo manuale del carico termico , con termostato no
nominale 2,0 integrato.
Potenza termica Pmin KW Controllo manuale del carico termico con riscontro della
minima 1,0 temperatura ambiente e/o esterna no
(indicativa)
Massima potenza Pmax,c KW controllo elettronico del carico termico con riscontro della
no
termica continua 2,0 temperatura ambiente e/o esterna
Consumo ausiliario di energia elettrica potenza termica assistita da ventilatore no
Alla potenza elmax N/A KW Tipo di potenza termica/controllo della temperatura ambiente
termica nominale (indicare una sola opzione)
Alla potenza elmin N/A KW potenza termica a fase unica senza controllo della
no
termica minima temperatura ambiente
In modo standby elSB W due o più fasi manuali senza controllo della temperatura
0,00039 no
ambiente
con controllo della temperatura ambiente tramite termostato
no
meccanico
con controllo elettronico della temperatura ambiente sì
con controllo elettronico della temperatura ambiente e
no
temporizzatore giornaliero
con controllo elettronico della temperatura ambiente e
no
temporizzatore settimanale
Altre opzioni di controllo (è possibile selezionare più opzioni)
controllo della temperatura ambiente con rilevamento di
no
presenza
controllo della temperatura ambiente con rilevamento di
sì
finestre aperte
con opzione di controllo a distanza nocon controllo di avviamento adattabile no
con limitazione del tempo di funzionamento sì
con termometro a globo nero no
Contatti Lange Distribution SrlCERAMIC WALL FAN HEATER
2000W
MODEL: TZR06N
INSTRUCTION MANUAL
Read this instruction manual carefully. Keep it for future reference.GENERAL WARNINGS
1. Children of less than 3 years should be kept away unless continuously supervised.
2. Children aged from 3 years and less than 8 years shall only switch on/off the appliance provided
that it has been placed or installed in its intended normal operating position and they have been
given supervision or instruction concerning use of the appliance in a safe way and understand
the hazards involved. Children aged from 3 years and less than 8 years shall not plug in, regulate
and clean the appliance or perform user maintenance.
3. This appliance can be used by children aged from 8 years and above and persons with reduced
physical, sensory or mental capabilities or lack of experience and knowledge if they have been
given supervision or instruction concerning use of the appliance in a safe way and understand
the hazards involved.
4. CAUTION — Some parts of this product can become very hot and cause burns. Particular
attention has to be given where children and vulnerable people are present.
5. If the supply cord is damaged, it must be replaced by the manufacturer, its service agent or
similarly qualified persons in order to avoid a hazard.
6. CAUTION: In order to avoid a hazard due to inadvertent resetting of the thermal cutout, this
appliance must not be supplied through an external switching device, such as a timer, or
connected to a circuit that is regularly switched on and off by the utility.
7. This appliance must only be used for the purpose for which it has been manufactured, i.e. for
additional electrical heating in rooms. Any other use is considered improper and therefore
dangerous. The manufacturer is not responsible for any damage caused by improper, incorrect
or unreasonable use.
8. Before cleaning or carrying out maintenance on the appliance, disconnect it from the electrical
mains by removing the plug from the electrical outlet or by switching off the system switch.
9. WARNING: In order to avoid overheating, do not cover the heater.
10. The heater must not be located immediately below a socket-outlet.
11. Do not use this heater in the immediate surroundings of a bath, a shower or a swimming pool.
12. The heater must be installed so that switches and other controls cannot be touched by a person
in the bath or shower.
13. Install the appliance on the wall above 1,8 m
14. WARNING: In order to avoid overheating, do not cover the heater.
15. Avoid the use of an extension cord because the extension cord may overheat and cause a risk of
fire.
16. Do not plug or unplug the product from the electrical outlet with a wet hand.
17. Keep the power cord and product away from heated surfaces.
18. Do not operate the heater with a damaged cord or plug. been dropped or damaged in any
manner.
19. In case of abnormal situation turn off the appliance immediately and contact the dealer or the
Service.
20. It is absolutely forbidden to remove or repair the unit: risk of electrical shock; contact your dealer
or Service Center.
21. ATTENTION: Do not use this product near bathtubs, showers, pools.
22. Do not insert anything inside the slots of the unit23. Before connecting the unit to the electricity distribution network ensure that the main voltage is
correct as shown on the label of the product and that the unit is compliant with the current
regulations,
24. Do not use flying sockets or damaged cables.
25. Hold the plug firmly when disconnecting from the electric socket to prevent electric shock , short
circuit or fire .
26. Before connecting the unit to the electricity distribution network ensure that the main voltage is
correct as shown on label of the product and that the unit is compliant with the current
regulations.
27. Do not use the product for purposes other than those for which he ' was built Don’t use
improperly the appliance.
28. Do not use flying sockets or damaged cables.
29. The heater must not be located immediately below an electrical socket-outlet.
30. Don’t use this heater in the immediate surroundings of a bath, a shower or a swimming pool.
31. Never locate the heater where it may fall into bathtub or other water container.
32. Before performing maintenance and cleaning, disconnect the appliance from the main supply.
33. Not use aerosols spray (for ex. Insecticides, hair spray, etc.), it may cause damage to the housing.
34. In case the supply cord is damaged, it must be replaced by the manufacturer or its service agent
or a similarly qualified person to avoid any hazard.
35. Never use outdoors and never expose the appliance to atmospheric agents.
36. Do not cover abnormal situations immediately switch off the appliance and contact your dealer
or service center.
37. Do not use outdoors or obstruct any of the heat outlet grilles or the air intake openings of the
heater
38. Keep the heater far from curtain or places where the air inlet can easily be blocked.
39. Only use the appliance for domestic purposes and in the way indicated in these instructions.
40. Never immerse the appliance in water or any other liquid for any reason whatsoever
41. Switch off the appliance and remove the plug from the electrical outlet when not in use.
42. 7. The use of any electrical appliance calls for the awareness of some basic rules, such as:
43. Do not use the appliance near sources of water such as baths, showers or swimming pools
44. Do not touch the appliance with wet or damp hands or feet
45. Do not use the appliance in the presence of potentially flammable or explosive liquids or gases.
46. Do not leave the appliance plugged in when not required. Unplug the appliance from the mains
after having switched it off when not in use.
47. Do not obstruct the ventilation or heat dispersion openings.
48. Do not use the appliance in the presence of potentially flammable or explosive liquids or gases.
49. Do not use the appliance in the presence of potentially flammable or explosive liquids or gases.
50. It is absolutely forbitten to remove or repair the unit: risk of electricl shock; contact your dealer
or Service Center.
51. Never leave the heater unattended while it is in use. Always turn the product to the OFF position
and unplug it from the electrical outlet when not in use.
52. The heater is to be installed so that switches and other controls cannot be touched by a person in
the bath or shower.
53. WARNING: Do not use this heater in small rooms when they are occupied by persons not capable of
leaving the room on their own, unless constant supervision is provided.BATTERIES PRECAUTIONS
1. If the appliance is not used for a long time, please remove batteries from remote controller.
2. To remove batteries open the cover on the back side of the remote controller. Only use
batteries and check correct battery polarity.
3. Lithium batteries are recommended for a longer remote controller operation.
4. Please remove batteries if remote controller won’t be used for a long period or if batteries get
hot during operation.
5. Batteries must be correctly installed inside the proper compartment on backside of the remote
controller
6. When batteries need to be replaced because they’re exhausted or damaged, Dispose of batteries
according to national regulations written below.
7. In case of loss of battery fluid, remove all batteries, preventing fluid leaking from coming into
contact with skin or clothes.
8. If the battery fluid comes into contact with skin or clothes, wash the skin with water
immediately. Before inserting new batteries thoroughly clean the battery compartment with a
cloth or paper towel and follow the manufacturer's recommendations for cleaning the battery.
9. CAUTION: Risk of explosion if the battery is replaced by an incorrect type. Use and replace only
with battery of the same size and type.
10. Improper use of the batteries may cause leakage, overheating or explosion. Fluid is corrosive and
may be toxic, can cause skin burns and hurt eyes and is harmful to ingest.
11. To reduce the risk of injury:
Keep batteries out of the reach of children.
Do not heat, open, puncture, shred or dispose of batteries in fire.
Do not mix old and new batteries or different types (for example, the carbon-zinc and alkaline
batteries).
Do not leave metal objects that can come into contact with the battery terminals and then may
become hot and / or cause burns.
FEATURES
1. High quality plastic shell and long using life.
2. PTC ceramic heater elements, high efficiency heating, quickly heating, noiseless, odor-free, non-polluting, no
flame and will not killing the oxygen.
3. Two level heat setting, you can arrange the temperature as your preference.
4. There is temperature fuse for fear of overheating and motor overheat protection. Automatically turn off when the
wind outlet is blocked and turn on again when the sundries are cleared away.
5. Natural/hot wind for selection. You could close the heat element in summer; the heater could blow cool wind.
6. Safety thermostat. Overheat protection.
INSTALLATION
Drill two holes in wall and have a distance of above 2.0m from the ground, the diameter of the hole just contained the
expansion bolt, which the diameter is 6mm. After tucked the expansion bolt, fixed pothook on the expansion bolt with
screw. Make sure pothook should be inserted the bottom. See the drawing as following for a better understanding. (seethe picture)
Use the machine's components (screws and expansion pipe) fix on the wall as following figure, then mounted the
machine.
1、The distance between the product and the ceiling(and the
side) should be ≥30cm.
2、Product installation size see Figure.
3、Note: when the product is installed, The hook (screw) is
aligned with the hole "A" on the product. After hanging, must be
moved to the "B", in order to firmly fix.
When to remove the product, must be moved from "B" to "A"
then take out.
TECHNICAL FEATURES
Model Rated Power Rated Voltage Rated Frequency
Class II
TERMOZETA TZR06N 2000W 220-240V~ 50-60Hz
USAGE
1. Please make sure the capacity should be 220-240V~, 50-60Hz.
2. Put the plug in the wall socket.
3. Switch the appliance on by selecting the desired setting.
“0” is “OFF”. “I”: is “ON”.
4. Use the machine according to the buttons on the infrared remote control. (The remote control keys are shown
below).
1、Turn on the power switch, LED display Environment
temperature, the appliance is standby.
2、At the right side of the appliance base have a switch, Press
“START/STOP”, High heat, press again, the appliance will
shutdown.
3、All function need to be operated by remote control.
4、Fan keep working for 30 seconds when shutdown the
appliance(after heating)
Note: The indicator lights when corresponding function is workingDisplay symbol description:
: FAN
: Low heat 1000W
:High heat 2000W
:Timer
: Week timer
:Light on:
set temperature mode,
temperature range 18-45℃
Light flickering:
Open window detection start up.
Remote control:
Press “ ” as follows: ON(Fan working), OFF(Fan keep working for 30 seconds when
Power shutdown the appliance after heating).
Press “ ” as follows: Low heat, High heat, FAN working.
Heating
Press “ ” to set timer as follows: 1H,2H,3H.....8H. When week timer is start up, you can not
Timer set this timer function.
Set 1 、 Press “ ”, set temperature mode is stand by, Press “+” “-” to adjust
temperat temperature, Temperature range: 18-45℃.
ure
Press “-”,
mode
Set temperature is equal to or lower than Environment temperature, stop heating.
Set Light On Press “+”,
temperatur Set temperature is 1-2℃ higher than Environment temperature, Low heating.
e Set temperature is higher or equal to Environment temperature+3℃, High heating.
2、Press OK, or after LED flickering 5s, set temperature mode is start up.
Open 1、Open window detection only can be start up when appliance in heating mode(can
window not start up when appliance is only fan working) or in set temperature mode.
detection
Light 2、Press “ ”, Open window detection on, Open window detection off.
flickering 3、Temperature detection start up after 1 minute from Open window detection start
up.
Per 10 minutes(temperature slow down detection check point) as a round, in one
Open round, detect the temperature once every 5 minutes(temperature fast downwindow detection check point). Detail in the following table.
detection
Time round Time Description
Min: s Min: s
00:00 - 01:00 0:00 Open window detection start up
01:00-11:00 1:00 Temperature detection start up
Temperature detection starting check
point
6:00 Temperature detection check point 1
(temperature fast down detection check
point).
1、Temperature detection check point 1
reduce from Temperature detection
starting check point ≤8℃, the appliance
keep heating and Open window
detection keep working.
2、Temperature detection check point 1
reduce from Temperature detection
starting check point > 8℃. The appliance
stop heating and stand by, Open window
detection stop.(See Remarks)
3、Temperature detection check point 1
( ** ℃ ) ≥ Temperature detection
starting check point, the appliance keep
heating and Open window detection
keep working
**℃: Maximum detection temperature
51℃(See power-off protection)
11:00 Temperature detection check point
2(temperature slow down detection
check point)
2、Temperature at this point is end of
this round and start of next round.
3、Per 10 minutes as a round, in one
round, detect the temperature once
every 5 minutes
3、At Temperature detection check point
2, test method is the same as
Temperature detection check point
1.(compare with Temperature
detection starting check point)
1、When the appliance stop heating, alarm 5s and fan keep
Remarks working 30s, then stand by, set temperature mode light
flickering and LED display OF and flickering.
1.1Press to restart to the same working mode before
the appliance stop.
After restart, Open window detection start a new time round.1.2Press to turn off, then LED display Environment
temperature and the appliance stand by.
Week timer only can be start up when appliance in heating mode(can not start up when
appliance is only fan working) or in set temperature mode.
First time to start up(start up after power cut off ), need to set Present
time.
Setting method:
Present First time c、Set day in one week: LED display 01, is Monday, press + or - to
time to start up adjust Present Day, 01-07, is from Monday to Sunday. Press OK to
finish setting.
d、Set hours: LED display 00, is 0H, press + or - to adjust Present
Hour, 00 to 23, is from 0H to 23H. Press OK to finish setting.
c、Set minutes: LED display 00, is 0min,press + or - to adjust Present
Minute, 00 to 59, is from 0min to 59min. Press OK to finish setting.
Note:
1、Not press OK within 10s after adjust, setting Present time is failure.
2、Cut off power first then to reset Present time.
Week timer Present LED display P1
time set
finished
P1
Press , LED display P1, press OK, select P1 Mode.
(Not press OK within 10s, Week timer setting is failure)
P2
Default Press , LED display P2, press OK, select P2 Mode.
Mode (Not press OK within 10s, Week timer setting is failure)
P3 (see detail
in Mode Press , LED display P3, press OK, select P3 Mode.
table) (Not press OK within 10s, Week timer setting is failure)
P4
Press , LED display P4, press OK, select P4 Mode.
(Not press OK within 10s, Week timer setting is failure)
P5
Press , LED display P5, press OK, select P5 Mode.
(Not press OK within 10s, Week timer setting is failure)
P6
Press , LED display P6, press OK, select P6 Mode.
P6 is free mode.
(Not press OK within 10s, Week timer setting is failure)
LED display 1, press + or _, from 1 to 7, set from Monday to Sunday.
Press OK Pre-set Mode at Monday
a、LED display 00, press + or - to
LED set from 0H to 24H, then press OK,Free mode display 1 start time set completed. The
and appliance start to work at this time.
flickering b、LED display 00, press + or - to set
(Monday) from 0H to 24H, then press OK, stop
time set completed..
c、Set start time is 00, stop time is
00, that Pre-set Mode default
shutdown.
Flickering 5s Not set in 5s, Pre-set Mode in Monday
shutdown and skip to 2(Tuesday)
LED Setting method for 2 to 7 are the same as 1.
display 2-7
1、In per day, only can set one working time
Note round(from start to stop)
2、Only can set hours, no minutes.
3、Pre-set Mode need to set start and stop time both.
4、Pre-set Mode all 1-7 must set completed or default
showdown, After set the 7, week time start up. Week
timer light is on.
Quick 1、LED 1-7 flickering, press + or - to adjust and press
setting OK to select day from Monday to Sunday, not
selected day default shutdown(start: 00, stop: 00).
Must set start and stop time at 7(set start: 00, stop: 00
if need to shutdown on 7(Sunday), then press OK),
Week timer is start up.
2、It has memory function after set week timer(cancel
week timer, the setting is in record)
Setting record delete after power cut off.
Week /
timer Seventh times to press , Week timer shutdown.
shutdow
n
1、LED display Environment temperature after setting, week timer indicator light and
Display corresponding function indicator light are on.
descripti 2、Heating mode(Low heat or High heat, not Set temperature Mode), when setting
on week timer, LED display Environment temperature and Week timer light and Low
heat or High heat light flickering. Set temperature mode, when setting week timer,
Set temperature mode light is on.
3、Swing, Low heat, High heat, Set temperature, Open window detection function
are all can be operated when in week timer mode or normal working mode.
4、The indicator light is on when corresponding function is working.Mode table:
M Monday Tuesday Wednesd Thursday Friday Saturday Sunday
od ay
e
P1 8:00-17:00 8:00-17:00 8:00-17:00 8:00-17:00 8:00-17:00 8:00-17:00 8:00-17:00
a a a a a a
P2 18:00-7:00 18:00-7:00 18:00-7:00 18:00-7:00 18:00-7:00 18:00-7:00 18:00-7:00a
P3 8:00-17:00 8:00-17:00 8:00-17:00 8:00-17:00 8:00-17:00 OFF OFF
a a a a a
P4 18:00-7:00 18:00-7:00 18:00-7:00 18:00-7:00 18:00-7:00 OFF OFF
P5 OFF OFF OFF OFF OFF 00:00-23:59 00:00-23:59
P6 Free Free Free Free Free Free Free
mode mode mode mode mode mode mode
N a: P2/P4 Mode, stop time is at the second day
ot P6: Time set range, 00-24H, start time must before than stop time, otherwise, set failure.
e
Cancel
3、When in setting, press to cancel.
Set
temperat 4、After setting temperature completed, must press first then press to
ure cancel.
mode 3、When set temperature mode on low heat, after cancel, return to low heat.
When set temperature mode on high heat, after cancel, return to high heat.
4、Press , set temperature mode showdown.
Cancel
Cancel Week 3、When in setting, press to cancel.
timer
4、After setting week timer completed, must press first then press to
cancel.
3.1Set temperature Mode to set week timer, when cancel week timer, Working on
High heat.
3.2When heating mode(not Set temperature mode) on Low heat, after cancel week
timer, return to Low heat.
When heating mode(not Set temperature mode) on High heat, after cancel week
timer, return to High heat.
Power-off Default Maximum detection temperature is 51℃, the appliance shutdown when detected
protection start up temperature reach 51℃.Information requirement for the electric local space heaters
Model identifier(s): KPT-2000B 4501L
Item Symbol Value Unit Item Unit
Type of heat input, for electric storage
Heat output local space heaters only (select one)
Nominal heat output
manual heat charge control,
Pnom 2,0 kW with integrated thermostat NA
manual heat charge control with
Minimum heat output room and/or outdoor
(indicative) Pmin 1.0 kW temperature feedback NA
Maximum electronic heat charge control
continuous heat with room and/or outdoor
output Pmax,c 2,0 kW temperature feedback NA
Auxiliary electricity
consumption Fan assisted heat output NA
At nominal heat Type of heat output/room
output elmax 0 kW temperature control (select one)
At minimum heat single stage heat output and no
output elmin 0 kW room temperature control [NO]
In standby mode elsb 0.00039 kW
Two or more manual stages, no
room temperature control [NO]
with mechanic thermostat room
temperature control [NO]
with electronic room
temperature control [NO]
electronic room temperature
control plus day timer [NO]
electronic room temperature
control plus week timer [YES]
Other control options (multiple
selections possible)
room temperature control, with
presence detection [NO]
room temperature control, with
open window detection [YES]
with distance control option [NO]
with adaptive start control [NO]
with working time limitation [NO]
with black bulb sensor [NO]
Contact details Lange Distribution SrlCLEANING AND MAINTENANCE 1. Don’t close with flame to avoid the heater change colors and distort. 2. If you don’t use the heater for a long time, please wipe the surface. Wait for the machine being cool and pull out the plug, then clean it. Wipe it clean with washcloth or cleaner. Never directly wash with water, do not drop the water into the machine. Never clean it with acids, chemical thinner, gasoline benzene etc. 3. Before use it again, please check it and make sure the wind outlet have no sundries. Warning: Don’t touch the working machine and don’t cover the wind outlet and inlet.
Puoi anche leggere