2019 2017-1-IT02-KA201-036739 - Buone partiche per lo sviluppo di corsi di scienza nelle scuole
←
→
Trascrizione del contenuto della pagina
Se il tuo browser non visualizza correttamente la pagina, ti preghiamo di leggere il contenuto della pagina quaggiù
2019
Buone partiche per lo sviluppo di corsi di
                     scienza nelle scuole
            2017-1-IT02-KA201-036739

                  0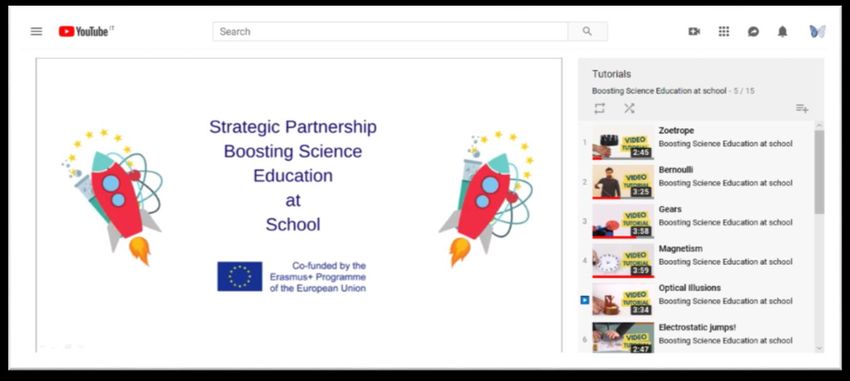
INDICE
INTRODUZIONE       ………………………………………………………………………………………………………………………………..3
COME È NATA LA NOSTRA IDEA ....................................................................................................................... 3
L’EDUCAZIONE SCIENTIFICA NEI CONTESTI NAZIONALI .................................................................................. 5
   INFORMAZIONI GENERALI ............................................................................................................................ 5
   SETTORE DELLE SCIENZE ............................................................................................................................. 11
SCHEDE D’ATTIVITÁ ........................................................................................................................................ 14
TOOLBOX: INQUIRY-BASED SCIENCE EDUCATION (IBSE) .............................................................................. 15
   Zoetrope ...................................................................................................................................................... 17
   Learning scenario ........................................................................................................................................ 18
   Bernoulli ...................................................................................................................................................... 18
   Gears ........................................................................................................................................................... 20
   Magnetism .................................................................................................................................................. 22
   Optical Illusion ............................................................................................................................................ 23
   Electrostatic jumps! .................................................................................................................................... 24
   Discovering acid and bases by colours (1/1) .............................................................................................. 25
   Leaf Life Lab................................................................................................................................................. 26
   Lea ............................................................................................................................................................... 27
   Let’s swing ................................................................................................................................................... 28
   Let’s swing ................................................................................................................................................... 29
   Rainbow soup.............................................................................................................................................. 30
   Coke drinks & Mentos (1/3) ....................................................................................................................... 31
   Water Purification (1/2) ............................................................................................................................. 34
    Hidden Iron (1/3) ....................................................................................................................................... 36
   Hidden Iron (2/3) ........................................................................................................................................ 37
   Hidden Iron (3/3) ........................................................................................................................................ 38
   LED Torch (1/3) ........................................................................................................................................... 39
   Hidden Objects (1/2)................................................................................................................................... 42
   Magnetic train (1/1) .................................................................................................................................... 44
   Acid rain (1/2) ............................................................................................................................................. 45
   Acid rain (2/2) ............................................................................................................................................. 46
   Music, Physics and Fun (1/2) ...................................................................................................................... 47
   Music, Physics and Fun (2/2) ...................................................................................................................... 48
   Osmosis (1/3) .............................................................................................................................................. 49
   Osmosis (2/3) .............................................................................................................................................. 50
   Reducing friction (1/1) ................................................................................................................................ 52
   CONCLUSIONE ............................................................................................................................................. 53

                                                                                   1
CONTRIBUTI E AUTORI DEL REPORT

Italia

Estonia

Grecia

Romania

“Il supporto della Commissione europea per la produzione di questa pubblicazione non costituisce un
sostegno dei contenuti che riflettono le posizioni dei soli autori, e la Commissione non può essere ritenuta
responsabile di nessun uso che potrebbe essere fatto delle informazioni ivi contenute.”

                                                       2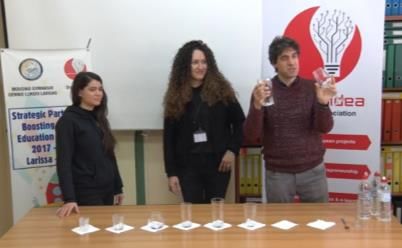
INTRODUZIONE

Boosting Science Education at School è un progetto di partenariato strategico finanziato dal programma
Erasmus Plus, durato 2 anni nel periodo tra ottobre 2017 e ottobre 2019 sviluppato insieme a scuole e
associazioni scientifiche con l'obiettivo di colmare il divario tra scuola e scienza.
Il partenariato è composto dal coordinatore Associazione Euphoria (Italia), quattro organizzazioni
scientifiche - The science zone (Italia), Digital Idea (Grecia), Science Center AHHAA (Estonia), Ludor
Engineering (Romania) - e quattro scuole di diversi livelli - Istituto Comprensivo “Maria Montessori”
(Italia), Mousiko Gymnasio-geniko Lykeio (Grecia), Tartu Tamme Gümnaasium (Estonia) e Scoala
Gimnaziala Barnova (Romania).
Il progetto mirava a sviluppare uno scambio di buone pratiche tra scuole e organizzazioni già attive nella
promozione della scienza nelle scuole al fine di creare sinergie tra il mondo educativo e scientifico.
Questo scambio è stato pensato per facilitare l'introduzione nelle scuole di pratiche più interessanti
nell'insegnamento delle scienze e per sviluppare uno scambio di metodologie tra le associazioni, al fine di
capire i modi migliori per stabilire una collaborazione stabile con le scuole. Il progetto mirava a ispirare
l'insegnamento delle scienze incoraggiando la comunicazione tra insegnanti, scienziati e associazioni
coinvolti a vari livelli e in vari modi nell'educazione scientifica europea e sostenendo gli insegnanti
nell'ammodernamento delle loro metodologie e delle attività laboratoriali in classe.
Inoltre, come diretta conseguenza, il progetto mirava anche a migliorare la motivazione, l'apprendimento
e l’atteggiamento degli allievi nell'educazione scientifica, con conseguente aumento dell'alfabetizzazione
scientifica e del reclutamento nelle carriere scientifiche, dotando i giovani delle competenze per
raggiungere il loro pieno potenziale e, in definitiva, convertire i loro posti di lavoro in vite migliori.

COME È NATA LA NOSTRA IDEA

La nostra idea progettuale è cresciuta attraverso tre considerazioni principali:

1) il sistema educativo nel suo complesso sta affrontando delle nuove sfide sia a livello nazionale che a
livello Europeo.
L'impatto della crisi economica e della globalizzazione hanno contribuito ad apportare cambiamenti
significativi al ruolo svolto dalle scuole che dovrebbero:
- facilitare la transizione verso il mercato del lavoro fornendo agli studenti nuove competenze;
- supportare gli studenti nella scelta delle loro future carriere;
- essere più attraenti e facilitare l'eccellenza tra gli studenti.

2) il ruolo cruciale della scienza nell'educazione in quanto la scienza porta all'innovazione e alla ricerca.
Gli studenti dovrebbero acquisire competenze in materie scientifiche affinchè possano diventare giovani
scienziati capaci di innovazione in una società competitiva radicata nella conoscenza. Inoltre, la
promozione della scienza a scuola consente agli studenti di capire e di decidere se proseguire in un
percorso di studi superiori in materia scientifica.

3) il ruolo chiave della scienza nella società.

                                                     3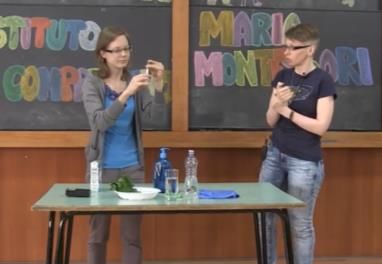
L'alfabetizzazione scientifica è importante anche per consentire ai futuri cittadini di partecipare
efficacemente al processo decisionale democratico e al processo politico che, nel prossimo futuro,
coinvolgerà sempre più la scienza. I nostri studenti, ad esempio, potrebbero essere chiamati a votare nelle
questioni come l'uso di OGM, la clonazione umana, le risorse energetiche, etc. Come affermato dal
segretario generale dell'OCSE Angel Gurrìa, "dal prendere un antidolorifico alla determinazione di cosa sia
un pasto" equilibrato”, dal bere latte pastorizzato a decidere se acquistare o meno un'auto ibrida, la
scienza è onnipresente nelle nostre vite. E la scienza non è solo provette e tavola periodica; è la base di
quasi tutti gli strumenti che utilizziamo, da un semplice apriscatole all'esploratore più avanzato dello
spazio. Ancora più importante, la scienza non è solo il dominio degli scienziati. Nel contesto di flussi enormi
di informazioni e cambiamenti rapidi, ora tutti devono essere in grado di "pensare come uno scienziato":
essere in grado di fare delle valutazioni e giungere a una conclusione; capire che la "verità" scientifica può
cambiare nel tempo man mano che vengono fatte delle nuove scoperte e mentre gli umani sviluppano una
maggiore comprensione delle forze naturali e delle capacità e limitazioni della tecnologia".

Partendo da questo contesto, i partner di questo progetto hanno creduto e tutt’ora credono fermamente
nel quanto sia fondamentale colmare il divario tra scuole e scienza: è un dato di fatto che molte scuole
non includono nel loro percorso educativo delle fasi sperimentali e dei metodi basati sull'indagine (c.d
enquiry based learning) utili per insegnare la materia e renderla più attraente per gli studenti. Crediamo
che il personale scolastico dovrebbe essere formato costantemente per adottare metodi basati
sull'indagine e altri metodi comprovati per insegnare le scienze in maniera più efficace. Questo infatti
potrebbe aiutare gli insegnanti a preparare meglio i loro allievi, coinvolgendoli in diverse attività
scientifiche e metterli in contatto con la scienza "reale".
Questi sono i motivi principali per cui vorremmo fornire agli insegnanti un supporto pratico e alcuni
strumenti per sviluppare delle attività scientifiche più coinvolgenti e... potenziare l'educazione scientifica
a scuola!

                                                      4
L’EDUCAZIONE SCIENTIFICA NEI CONTESTI NAZIONALI

L’insegnamento della scienza a scuola è diverso in ogni paese. Le differenze vanno dal numero di ore
dedicate alla scienza alle metodologie applicate, come ad esempio un approccio più teorico verso un
approccio più pratico e pratico. Nelle seguenti tabelle vorremmo presentare un confronto tra i diversi
sistemi educativi dei 4 paesi coinvolti nel progetto, con un focus specifico sul campo scientifico.

INFORMAZIONI GENERALI

   Schools levels sorted by age of students

                               Primary                  Lower                   Upper
     Countries                                        Secondary               Secondary
                               school                   school                  school

                            From 6/7 to            From 13/14 to             From 16 to
       Estonia
                              13 years                16 years               18/19 years

                           From 6 to 10            From 11 to 13           From 14 to 18
         Italy
                              years                    years                   years

                           From 6 to 12            From 13 to 15           From 16 to 18
       Greece
                              years                    years                   years

                            From 6/7 to            From 11 to 14           From 14 to 18
      Romania
                              11 years                 years                   years

                                                  5
Numero di giorni dell'anno scolastico

             Scuola        Scuola    Scuola
 Paesi
          Elementare       Media    Superiore

Estonia      175            175        175

 Italia   Minimo 200   Minimo 200   Minimo 200

Grecia       175            175        175

Romania      168            168        154

                       6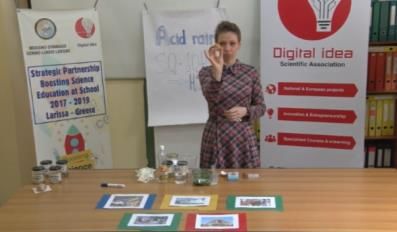
Numero di ore d'insegnamento

             Scuola        Scuola    Scuola
 Paesi
          Elementare       Media    Superiore

Estonia      4-6            6-7        7

 Italia      5-8            6-7       5-7

Grecia       5-6            6-7       6-7

Romania      4-5            5-6       6-7

                       7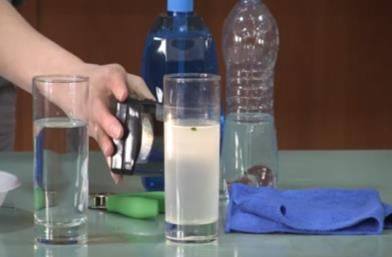
Libri scolastici: gratuiti o a pagamento

                               Scuola                      Scuola         Scuola
       Paesi
                            Elementare                     Media         Superiore

     Estonia                  Gratuiti (*)                Gratuiti (*)   Gratuiti (*)

                                                          Pagati dalle   Pagati dalle
        Italia                   Gratuiti
                                                           famiglie       famiglie

      Grecia                     Gratuiti                  Gratuiti       Gratuiti

    Romania                      Gratuiti                  Gratuiti       Gratuiti

(*) In Estonia, i quaderni di lavoro sono pagati dalle famiglie.

                                                      8
Autonomina del Dirigente Scolastico
     nella gestione della scuola
 Paesi                               Tutti i gradi

           Il dirigente scolastico assume gli insegnanti e quadri
           tra il comune (o lo stato) e rappresenta la scuola sia
           pubblicamente che nei confronti dei genitori.
Estonia    Il DS decide (insieme al consiglio dei docenti e i
           genitori) la strategia generale della scuola (rami di
           studio e immagine).

           Il Preside è "responsabile della gestione delle risorse finanziarie e
           strumentali e dei risultati del servizio. Il Preside organizza le attività
           scolastiche secondo criteri di efficienza ed efficacia ed è il
           proprietario delle relazioni sindacali" (decreto legislativo n. 165/01,
 Italia    art. .25). Il preside è un dirigente scolastico che gestisce le risorse
           finanziarie e deve riferire periodicamente il bilancio al Consiglio
           d'Istituto, dove sono rappresentati tutti i membri della comunità
           educante (insegnanti, genitori, personale amministrativo, studenti).

           Tutte le posizioni dei dirigenti scolastici sono ricoperti
           da qualifiche formali e interviste al comitato del
           Ministero della Pubblica Istruzione. Il preside,
Grecia     insieme ad una comitato di insegnanti, segue il
           programma stabilito dal ministero. Il preside è al
           vertice della comunità scolastica ed è un ufficiale
           responsabile per la pedagogia e l'amministrazione.

           Tutte le posizioni dei dirigenti scolastici sono
           ricoperte da esami. Il preside della scuola è chiamato
Romania    "line manager" o "middle manager": coordina
           direttamente i processi, le relazioni con studenti e
           insegnanti, genitori e autorità locali.

                                 9
Autonomia del docente
nell'organizzazione dell'insegnamento
Paesi Tutti i gradi
Gli insegnanti devono seguire il curriculum impartito
dal Ministero della Pubblica Istruzione ma sono
Estonia anche liberi di decidere come insegnare e valutare
purché soddisfino gli obiettivi del curriculum.
L'autonomia degli insegnanti è data sia come individui "agli
insegnanti è garantita la libertà di insegnamento per quanto
riguarda l'autonomia didattica sia come loro libera espressione
culturale", e come istituzioni "L'autonomia delle istituzioni educative
è una garanzia di libertà di insegnamento e di pluralismo culturale
Italia ed è incarnata nell'attuazione dell'istruzione e della formazione
mirate allo sviluppo della persona umana, adattato ai diversi
contesti, alla domanda delle famiglie e alle caratteristiche specifiche
delle materie coinvolte". Gli insegnanti sono invitati a seguire le
Linee guida del curriculum nazionale, redatto dal Ministero della
Pubblica Istruzione per ogni livello scolastico.
Gli insegnanti applicano quotidianamente il
curriculum predeterminato dal Ministero della
Grecia Pubblica Istruzione. Tuttavia, ci sono dei consulenti
scolastici che aiutano gli insegnanti a proporre il
modo di insegnare le varie materie.
Esiste un curriculum scolastico unico, approvato dal Ministero della
Pubblica Istruzione per tutte le discipline, che si applica a livello
nazionale. A parte questo, ogni insegnante può manifestare la sua
originalità nella progettazione e nello svolgimento di lezioni.
Nell'attuale sistema, per diventare un insegnante, è necessario
Romania seguire un corso universitario e laurearsi al modulo psicopedagogico
che dà il diritto ad insegnare. Dopo la laurea, la persona deve
paretcipare ad un concorso per ottenere un lavoro come
insegnante. Tutti gli insegnanti si formano continuamente,
partecipando ad esami per l'insegnamento ed esami sulla
valutazione.
10SETTORE DELLE SCIENZE
L'approccio alle scienze:
accademico o pratico?
Scuola Scuola Scuola
Paesi
Elementare Media Superiore
Dipende dal Dipende dal Dipende dal
docente.
docente. docente.
Estonia Soprattutto
Combinazione di
Soprattutto
accademico e
pratico pratico accademico
Dipende dal Dipende dal
docente. Dipende dal
docente.
Italia Soprattutto
Combinazione di docente e dal
accademico e tipo di scuola
pratico pratico
Combinazione di Combinazione di
Misto, dipende
Grecia accademico e accademico e
dall'indirizzo
pratico pratico
Combinazione di
Romania accademico e Accademico Accademico
pratico
11Numero di lezioni STEM per settimana
Scuola Scuola Scuola
Paesi
Elementare Media Superiore
23 Matematica 13 Matematica 13 Matematica
Estonia 10 Scienze 20 Scienze 20 Scienze
naturali (*) naturali naturali
6-10 4 Matematica - 2
3-7 Matematica
Matematica Scienze naturali
Italia 2 Scienze 1 Geo - 2
2 Scienze
naturali -1 Geo
naturali - 2 Geo Technologia
5-6 Matematica
4 Matematica 5-7 Matematica
Grecia 3-4 Scienze
6 Scienze 8-12 Scienze
naturali
4 Matematica
4 Matematica Dipende dal tipo
Romania 1 Scienze
6 Scienze di scuola
naturali
Commentato [EN1]: nella romania mancano le materie
(*) In Estonia, gli insegnanti hanno un massimo di ore / lezioni da impartire agli studenti del livello
primario, secondario inferiore e secondario superiore. Ad esempio, il livello primario dura 6 anni e hanno
10 lezioni per gli alunni dei 1-3 gradi e 13 lezioni per studenti dei 4-6 gradi. La divisione di tali lezioni nel
corso degli anni (ad esempio il numero effettivo delle lezioni a settimana) dipende dalla scelta degli
insegnanti.
12Materie per ciascun grado(*)
Scuola Scuola Scuola
Paesi
Elementare Media Superiore
Matematica,
Matematica,
Matematica, fisica, chimica,
Estonia Scienze naturali
Scienze naturali
biologia,
(*)
geografia
Matematica,
Matematica, Matematica,
fisica, biologia,
geometria, geometria,
Italia scienze naturali, biologia, scienze
earth science,
geo astronomica,
TIC (**) della terra, TIC
chimica, TIC
Matematica,
fisica, chimica, Matematica,
Matematica,
Grecia Scienze naturali biologia, TIC fisica, chimica,
geografia biologia, TIC
Matematica, Matematica,
Matematica,
Romania Scienze naturali
fisica, chimica, fisica, chimica,
biologia biologia
(*) Si prega di notare che questa tabella deve essere letta in relazione a quella che spiega le diverse età
per i livelli nei diversi paesi in quanto si differenziano le diverse materie in base ad ogni livello.
(**) In Estonia, le scienze naturali consistono in biologia e geografia in grado 7 e lezioni separate di chimica
e fisica in grado 8.
13SCHEDE D’ATTIVITÁ
Nel corso del nostro progetto, abbiamo organizzato 4 attività di formazione durante le quali ciascun
partner scientifico ha mostrato la propria esperienza nell'organizzazione di laboratori e attività per
aumentare l'interesse per le materie STEM tra gli studenti e preparare gli insegnanti ad affrontarli.
Successivamente, abbiamo preparato 20 video-tutorial grazie ai quali gli insegnanti possono replicare tali
attività a scuola. La lingua parlata dei vide-tutorial è l'inglese, ma sono stati sottotitoli in estone, italiano,
greco e rumeno, quindi sono utili anche per gli insegnanti che non parlano inglese.
Ogni video tutorial è accompagnato da una descrizione degli esperimenti, lo scenario di apprendimento
e vari suggerimenti per implementarli. Troverete tutte queste informazioni nelle schede d’attività
annesse.
Potete trovare tutti i video-tutorial sul nostro canale Youtube: www.youtube.com/boostingscience
14TOOLBOX: INQUIRY-BASED SCIENCE EDUCATION (IBSE)
Prima di utilizzare i nostri tutorial video e i fogli di attività ad essi collegati, vorremmo fornirvi un ulteriore
input.
Naturalmente, sarete liberi di replicare cone desiderate le attività nella vostra classe, ma vorremmo
suggerirvi un metodo che potrebbe stimolare ancora di più l'approccio scientifico nei vostri studenti:
l'insegnamento della scienza basato sull'indagine scientifica (IBSE).
IBSE è un metodo pedagogico che pone le idee, le domande e le osservazioni dei bambini al centro
dell'esperienza educativa1.
Nel fare ciò, sia i divulgatori scientifici (in generale, gli educatori), sia i bambini (gli studenti) condividono
la stessa responsabilità nel processo di apprendimento: qui, la libertà di ricercare come si verificano alcuni
fenomeni - attraverso l'esperienza e il confronto con i propri compagni di classe si manifesta nella
responsabilità della costruzione della conoscenza collettiva2.
Educatori e studenti costruiscono insieme delle esperienze di apprendimento accettando la reciproca
responsabilità nella progettazione e nella valutazione delle varie fasi di apprendimento e di miglioramento
dell'individuo, nonché quella dell'intera classe.
Questa peculiarità del metodo IBSE implica un maggiore impegno durante l'esperienza educativa, sia da
parte degli allievi che da parte dei divulgatori scientifici: gli alunni sono tenuti a partecipare attivamente
alla definizione del percorso di indagine, i tutor devono apprendere di nuovo ogni volta con gli alunni.
In breve, potremmo condensare operativamente il metodo IBSE in questo modo:
Mettiamo le idee e il ragionamento degli studenti al centro della discussione, sviluppando con
loro sia il percorso iniziale da loro delineato che l'indagine che segue;
Creiamo un ambiente per una discussione rispettosa: apprezziamo il contributo di tutti;
Interveniamo per indurre gli studenti a dare il loro contributo al sondaggio, garantendo che gli
studenti abbiano idee chiare e prestino maggiore attenzione ai concetti chiave;
Sviluppiamo insieme domande che sorgono per interessarli ancora di più all'argomento e porre
loro ulteriori domande;
Diamo istruzioni o prendiamo mini lezioni quando è evidente che gli studenti hanno bisogno di
nuovi strumenti o concetti per il progresso.
1
Ontario Ministry of Education. Inquiry-based learning. Student Achievement Division - Ontario
2
Michel Rocard, Valérie Hemmo, Peter Csermely, Doris Jorde, Dieter Lenzen, and Harriet Wallberg-Henriksson. Science Education Now: a Renewed
Pedagogy for the Future of Europe. European Commission
15L'apprendimento basato sull'indagine consiste in 5 fasi3:
1. Orientamento: creare interesse - trovare connessioni con la vita di tutti i giorni, con delle notizie
quotidiane e/o guardare dei video.
2. Concettualizzazione (generazione di domande e/o ipotesi): la domanda di indagine consiste in una
caratteristica misurabile, una domanda (ad es. "Quanto volerà lontano?") e nel fattore che la
influenza ("La quantità e il tipo di combustibile"). Inoltre, nel formare l’ipotesi c'è anche un effetto
atteso. Con alunni più piccoli, invece dell'ipotesi, è meglio iniziare a creare delle idee e in seguito
fare pratica su come formare le idee in ipotesi.
3. Indagine (esplorazione o sperimentazione, e interpretazione dei dati): Pianificazione
dell'esperimento (cosa misurare, cosa dovrebbe essere costante, come raccogliere i dati), scelta
di attrezzature adeguate (le attrezzature ed oggetti possono essere condivisi per migliorare
ulteriormente il lavoro di squadra e la cooperazione degli alunni), svolgere l'esperimento,
analizzare i dati, correggere il piano e riprovare se necessario.
4. Conclusione: i risultati supportano l'ipotesi? è possibile rispondere alla domanda?
5. La discussione in tutte le fasi (comunicazione, riflessione) include anche il pensiero critico.
Date un'occhiata agli esperimenti e ai materiali di accompagnamento nelle pagine 33-43 di questo
rapporto. Troverete degli esperimenti, fogli di lavoro e guide per gli insegnanti basati sul metodo IBSE,
progettato dallo Science Center AHHAA in Estonia.
Potete anche dare un'occhiata ad alcuni esperimenti condotti da The Science Zone, sempre secondo il
metodo IBSE: https://www.youtube.com/channel/UC70JvV5jWJIHGe40HBxUXTQ
E ora ... siete pronti per iniziare a dare un impulso alla scienza nella vostra a scuola?
3
Margus Pedaste, Mario Mäeots, Leo A. Siiman, Ton de Jong, Siswa A. N. van Riesen, Ellen T. Kamp, Constantinos C. Manoli, Zacharias C. Zacharia,
Eleftheria Tsourlidaki. 2015. Phases of inquiry-based learning: Definitions and the inquiry cycle. Educational Research Review, 14, 47-61.
16Zoetrope (1/1) Duration: 45 minutes;
Learning scenario Objectives: construct a zoetrope
and relate its operation to film
Divide the class into groups of 5-6 kids and give them the and video;
materials for the experiment. Work with them during the
activity. First, take an A4 piece of paper and make templates for Covered subjects: science;
kids in order for them to know where to cut it. They have to form persistence of vision;
one long strip. This is the basic part of the zoetrope, it should engineering;
look like a cylinder with small holes cut at the same distance
from one another. Second, wrap the strip around the cylindrical Topics: optical illusions, zoetrope;
container and tape it in place. If it is difficult for you to find a
cylindrical container you can use CD disks. In this case, you have Target group: students aged 6-12
to change the template, this one needs to be applied to the disk. years;
Third, using a craft knife or scissors, cut the cylinder to size and
cut out the slots. Remove the template. Four, poke a hole in the Materials: cardboard, black paint,
middle of the bottom of the can and push a pencil partway cylindrical food container, printed
through the hole. If you used a cd disk, it is already cut. Fifth, draw with animation, adhesive
paint the outside of the cylinder black. Using black paint you can tape, scissors, small marble ball;
raise the effectiveness of the zoetrope. Six, cut out two strips
with images, tape them together to form one long strip and Words for internet search:
place it inside the zoetrope. Place the marble ball on the hole Zoetrope
that you poked. Finally, ask students to look through the slots at
the images on the inside of the zoetrope as they spin it. It helps Further information:
to hold the zoetrope under a bright light. Show kids the video https://en.wikipedia.org/wiki/Zo
tutorial and show them that you can do the zoetrope etrope
experiment with 3D horses. Tell them a story about zoetrope
and explain that this is a pre-film animation device. Link to the video tutorial:
Explanation https://youtu.be/LV31pc65-70
The zoetrope consists of a cylinder with slits cut vertically in the
sides. On the inner surface of the cylinder is a band with images
from a set of sequenced pictures. As the cylinder spins, the user
looks through the slits at the pictures across. The scanning of the
slits keeps the pictures from simply blurring together, and the
user sees a rapid succession of images, producing the illusion of
motion. The 3D zoetrope relies on the same principles but instead
of flat 2D frames it uses 3D models and instead of the slits it uses
a strobing LED light to illuminate each frame for a fraction of a
second. The strobe and slits are necessary to freeze the frames,
otherwise, you would just see a blur.
17Bernoulli (1/2) Duration: 45 minutes;
Learning scenario
Objectives: gain awareness of
the Bernoulli Principle;
Introduction - 10 minutes:
explain that air pressure
Speak with kids about flying. Ask them what they know about it
decreases as the speed of the air
and give them suggestions to guide their thoughts. You can ask
increases and that air pressure
them about birds and planes, about the wings of the birds and
acts in all directions; apply the
planes. Guide the discussion to the point where kids think about
Bernoulli Principle;
air. Ask again questions and give them indication to guide their
thoughts. What is the role of the air in the process of flying?
Covered subjects: physics;
Does the air help? Can you say something about the
characteristics of the air? Make some suggestions about
Topics: Bernoulli's Principle; lift
pressure and density.
(force);
Divide the group - 10 minutes:
For a better understanding of the experiments, divide the class Target group: students aged 6-10
into groups of 5-6 kids and give them separate places into the years;
classroom. Give them papers and markers and ask them to
select the most important ideas from the discussion below. This Materials: for everyone - paper
way you will help kids to put in order the ideas and to think 15x2 cm, 2 ballons, 1 hanger,
about what they do not understand. Kids will connect ideas thread; for demonstration - a
about birds, planes, wings, air, and flight. hair dryer, balls of different sizes
Experiments - 20 minutes: (some of them should be made
Give kids the pieces of paper you cut. You can use recycled paper of polystyrene);
and cut it to 15x2 cm. Tell them that they have to take the piece
of paper into their hand then hold it close to the mouth, and Words for internet search:
blow on top of the paper. Speak with them about what is Bernoulli; Bernoulli Principle; lift
happening. Let them discuss and give opinions. Prepare the force;
second experiment. Give kids one hanger, 2 ballons, and thread.
Explain to them what they have to do with all of this. You can Further information:
see in the video tutorial how to use the materials. After setting http://bit.ly/2WPo6PD
up the experiment let kids blow between the two balloons and
discuss. Ask kids what happened in the two experiments and http://bit.ly/2Zy0d0H
what is strange about them. Speak about why the piece of paper
goes up and why the two balloons stick together. Then prepare Link to the video tutorial:
for the third experiment. Set the hair dryer to cool, switch it on, https://youtu.be/i3u9lPXN_BA
and point it at the ceiling. Put the ping-pong ball in the stream
of air. Be careful to put the ball exactly on the stream of air. Hold
the hairdryer steady and watch as the ping-pong ball floats in
the stream of air.
Be careful to put the ball exactly on the stream of air. Hold the
hairdryer steady and watch as the ping-pong ball floats in the
stream of air. Move the hair dryer from left to right and watch
how the ball moves as well, staying in the stream of air. Ask the
students whether the ball is being pushed up or pulled up.
18Bernoulli (2/2)
Learning scenario
Ask a student to place his hand above the ball. The ball should
drop.
This represents turbulence above an airplane wing. Prepare the
fourth experiment. For this, you will need a bigger ventilator. Try
to float two or more balls in the same air stream. Ask kids what
they think, how many can you float at once? How do they
behave when there is more than one? Place balls of different
sizes and watch how they behave on the stream of air.
Instructions and tips for the students:
Ask kids to get from their house hangers and thread, and give
them the opportunity to find some more interesting balls.
After the experiment ask them to write conclusions and main
ideas. This way you can make them think about what they saw
and what they learned about.
Explanation
Bernoulli Principle states that as air moves around an object, it
creates different pressures on that object. When the air moves
faster it creates less pressure. When the air moves slower it
creates more pressure. Why the piece of paper goes up?
Because when you blow the air you are increasing the speed of
it over the paper and the pressure above the paper decreases.
The higher pressure below the paper pushes up and causes the
paper to rise. Why the two balloons stick together? The fast-
moving air that you blow between the balloons lowers the air
pressure between them. Both balloons are moving closer to the
area where there is less pressure. How can we explain the flight
of different balls? There are two primary explanations for this
demonstration. A.) There is a moving stream of air traveling
around the ball resulting in an area of less pressure. The ball is
prevented from falling out of the moving stream of air because
it is pushed in by the higher pressured air adjacent to the moving
stream of air. B.) The air travels around the ball and is moving at
the greatest velocity at the top of the ball, resulting in an area of
low pressure above the ball. The ball is drawn toward the area
of low pressure. This area of low pressure can be disturbed by
placing a hand above the ball.
19Gears (1/2) Duration: 30 minutes;
Learning scenario Objectives: Explain the role of
gears in mechanical devices;
Introduction: explain how gears can be used to
The purpose of this lesson is to give kids something to think create motion;
about, to make them curious to ask questions and to find
answers. First, divide the class into groups of 5-6 kids. Use their Covered subjects: physics;
help to organize the class and to put the tables into separate
spaces for each group. Give them gears of different sizes and tell Topics: gears, motion;
them to play with them. They will have three gears of different
sizes: small, medium and big. Tell them to choose two of them Target group: students aged 6-10
and to start playing and observing. Students can change the years;
gears after they observe them and if they need they can rotate
the three gears at the same time. Once they rotate two gear Materials: gears of different
they have to observe something. Ask them what they observe. sizes;
Help kids find the right questions and the right answers. Ask
them about the number of teeth, about the sense of rotation, Words for internet search: gears,
about the speed. After finding their answers ask kids to write motion;
down the main ideas and to draw useful explanation.
Understanding gears:
Further information:
Organise a game and ask kids to think about where they can use
http://bit.ly/2x0696q
gears and for what. Ask them to write down the uses. After 5
minutes of speaking and analyzing ask kids to present their list http://bit.ly/2FcO3lY
and to explain why they thought this way. With this game, kids
will try to remember if they saw gears in some mechanical Link to the video tutorial:
devices and they will name them. You can speak about bicycles https://youtu.be/TirFWNyr2bM
where gears work together to change the relationship between
the driving mechanism and the moving parts. On a bicycle you
change gears depending on terrain. Motion Another part of the
lesson is to explain motion. We will explain three types of
motion, circular motion, linear motion and oscillatory motion.
Ask kids to think about each one of this moves and to say what
they think about it. Ask them to give examples.
Give them materials to test each of this moves. They already
have gears, give them a ruler for linear motion and a small
pendulum for oscillatory motion.
Show kids the video tutorial and discuss what they learned.
Speak about the way all of those three moves are connected in
the mechanical device.
Feedback, experience: there are more ways in which you can do
this lesson. You can make a mechanical device like the one
presented in the video tutorial.
20Gears (2/2)
Learning scenario
It is easy to make it if you use a 3D printer. If this is not a solution
for you, you can make your own gears from cardboard. Choose
a cardboard, one that is thick, or two pieces less thick that can
be glued together, cut it in circles of different sizes and insert
beads with pins on the edges.
Explanation
Gears are helpful in machines of all kinds, not just bicycles.
They're a simple way to generate more speed or power or send
the power of a machine off in another direction. Gears are
simple machines. When we try to connect two gears of different
sizes, we can:
Change direction: When two gears mesh together, the second
one always turns in the opposite direction. So if the first one
turns clockwise, the second one must turn counterclockwise.
Increase force: If the second wheel in a pair of gears has more
teeth than the first one it turns slower than the first one but with
more force.
Increase speed: If you connect two gears together and the first
one has more teeth than the second one, the second one has to
turn round much faster to keep up. So this arrangement means
the second wheel turns faster than the first one but with less
force.
We can use gears to explain different types of motion. You can
see this in the video tutorial, circular motion with the gear, linear
motion, and oscillatory motion, with the hand. You can see that
gears are used for transmitting power from one part of a
machine to another.
21Magnetism (1/1) Duration: 45 minutes;
Learning scenario Objectives: determine which
objects are magnetic and which
Encourage students to discuss their experience with magnets,
are not; observe that magnets
then let them know that they are about to perform a series of
have two sides like the Earth;
simple experiments that will show which of a group of objects
will be attracted to a magnet.
Covered subjects: physics;
Divide the class into groups and give each group the materials.
Before the experiment, ask students to predict which materials
Topics: magnetism;
will be attracted by the magnet and which will not. Ask kids to
write down their prediction in two charts. Ask students to test
Target group: students aged 6-12
each object or substance with the magnet. On their charts,
years;
they should record what was attracted by the magnet and
what was not. Ask them if their predictions confirmed. Then
Materials: 2 common magnets for
give kids the compasses and ask if they know what are they
every child, 10 strong magnets;
used for. Ask them if they know something about the Earth and
compass for every group;
about its magnetic field. Explain that the north pole of a different objects including some
magnet points roughly toward Earth's north pole and vice- that will and some that won’t be
versa. That's because Earth itself contains magnetic materials attracted by a magnet (e.g.
and behaves like a gigantic magnet. Think about ancient aluminum foil, paper, keys, clips,
people, for them, magnetism must have seemed like magic. beans); a computer with Internet.
We can see that if we hold two bar magnets so their north
poles are almost touching, they'll push away from one another; Words for internet search:
If magnet's north pole is near the other magnet's south pole, magnetism, magnet, north pole,
the magnets will pull toward one another. south pole, compasses;
Explanation Further information:
A magnet has two ends called poles. One is called a north pole http://bit.ly/2WLaV1S
or north-seeking pole, while the other is called south pole or
south-seeking pole. The north pole of one magnet attracts the Link to the video tutorial:
south pole of another magnet, while the north pole of one https://youtu.be/N7hWXaBXH7g
magnet repels the other magnet's north pole. Magnets can
attract other magnets or other magnetic materials through a
magnetic field. The red pointer in a compass is a magnet and
it's being attracted by Earth's own magnetism. Earth behaves
like a giant bar magnet with one pole up in the Arctic (near the
north pole) and another pole down in Antarctica (near the
south pole). If the needle in your compass is pointing north,
that means it's being pulled toward something near Earth's
north pole. Since unlike poles attract, the thing your compass
is being attracted to must be a magnetic south pole. What we
call Earth's magnetic north pole is actually the south pole of
the magnet inside Earth.
22Optical Illusion (1/1) Duration: 45 minutes;
Learning scenario
Objectives: understand why
This lesson can serve an important purpose in class and in life in optical illusions occur; explain
general. The main objective is for kids to understand why optical different types of optical
illusions occur. We can say that we can't always trust our eyes. illusions;
Divide the class into groups of 5-6 kids and give them the printed
papers with the illusions. You can choose whatever you want. Covered subjects: optics, physics;
We recommend 10 images with optical illusions.
This image is an example, it represents the Müller-Lyer illusion. Topics: perceptions;
It consists of two stylized arrows that appear to have different
sizes. Ask kids to analyze each image, to explain it and to Target group: students aged 6-12
demonstrate why it is an illusion. After the first experiment, years;
show kids the video tutorial and then talk with them about what
they saw. Ask them to explain the illusions. Ask helpful questions Materials: a computer and a
and give the indication to guide their thoughts. Ask kids if they video projector; printed pictures
know why the optical illusions happen. with optical illusions;
Explanation Words for internet search:
Things can appear as more than one thing at different times Optical illusion, perception;
depending on how you look at them. Things aren't what you
think they are. Things can be more than one thing at the same Further information:
time, and your mind and sight can be tricked by something rather
http://bit.ly/2wZy0DG
simple in the end.
Ambiguous cylinder illusion - Based on whether you're looking at
http://bit.ly/2MSqPIl
it in a mirror or in person, it's a shape that appears to
simultaneously be two different shapes, a small plastic square or
a circle. Each piece is the exact middle ground between a circle
http://bit.ly/2N2iUs2
and a square. The tops of the sides are wave patterns. Two sides
dip up, and two sides dip down. Combined, the sides "correct" Link to the video tutorial:
the shape, depending on which way the shape is projected in a https://youtu.be/TEstaBDYh9U
mirror.
Straight Pole Curved Hole Optical Illusion - You can see a rotating
pole that somehow appears to fit through a curved hole. How
does this work? The first thing to note is that the pole is not
attached perpendicularly to the base but it's at an angle. Because
the straight pole is at an angle, the base of the pole passes
through the hole first. Then, each section of the rest of the pole
slowly passes through, working upward until the whole thing fits.
Impossible object illusion - Why is it impossible? Because it is a
two-dimensional object made to look three dimensional —
depending on the angle you perceive it at. The impossible
triangle presents itself as an object that seamlessly conjoins
different sides of a triangle, but that depends on the angle you
look at it.
23Electrostatic jumps! (1/1) Duration: 45 minutes;
Learning scenario Objectives: exploring how static
electricity works, the existence
Put the sheet of paper on a flat surface (a table), then put the of different charges and the
supports at the corners. Drop some sugar, salt and pepper on behaviour of different materials
the paper and then put the plexiglass sheet above the under electrostatic force.
supports. Rub the plexi with the woolen cloth and see what
happens. Then repeat the experiment with lentils, paper, Covered subjects: science,
aluminium. physics;
Divide the pupils in groups of 5. Let them try the basic
experiment and then vary the experimental setting and Topics: static electricity;
observe what happens. For example, change the distance
between plexi and the table, use a different cloth (material) to Target group: students aged 8-13
rub the plexi, change weight and dimensions of the objects years;
and/or material of the support. Observe that attraction
depends on distance, “intensity” of rubbing, materials you Materials: for one group - white
used (stronger for conductors). For a success in the experiment paper sheet (1 per group); 4
you have to use very light objects and spread them widely and isolating supports (wooden,
evenly on the paper. Let the students do the experiment with plastic, etc.); a bunch of light and
your help and take notes of observations . small objects like sugar grains,
salt, pepper, dried lentils, pieces
Explanation of paper, pieces of aluminium
foil; 1 woolen cloth; 1 sheet of
Matter is generally neutral but it can be electrified by rubbing
plexiglass (20x20 cm);
it, that is by trasferring charges by mechanical work. Plastic
(plexi) is negatively charged when rubbed with wool (cloth),
Words for internet search: static
this induce a redistribution of charges in nearby objects, by
electricity, Coulomb’s Law,
polarization for insulators (paper, lentils, sugar, pepper,salt)
charge, conductor, insulator,
and by induction for conductors (aluminium). The objects are
electrostatic force;
attracted to the plexi due to the electrostatic force (opposite
charges). Notice that you can see also repulsion between
pieces of aluminium (they get the same charge by contact). Link to the video tutorial:
https://youtu.be/K74RoAvfhms
24Discovering acid and bases by colours (1/1) Duration: 45 minutes;
Learning scenario Objectives: to measure acidity
and basicity by interaction of
Prepare the cabbage juice by boiling the red cabbage in a pot
substances with a pH indicator;
until it becomes violet, then filter it. Prepare five glasses and
put them side by side. Fill each glass three-fourths with
Covered subjects: science,
cabbage juice. Add bicarbonate to one glass, vinegar to
chemistry;
another one, lemons and ammonia to another (using syringes,
be careful ammonia is dangerous). Keep a glass of purple
Topics: acid and bases; chemical
cabbage juice to show the colour of a neutral solution. Stir
reactions; enviromental
with a spoon and observe that the colour changes in different
properties, pH and
ways in each glass. You can also check with pH indicator stripes
neutralization;
the acidity of substances that you add and see that the colour
is the same of the cabbage with the substance. In the Target group: students aged 12-
classroom, let the students choose the liquids to mix and ask 14 years;
them to write down in a table the transformations they
observe. Let the students do the experiment with your Materials: for 20 kids - spoons (3
guidance and take notes of observations. per group of students); small
glasses (5 per group of students);
Explanation red cabbage juice (for 2 liters,
boil half of a red cabbage in 3
Substances are classified as either acid or a base. Acids have a
liters of water for 30-45 mins);
low pH and bases have a high pH. We can tell if a substance is
bicarbonate (half a glass – 200 g);
an acid or a base by means of an indicator. An indicator is
vinegar (1 glass); 2 lemons
typically a chemical that changes colour if it comes in contact
(sliced); ammonia (half a glass);
with an acid or a base. Red cabbage contains a pigment called
syringes without needle (1 per
anthocyanin that changes colour when it is mixed with an acid
group of students) to provide
(red) or with base (blue-green). kids with ammonia without them
handling it directly; pH indicator
stripes (5 per group of students);
Words for internet search: Red
cabbage, PH, acidity, PH
indicator, anthocyanin;
Link to the video tutorial:
https://youtu.be/wdyDqNfqKm8
25Leaf Life Lab (1/2) Duration: 20 minutes;
Learning scenario
Objectives: to investigate the
First, pour water into the transparent glass, then add half of a role of light on oxygen
tea spoon of bicarbonate and a drop of soap and mix the production in photosynthesis;
solution. Cut 5 or more uniform leaf disks using the hole punch.
Remove the plunger of the syringe and place the leaf disks into Covered subjects: biology;
the syringe barrel. Replace the plunger and push it being
careful not to crush the leaf disks. Fill the syringe with the Topics: plant physiology,
bicarbonate solution from the glass. To press out the gas from photosynthesis;
the leaf disks, cover the syringe-opening with a thumb and
draw back on the plunger to create a vacuum. Hold this
Target group: students aged 10-
vacuum for about 10 seconds while swirling the leaf disks to 13 years;
suspend them in the solution. Let off the vacuum. It may need
a few repeats to remove all the gas from the leaf disks. You can Materials: for one group -
see that the gas is removed when the leaves go to the bottom sunlight or strong artificial light
of the syringe. Finally, put the leaf disks back into the glass (not commercial LED); tea
under a light source and wait until the leaves slowly go up and spoon; transparent glass;
reach the surface. It may take a few minutes. In the classroom syringe (no needle!!); hole
divide the pupils in groups of 5 and let them do the experiment punch; bicarbonate (baking
and then vary the materials and notice what happens. For soda, half of a tea spoon); dish
example, trying different light sources they can see a soap (1-2 drops); spinach leaves;
difference in the time it takes for the leaves to float. The water (a glass);
students can notice that the best light source is sunlight while
commercial LED does not work. This is because the wavelength Words for internet search:
of light produced by commercial LED is different than the one Photosynthesis, oxygen
plants use. Once all the leaf disks have floated to the top, production, leaf disk, plant;
students can place the glass in a dark cupboard and see how
long it takes for them to sink. Pupils can try leaves from Link to the video tutorial:
different plants. They will notice that the plants that have the https://youtu.be/wS3TFERvU9E
leaf surface smooth and not too thick, take less time to float
than the others. Let the students do the experiment with your
guidance and take notes of observations.
Explanation
Photosynthesis is a process used by plants to convert light
energy into chemical energy stored in carbohydrate
molecules. To do photosynthesis, plants need carbon dioxide,
water and light. Using photosynthesis, sugar molecules and
oxygen are produced.
26Leaf Life Lab (2/2)
Explanation
The bicarbonate added to the water serves as a source of
carbon dioxide while soap decreases the surface tension of
water so the leaf disks could easily drop to the bottom of the
glass.
Actually, normally leaf disks float because they contain gas
inside them. When the air spaces are replaced by water, the
overall density of the leaf disk increases and the disk sinks.
When you see the leaf disks slowly going up, it is due to the
oxygen produced. As density of gas is lower than water density,
the leaf rises up, finally reaching the surface.
27Let’s swing (1/2) Duration: 45 minutes;
Learning scenario Objectives: to learn the concepts of
Single Pendulum
periodicity, frequency and
This experiment involves many different steps and activities,
resonance; to develop qualitative
so it is a good choice to make the students split tasks among
(description) and quantitative
(measurement) scientific
themselves.
methodology approaches;
Let the students build a pendulum using a rigid frame (a chair
on a desk), the fishing wire and nuts and decide the number of
Covered subjects: science,
complete oscillations they want to observe. Using the
mechanics (physics);
stopwatch, make them observe and write down the time
needed for the pendulum to perform the decided number
Topics: oscillations and resonance
oscillations.
in a pendulum; periodic motion
Make the students repeat the experiment as many times as
they want (around 10x), then help them decide a single
and transfer of energy;
number to represent all the results obtained: you could Target group: students aged 10-12
suggest them to take their ‘average’. years;
Repeat the above procedure by changing some details:
1) number of nuts tied to the bottom end of the wire; Materials: for one group/10 kids-
2) starting position of the nut; metal nuts (x 12); fishing wire (10
3) material composing the wire; m); other kinds of thread (10 m
4) length of the wire. each; ropes, ribbons, etc); some
It’s very important to change one detail at a time, while kind of rigid support (1-1.5 m tall);
keeping the other details the same. tape (a few pieces, if need to hold
Make the students compare the results coming from the some structures); stopwatch for
different experiments and draw some conclusion. Ask them measuring time (accuracy of tenths
the question: does the time needed to complete the number of seconds is enough; e.g., those
of oscillation you decided, change bynchanging the details of
from smartphone apps);
the experiment?
paper, pens and colors to record
results, make plots, tables and
sketch the experimental setup;
Coupled Pendulum
For this experiment, it is better to use a softer thread than the
Words for internet search:
fishing wire: try with a thin rope. Tie two end of a rope to two
Pendulum (motion), oscillation,
rigid structures, so that it is horizonal and well stretched (this
coupled pendulum, air friction;
is very important). Build two pendula by fixing their upper end
to the horizontal rope. Make sure that both pendulas are
Link to the video tutorial:
steady. Displace the nut of one of the two pendulas and let it
https://youtu.be/5aPqS5wohek
go. Observe what happens.
28Let’s swing (2/2)
Explanation
Single pendulum – First, you will notice that the pendulum
makes always the same movement: back and forth, back and
forth, …and it always take the same time do it! This property is
called ‘periodicity’: a movement is ‘periodic’ when it repeats
itself over and over, taking always the same time. In particular,
the time needed to perform one of these equal movements
(one oscillation, in the case of a pendulum) is called ‘period’.
Hopefully, you will then notice that the time needed to
perform a fixed number of oscillations will not depend on the
initial displacement of the nut, the number of nuts tied to the
bottom end of the wire nor the material composing it. Instead,
it will depend on the length of the wire! In particular, the
longer it is, the longer it takes to complete a single (or a certain
number of) oscillation.
Coupled pendulum – Once the first pendulum starts moving,
you will notice that after a little time, the amplitude of its
movement will start reducing until it almost stops, while the
other pendulum (which was initially still) will actually start
moving more and more. Waiting some more time, the second
pendulum will reduce its movement, while the first one will
start moving again, and so on. What is happening?
Everything which moves has some energy. This energy can be
transmitted to other objects to make them move too: the only
thing needed for this to happen, is a mean to transfer this
energy. Pendula are continuously transferring energy to one
another through the horizontal wire which connects their
upper ends: if you notice, while they oscillate, they also move
like thye are rolling on themselves. So, once one pendulum
starts transferring energy to the other, it will start moving less,
because it is away its energy. The other one, on the contrary,
will receive energy, and use it to start moving.
29Puoi anche leggere