RIVESTIMENTI COATINGS - ISTRUZIONI DI TAGLIO e FORATURA CUTTING & DRILLING INSTRUCTIONS
←
→
Trascrizione del contenuto della pagina
Se il tuo browser non visualizza correttamente la pagina, ti preghiamo di leggere il contenuto della pagina quaggiù
RIVESTIMENTI
         COATINGS

          0

              10

                   20

                        30

                             40

                                  50

ISTRUZIONI DI TAGLIO e FORATURA
CUTTING & DRILLING INSTRUCTIONS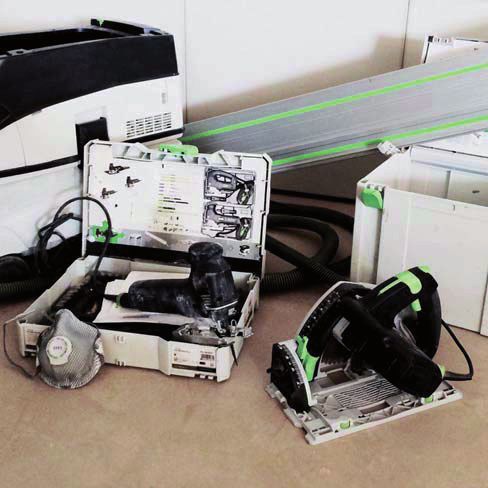
ISTRUZIONI DI TAGLIO e FORATURA
CUTTING & DRILLING INSTRUCTIONS
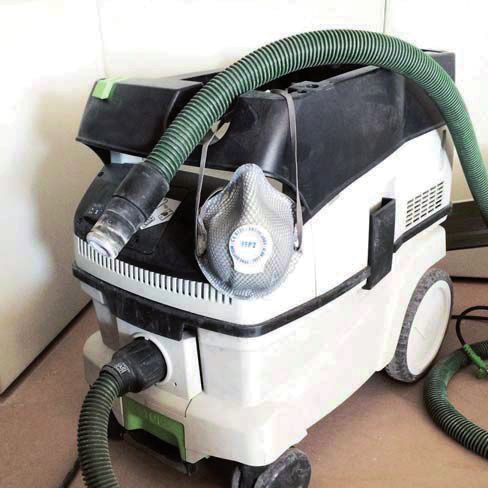
STRUMENTI DA TAGLIO AVVERTENZE Utilizzare appositi dispositivi per l’aspirazione delle polveri e/o
CUTTING TOOLS ventilazione durante la lavorazione dei pannelli.
I residui di taglio e foratura devono essere rimossi immediata- Se l’aspirazione delle polveri non è sufficiente devono essere
mente, se non rimossi possono causare macchie permanenti utilizzate maschere protettive ai sensi della normativa EN
1 - SEGA CIRCOLARE FISSA 149:2001.
CIRCULAR SAW WARNINGS
Cut remains have to be removed immediatly, if not they can Please use specific devices for the powder aspiration and/or
2 - SEGHETTO ALTERNATIVO cause permanent stains. ventilation during the manufacturing of the panels. If powder
JIG SAW aspiration is not sufficient, protective masks have to be used in
accordance with the EN 149:2001 regulation.
Utilizzare utensili in diamante, materiali diversi hanno durata
limitata.
Use diamond refined cutting/drilling tools, different materials
have limited duration.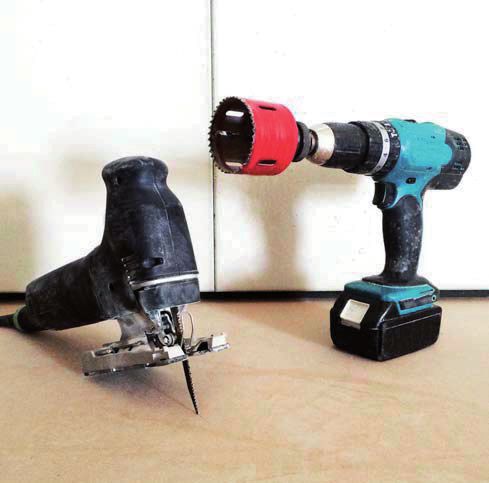
ISTRUZIONI DI TAGLIO e FORATURA
CUTTING & DRILLING INSTRUCTIONS

PASSO 1                                                          PASSO 2                                                            PASSO 3

Il piano di lavoro deve essere stabile e non deve vibrare.       Utilizzare il foglio di polietilene espanso, come protezione per   Appoggiare il pannello con la finitura in CIMENTO® rivolta
                                                                 la finitura CIMENTO®. Il foglio si trova all’interno delle casse   verso il foglio di polietilene espanso.
STEP 1                                                           come protezione tra pannelli.
                                                                                                                                    STEP 3
The work surface area has to be stable and without vibrations.   STEP 2
                                                                                                                                    Lay out the panel on the surface and overturn the CIMENTO®
                                                                 Use the polyethylene sheet as protection for the CIMENTO®          finish on the plyethylene sheet.
                                                                 finish. It is place inside the create, between the panels.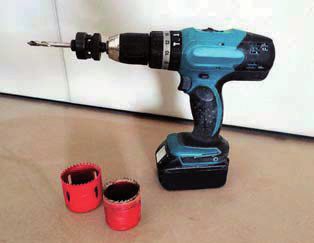
ISTRUZIONI DI TAGLIO e FORATURA
CUTTING & DRILLING INSTRUCTIONS

                                                                      0

                                                                          10

                                                                               20

                                                                                    30

                                                                                         40

                                                                                              50

PASSO 4

Misurare e segnare il taglio da fare.
Appoggiare il binario della sega circolare, sul retro del pannel-
lo, facendolo combaciare con le linee di taglio.
                                                                    PASSO 5
STEP 4
                                                                    Eseguire il taglio.
Measure and mark the cut to be realized. Lean the rail of the
circular saw on the backside of the panel; it has to correspond     STEP 5
with the cutting line.
                                                                    Do the cut.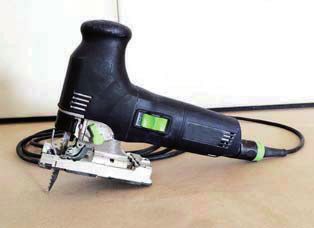
ISTRUZIONI DI TAGLIO e FORATURA
CUTTING & DRILLING INSTRUCTIONS

    20

         30

              40

                   50

                                               NO                                                                                                                                     SI

COSE DA NON FARE                                                     Non tagliare il pannello direttamente sopra due cavalletti. Non   Durante le lavorazioni il pannello deve essere supportato in
                                                                     deve vibrare o essere in tensione durante il taglio.              modo da non curvarsi.
Non si deve effettuare il taglio dalla parte della finitura in
CIMENTO®. Se per necessità si dovesse tagliare dalla parte           Do not cut the panel directly upon two tressels. It has not to    During the cutting procedure the panels should be supported in
della finitura rivolgersi a SAI Industry, per farsi consigliare la   vibrate or be in tension during the cutting.                      order to avoid any bending.
procedura da effettuare.

NOT TO DO

Do not cut the panel on the finish surface. If necessary, please
contact SAI Industry to receive the right indications for the
procedure to apply.
ISTRUZIONI DI TAGLIO e FORATURA
CUTTING & DRILLING INSTRUCTIONS
STRUMENTI DA FORATURA AVVERTENZE Per un foro preciso e pulito, appoggiare un listello di legno
sopra ad un ritaglio di polietilene espanso (a protezione della
DRILL TOOLS
Il pannello deve essere supportato intorno al punto in cui verrà finitura). Forare dall’alto anche il listello di legno, fino ad arriva-
praticato il foro disponendolo su una superficie uniforme (ad re al pianale.
1 - TRAPANO esempio un pianale in legno). La finitura in CIMENTO® deve N.B: una procedura diversa potrebbe causare la delaminazione
essere rivolta verso l’alto. del rivestimento attorno al foro.
DRILL
WARNINGS To obtain a clear hole, please lay a wood slat on a piece of the
2 - SEGHETTO ALTERNATIVO polyethylene sheet (to protect the finish). Drill the slat top-down
JIG SAW The panels has to be supported around the point where the hole until the support.
is going to be made, laying it on a uniform surface (like a wood PS: a different procedure may broke the layer of the finish
surface). The CIMENTO® finish has to be point upwards. around the hole.ISTRUZIONI DI TAGLIO e FORATURA
CUTTING & DRILLING INSTRUCTIONS
COSE DA NON FARE Non si deve effettuare il foro senza protezioni per la finitura in Per tutte le altre possibili lavorazioni di foratura eseguire il
CIMENTO. Non si può forare il pannello senza averlo appoggia- taglio utilizzando trapano con punta a tazza come da istruzioni
Non si deve effettuare il foro dal retro del pannello, ma solo to totalmente su un piano di lavoro. di taglio della sega circolare. Oppure con seghetto alternativo
dalla parte della finitura in CIMENTO®, come da procedura agendo dalla parte della finitura in CIMENTO®.
precedentemente illustrata. Do not do the hole without the protection for the finish. Do not
drill the panel if it is not completely laying on the work surface. Regarding all other drilling procedures, please do the cut using
NOT TO DO a drill with tips or cups as per cutting instructions of the circular
saw. Alternatively, use a jig saw from the finish surface.
Do not do the hole starting behind the panel but only from the
CIMENTO® finish side, as previous declared.CIMENTO® HEADQUARTER SHOWROOM Via J.F. Kennedy, 107/a - 30027 San Donà di Piave (Venezia) - ITALY www.cimento.tech - info@cimento.tech IT SHOWROOM Via Borgogna, 7 - 20122 Milano - ITALY ES SHOWROOM Avenida Barcelona, 56 - 08700 Igualada (Barcelona) - SPAIN CH SHOWROOM Piazza Santa Lucia, 7 - 6900 Massagno (Lugano) - SWITZERLAND UK SHOWROOM The Cube Building | 17-21 Wenlock Road - N1 7GT London - UNITED KINGDOM
Puoi anche leggere