6,2" TFT/LCD 2 DIN NAVIGATION - MANUALE ISTRUZIONI INSTRUCTIONS MANUAL NOTICE DE MONTAGE ET D'EMPLOI GEBRAUCHSANWEISUNGEN MANUAL DE ...
←
→
Trascrizione del contenuto della pagina
Se il tuo browser non visualizza correttamente la pagina, ti preghiamo di leggere il contenuto della pagina quaggiù
6,2” TFT/LCD
     2 DIN NAVIGATION                                  IT
                                                       EN
                                                       FR
                                                       DE
                                                       ES

       MANUALE ISTRUZIONI • INSTRUCTIONS MANUAL
NOTICE DE MONTAGE ET D’EMPLOI • GEBRAUCHSANWEISUNGEN
              MANUAL DE INSTRUCCIONES

                VM069
Precauzioni • Warnings • Précautions • Vorsicht • Precauciones                                                                                                                               IT/EN

• Per l’installazione rivolgersi al personale tecnico qualificato. • Usare solo con impianto elettrico a 12V DC con negativo a massa. • Scollegare il terminale negativo della batteria del veicolo
quando si effettuano le connessioni dell’apparecchio. • Quando si sostituisce il fusibile, utilizzarne uno con lo stesso valore di amperaggio. • Non aprire l’unità e non tentare di ripararla, consul-
tare il proprio rivenditore o personale tecnico qualificato. • Assicurarsi che oggetti estranei non entrino all’interno dell’apparecchio, potrebbero causare malfunzionamenti, generare cortocircuiti
elettrici o un’esposizione rischiosa ai raggi laser se presenti. • Accendere l’apparecchio solo quando la temperatura dell’abitacolo è nella norma. • Mantenere un volume di ascolto che permetta di
udire i suoni provenienti dall’esterno del veicolo (clacson, sirene, etc… • Non collegare alcun cavo in luoghi dove potrebbe ostacolare il funzionamento dei dispositivi di sicurezza dell’auto.

• Installation to be carried out by trained technical personnel • Make sure you have 12V DC, with negative-pole to mass • First disconnect negative-pole of the car-battery, then effect car-radio con-
nections • When replacing fuse, always use fuse with same Ampere-value • Never open the unit, nor try to repair yourself. Always ask your Retailer or authorized technical staff • Make sure that no
foreign objects fall into the unit, they would cause malfunctions, short-circuits or exposure to dangerous laser-rays • When switching-on, make sure that temperate inside passenger-compartment
is at a normal level • Choose a listening-Volume which will allow you to hear external noises (car-horn, sirens etc.) • When placing the cables, keep away from all car security-devices.

• Se servir du personnel technique qualifié pour l’installation. • Utiliser uniquement dans des installations électriques à 12V DC avec négatif à masse.
• Débrancher le terminal négatif de la batterie lorsqu’on fait les connexions de l’appareil. • Quand on remplace un fusible, se servir d’un autre ayant le même ampérage.
• Ne pas ouvrir l’appareil pour essayer de le réparer, contacter votre revendeur ou un personnel technique qualifié • Eviter que des corps étrangers entrent dans l’appareil, car ils peuvent provo-
quer des mauvais fonctionnements, des courts circuits; éviter aussi l’exposition risquée aux rayons laser si présents. • Allumer l’appareil seulement lorsque la température interne du véhicule est
dans la norme • Tenir le volume à un niveau permettant d’écouter les sons en provenance de l’extérieur du véhicule (Klaxon, sirène etc.…)
• Ne brancher aucun câble dans des endroits pouvant causer les obstacles au fonctionnement des dispositifs de sécurité du véhicule.

• Die Installation muss durch technische Fachkräfte vorgenommen werden • Nur bei 12V DC verwenden, mit Negativ-Pol zur Masse • Erst den Negativ-Pol der Auto-Batterie abtrennen, dann die
Radio-Anschlüsse herstellen • Beim Auswechseln, immer Sicherungen derselben Ampere-Stärke verwenden • Nie versuchen, das Gerät zu öffnen oder eigenhändig zu reparieren. Immer den
Händler bzw. technische Fachkräfte zu Rate ziehen • Sicherstellen, dass keinerlei Fremdkörper in das Gerät eindringen können. Diese würden Betriebsstörungen, Kurzschlüsse oder die Entfaltung
gefährlicher Laser-Strahlen verursachen • Gerät nur dann einschalten, wenn die Temperatur im Wagen-Innenraum auf normalem Niveau ist • Lautstärke so einstellen, dass externe Geräusche
(Hupe, Sirenen etc.) noch hörbar sind • Kabel fernhalten von allen Sicherheits-Geräten des Wagens.

• Para la instalación, contactar exclusivamente con empresas especializadas y personal técnicamente cualificado. • Usar solo en vehículos con alimentación de 12V DC y negativo a masa. • Desco-
nectar el terminal negativo de la batería del vehículo cuando se efectúen las conexiones del aparato.• Cuando se sustituya el fusible, utilizar exclusivamente fusibles con el mismo amperaje.
• Non abrir la unidad y no intentar repararla, consultar al revendedor o personal técnico cualificado. • Asegurarse de que no entren objetos extraños en su interior, ya que impediría el buen
funcionamiento, generar cortocircuitos eléctricos, además se corre el riesgo de una exposición muy perjudicial a los rayos laser, si están presentes • Encender el aparato solo cuando la tempera-
tura del habitáculo se haya normalizado. • Mantener un volumen de escucha tal que nos permita escuchar los sonidos del ambiente circunstante. (Claxon, sirenas) • No conectar ningún cable en
lugares que puedan obstaculizar el funcionamiento de los dispositivos de seguridad del coche.

                                                                                                  2
CONNESSIONI • CONNECTIONS		                                                                                                                                                                IT/EN

                                                                                                                              RST

                                                                                                                                              INGRESSO ANTERIORE A/V 1
                                                                                                                                              FRONT INPUT A/V 1

                                                                                                           FUSE                                                                  AUX IN 1 R
      RETROCAMERA / REAR-CAMERA

                                                                                                                                                                                 AUX IN 1 L
                                                                                                                                                                                 AUX IN VIDEO
USB

                                                           ANTENNA AM-FM
                                  MICROFONO / MICROPHONE

                                                                                        ANTENNA GPS
                                                                           1            GPS AERIAL                2

                                                                                                                                                                          DIGITAL RADIO
                                                                                                                                                                            RECEIVER
                                                                                                      DAB BUS         INGRESSO RICEVITORE DIGITALE COD. VM222 USCITA

      1                                                         USCITE PRE-AMP
                                                                PRE-AMP OUTPUT
                                                                                 GIALLO/YELLOW
                                                                                 ROSSO/RED
                                                                                                      VIDEO OUT       VIDEO
                                                                                                      AV IN           DESTRO / RIGHT
                                                                                 BIANCO/WHITE                                                            INGRESSO A/V 2
                                                                                                      AV IN           SINISTRA / LEFT
                                                                                                                                                         INPUT A/V 2
                                                                                 GIALLO/YELLOW
                                                                                                      AV IN           INGRESSO VIDEO / VIDEO INPUT
                                                                                 BLU/BLUE
                                                                                                      SUB WOOFER      USCITA SUB WOOFER / SUB-WOOFER OUTPUT
                                                                                 ROSSO/RED
                                                                                                      FRONT R         ANTERIORE DESTRO / FRONT RIGHT
                                                                                 BIANCO/WHITE
                                                                                                      FRONT L         ANTERIORE SINISTRA / FRONT LEFT
                                                                                 ROSSO/RED
                                                                                                      REAR R          POSTERIORE DESTRO / REAR RIGHT
                                                                                 BIANCO/WHITE
                                                                                                      REAR L          POSTERIORE SINISTRA / REAR LEFT
                                                                                                       3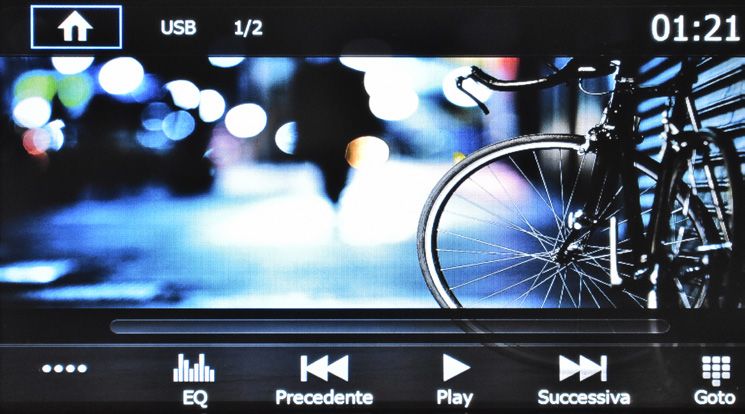
CONNESSIONI • CONNECTIONS		                                                                                                                                            IT/EN

  2

                                                                                             CONNESSIONI E PROGRAMMAZIONE VEDI PAG. 18-19
                                                                                              CONNECTIONS AND PROGRAMMING PAGE 18-19
                       ARANCIONE-BIANCO/ORANGE-WHITE
                                                         KEY A           Linea A Comandi al volante                        Line A Steering-wheel Commands
                       BIANCO-MARRONE/WHITE-BROWN
                                                         KEY B           Linea B Comandi al volante                        Line B Steering-wheel Commands
                       MARRONE-NERO/BROWN-BLACK
                                                         KEY GND         Massa Comandi al volante                          Ground for Steering-wheel Commands
                       VERDE/GREEN
                                                         BRAKE           Freno a mano (collegamento obbligatorio)          Hand-Brake (connection absolutely necessary)
                       ROSA/PINK
                                                         REVERSE         Attivazione retrocamera                           Rear-Camera Activation

                   USCITE ALTOPARLANTI                   GRIGIO/GRAY
                                                                                   FRONT R +       ANTERIORE DESTRO
                   SPEAKERS OUTPUT                       GRIGIO-NERO/GRAY-BLACK
                                                                                   FRONT R -       FRONT RIGHT
                                                         BIANCO/WHITE
                                                                                   FRONT L +       ANTERIORE SINISTRO
                                                         BIANCO-NERO/WHITE-BLACK
         MARRONE
          BROWN
                                                                                   FRONT L -       FRONT LEFT
                                                         VIOLA/PURPLE
                                                                                   REAR R +        POSTERIORE DESTRO
                                                         VIOLA-NERO/PURPLE-BLACK
                                                                                   REAR R -        REAR RIGHT
                                                         VERDE/GREEN
                                                                                   REAR L +        POSTERIORE SINISTRO
                                                         VERDE-NERO/GREEN-BLACK
                                                                                   REAR L -        REAR LEFT

                   ALIMENTAZIONE
                   POWER-SUPPLY                          GIALLO/YELLOW
                                                                                   BATT                     +12V Positivo batteria              +12V Battery-Positive
                                                         ROSSO/RED
                                                                                   ACC                      +12V Sottochiave                    +12V Injection-Key
          NERO                                           NERO/BLACK
          BLACK                                                                    GND                      Massa                               Ground
                                                         MARRONE/BROWN
                                                                                   ILLUMI                   IIlluminazione / Dimmer             Illumination / Dimmer
                                                         BLU/BLUE
                                                                                   AMP/ANT Remote           Accensione antenna elettrica        Activation of Electric Aerial

Durante l’avviamento dell’auto il VM069 potrebbe spegnersi per poi riaccendersi. Per evitare questo inconveniente collegare lo stabilizzatore di tensione 5/146.
The VM038 could turn-out and turn-on again, when the ignition-key gets activated. You can avoid such inconvenience, by connecting the tension stabilizer 5/146.
                                                                                       4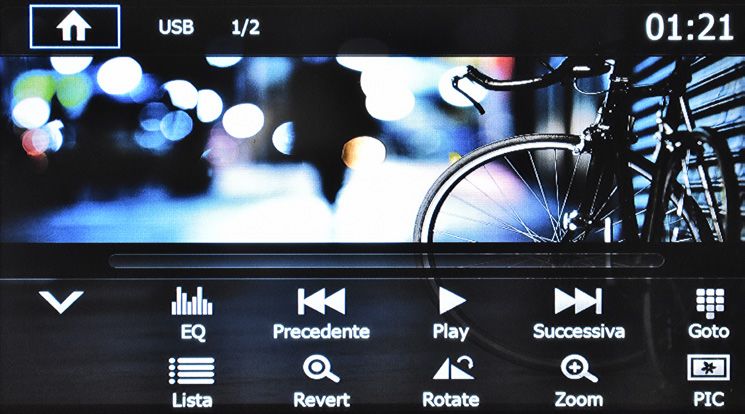
FUNZIONI • FUNCTIONS                                                                                             IT/EN

                                                                                    2     1

                        3
                        4
                        5

                        6
                    7
                        8
                    9
                        10

         1    Slot micro SD Card per navigazione                          1.    Navigation micro SD Card slot
         2    Sensore IR                                                  2.    IR-Sensor
         3    Navigazione                                                 3.    Navigation
         4    Menù principale                                             4.    Main Menu
         5    Accensione/Spegnimento - Volume - Silenziamento Audio       5.    ON/OFF - Volume – Audio-Muting
         6    Luminosità schermo                                          6.    Screen-Brightness
         7    Reset                                                       7.    Reset
         8    Slot SD Card multimediale                                   8.    Multimedia micro-SD Card slot
         9    Porta USB                                                   9.    USB port
         10   A/V AUX-IN                                                  10.   A/V AUX-IN

                                                                      5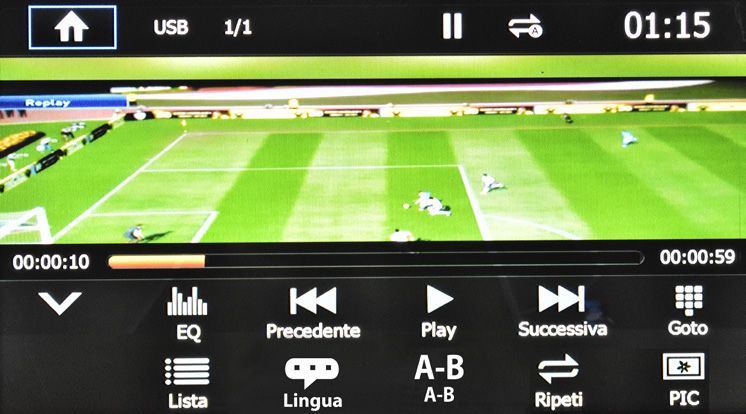
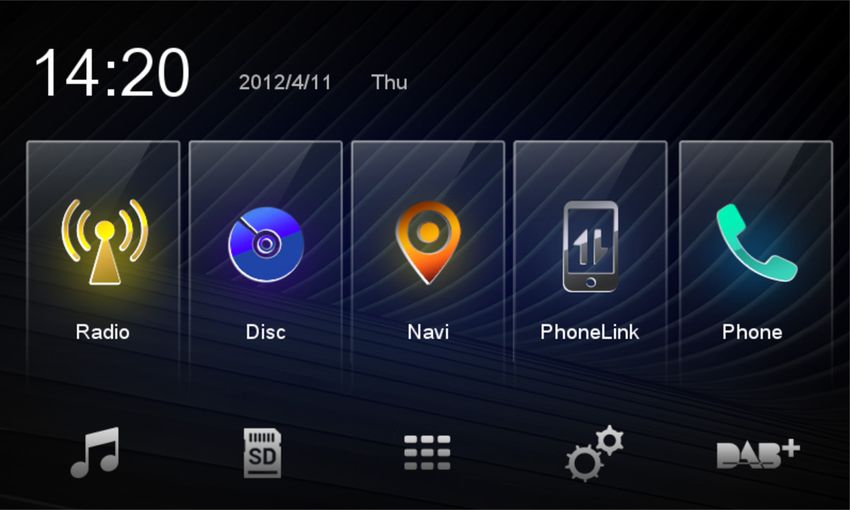
MENÙ • MENU                                                                                                                   IT/EN

All’accensione dell’autoradio compare il MENU principale.              Passa al Menù successivo.   Passa al Menù principale.
Con le icone sullo schermo si seleziona la sorgente o la funzione
desiderata.                                                            Go to following Menu.   Go to Main Menu.

   Passa al Menù successivo

When you switch-on the car-radio, the Main Menu will appear.
With the icons on the screen, you can choose the Source and the
requested Functions.
   Go to next Menu

                                                                       Passa al Menù precedente.   Passa al Menù principale.
                                                                       Go to previous Menu.    Go to Main Menu.
                                                                       6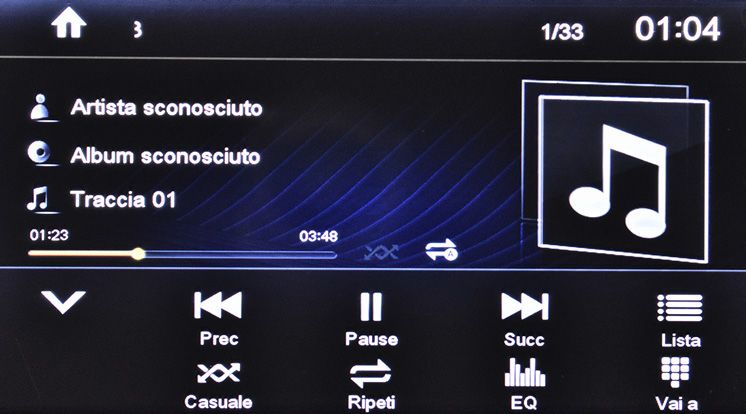
IMPOSTAZIONI DI SISTEMA • SYSTEM SETUP                                                                                                                      IT/EN

           Premere l’icona Setup sul pannello del menù principale per modificare i seguenti settaggi: generali, video, suono, Data e ora, Lingua, Bluetooth, DVD,
           volume sorgenti. / Press Setup-icon on the Main-Menu-interface, to change following Settings: General, Video, Audio, Date and Time, Language, Bluetooth,
           DVD, Source-Volume.

                                                           GENERAL SETUP
                                                       • REGION Select Area
                                                       • RADIO RANGE Select National Stations.
                                                       • BLACKOUT Activate automatic screen-shut-off
                                                          after 10-20 seconds idling
                                                       • DIMMER Set Screen-Brightness
                                                       • BEEP Activate/Deactive Key-sound
                                                       • BACKGROUND Change Background.
                                                       • KEYS COLOR Change colour.
                                                       • CALIBRATION For Calibration touch the screen
                                                          per stated sequence.
                                                                                                                   VIDEO
                                                                                                               • PARCHEGGIO Attiva/Disattiva la visione
                                                                                                                 in movimento dei filmati.
                                                                                                               ATTENZIONE: In alcuni paesi è severamente vietato
                                                                                                               attivare questa funzione, la visione deve essere
     IMPOSTAZIONI GENERALI                                                                                     vincolata al freno a mano.
• REGIONE Seleziona area di appartenenza.
• RADIO RANGE Seleziona stazioni nazionali.                                                                        VIDEO
• BLACKOUT Attiva spegnimento automatico                                                                       • PARKING Activate/Deactivate
   schermo dopo 10-20 secondi di inattività.                                                                     DVD-reproduction while moving.
• DIMMER Regola la luminosità dello schermo.                                                                   ATTENTION: In certain Countries, the activation of
• BEEP Attiva/Disattiva suono tasti                                                                            this Function is severely forbidden and has to be
• SFONDO Cambia sfondo.                                                                                        combined with the hand-brake.
• COLORE TASTI Cambia colore.
• CALIBRAZIONE La calibrazione avviene toc
cando lo schermo secondo la sequenza indicata.

                                                                                 7
IMPOSTAZIONI DI SISTEMA • SYSTEM SETUP                                                                                                            IT/EN

    SUONO                                          REGOLAZIONE DATA E ORA                               IMPOSTAZIONI LINGUA
• SUBWOOFER Attiva/Disattiva uscita pre 		   • Posizionarsi sulla voce da modificare ed effettuare   • OSD Cambia la lingua dei menù di sistema.
subwoofer.                                      le modifiche.
• FILTRO Cambia taglio crossover subwoofer
   80/120/160 Hz.                                                                                       LANGUAGE SETTINGS
                                                  SETTING DATE AND TIME                              • OSD Change Language of System-menus.
                                             • Touch the function required and change values.
    SOUND
• SUBWOOFER Activate/Deactivate Subwoofer
   Pre-Exit.
• FILTER Change subwoofer crossover-cut
   80/120/160 Hz.

                                                                         8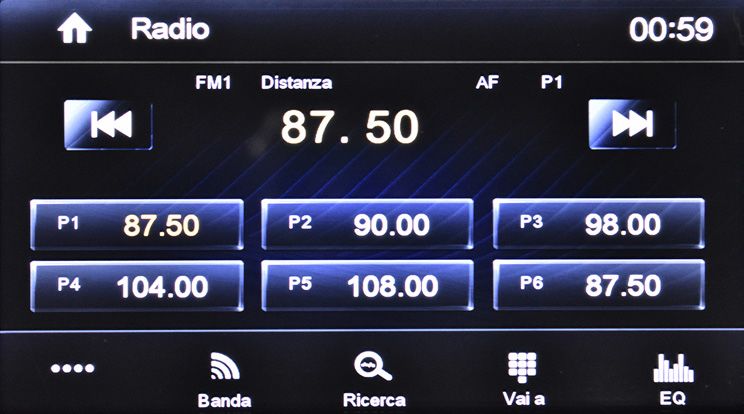
IMPOSTAZIONI DI SISTEMA • SYSTEM SETUP                                                                                                            IT/EN

   IMPOSTAZIONI BLUETOOTH                                  RESET                                        REGOLAZIONE VOLUME
• BLUETOOTH Attiva/Disattiva la funzione 		            Reset Riprisino impostazioni di fabbrica   E’ possibile regolare un diverso volume per ogni sorgen-
bluetooth.                                                                                        te, in modo da evitare sbalzi di livello.
• AUTO CONNESSIONE Attiva/Disattiva la 		                                                         Selezionare la sorgente ed effettuare la regolazione
                                                           RESET                                  voluta.
connessione automatica del telefono al VM069.
                                                       Reset Factory reset
• AUTO RISPOSTA Attiva/Disattiva la risposta
automatica di una chiamata dopo il terzo squillo                                                       SOURCES VOLUME
• ACC Imposta il codice di accoppiamento da digitare                                              Every single Source has its own Volume-Setting. This
sul telefono (codice di fabbrica 0000).                                                           will exclude the disturbing impact of intensity-differ-
                                                                                                  ences when switching from one Source to another.
   BLUETOOTH SETTINGS
• BLUETOOTH Activate/Deactivate
  Bluetooth-function.
• AUTO-CONNECTION Activate/Deactivate
  automatic phone-connection with the VM069.
• AUTO-REPLY Activate/Deactivate automatic
  phone-answering after three times ringing.
• ACC Set coupling-code necessary for the phone
  (Factory code 0000).

                                                                                  9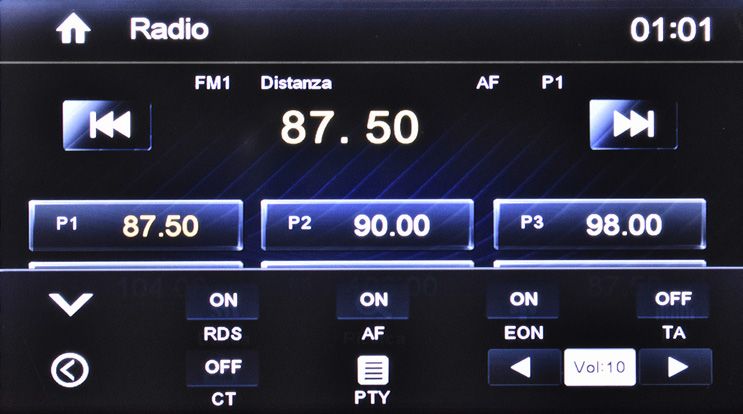
RADIO                                                                                                                   IT/EN

 FUNZIONI RADIO                                    FUNZIONI RADIO RDS
     Torna al menù principale.                            Ricompatta menù.
FM/AM Banda.                                              Torna al primo menù.
•••• Passa ad altre funzioni.                     • RDS (quando il servizio è disponibile).
     Ricerca automatica stazioni / Indietro.
                                                  • AF frequenza alternativa.
     Cambia banda radio AM/FM.
     Scansione automatica emittenti principali.   • EON Abilita la radio all’utilizzo completo delle informazioni RDS.
     Imposta frequenza radio manuale.             • TA Attiva/Disattiva le informazioni sul traffico.
     Equalizzatore.                               • CT Non attivare.
     Ricerca automatica stazioni / Avanti.        • PTY Mostra la lista dei programmi RDS.
AF Ricerca stazione alternativa.                     Vol. 10 Regola il volume del TA
TA Annunci informazioni sul traffico.

 RADIO-FUNCTIONS                                   RADIO FUNCTIONS - RDS
     Back to Main Menu.                                   Recompact Menu.
FM/AM Band.                                               To return to the first menu.
•••• Switch to other functions.                   •RDS (when Area offers RDS-function)
     Autom. Stations-Research / Backward.
                                                  • AF Alternative frequency.
     Automatic scanning main radio stations.
     Set manual radio-frequency.                  •EON puts radio in a condition to use full RDS-Information.
     Autom. Stations-Research / Forward.          •TA Activate/Deactivate Traffic-Information.
     Change radio-band AM/FM.                     • CT Non attivare.
     Equalizer.                                   • PTY Shop List of RDS-programs.
AF Research alternative Station.                     Vol. 10 Regola il volume del TA
TA Traffic-Information Announcements.
                                                                               10
EQUALIZZATORE • EQUALIZER RIPRODUZIONE • PLAYBACK IT/EN
EQUALIZZATORE - LOUDNESS FADER - BILANCIAMENTO - SUB WOOFER FUNZIONI USB/SDCARD
• Premere l’icona per modificare le Premere per accedere alle regolazioni. All’inserimento del supporto USB/SD verrà visualizza-
impostazioni di fabbrica. Tramite le icone è Utilizzare le frecce presenti sullo schermo per le regola- to il contenuto sullo schermo.
possibile selezionare 8 diverse modalità di zioni del FADER, del BILANCIAMENTO e del SUB W. Se sono presenti brani musicali la riproduzione
equalizzazione preimpostate: USER-FLAT-POP partirà automaticamente.
ROCK-CLASSIC-JAZZ-TECHNO-OPTIMAL. FADER - BALANCE - SUBWOOFER Selezionare il tipo di file da riprodurre tramite l’icona
L’icona riporta in OPTIMAL. Press to enter Setup-functions. relativa.
• LOUD Attiva/Disattiva esaltazione basse Use arrows appearing on the screen, to set FADER,
frequenze. BALANCE and Subwoofer. MUSICA VIDEO
IMMAGINI TUTTI I FILE
EQUALIZER - LOUDNESS
• Press icon To modify the factory settings.
USB/SD-FUNCTIONS
By means of the icones it is possible to choose
When introducing the USB/SD-support, the contents
8 different predetermined equalization-modes:
will be visualized on the screen.
USER-FLAT-POP-ROCK-CLASSIC-JAZZ
In the presence of musical files, reproduction will start
TECHNO-OPTIMAL.
automatically.
The icone returns to OPTIMAL.
Select Reproduction-File by clicking the related files-
• LOUD Activate/Deactivate boosting of Low
icon.
Frequencies.
MUSIC VIDEO
PICTURES ALL FILES
11RIPRODUZIONE • PLAYBACK USB-SD CARD IT/EN
RIPRODUZIONE MUSICA RIPRODUZIONE MUSICA RIPRODUZIONE VIDEO
•••• Estende il menù Ricompatta menù. Toccare lo schermo per fare apparire il menù quando
LIST Torna all’elenco file. SHUFFLE Riproduzione casuale. il filmato è in riproduzione.
Avvia o mette in pausa la riproduzione. REPEAT Ripete traccia/cartella/disco. •••• Passa al secondo menù.
Traccia successiva/precedente. EQ Equalizzatore. EQ Equalizzatore.
GOTO Inserisce il numero traccia da riprodurre. Traccia video precedente o successivo.
MUSIC-REPRODUCTION Avvia o mette in pausa la riproduzione.
•••• Extend Menu MUSIC-REPRODUCTION GOTO Inserisce il numero traccia da riprodurre.
LIST Back to Files-List Recompact Menu.
To Start / Interrupt Reproduction. SHUFFLE Random-Reproduction.
Track after/before REPEAT Repeat Track//Folder/CD. VIDEO PLAYBACK
EQ Equalizer. If you touch the screen while film is being shown,
GOTO Introduce Track-number the Menu will appear.
for Reproduction. •••• To procede to the second-Menu.
EQ Equalizer.
To get previous/next track video.
To Start / Interrupt Reproduction.
GOTO Introduce Track-number for Reproduction.
12RIPRODUZIONE • PLAYBACK USB-SD CARD IT/EN
RIPRODUZIONE VIDEO RIPRODUZIONE IMMAGINI RIPRODUZIONE IMMAGINI
Ricompatta menù. Selezionare il file desiderato per visualizzare l’im- Ricompatta menù.
LIST Torna all’elenco file. magine. Per far comparire il menù premere la parte LIST Torna all’elenco file.
Ripete traccia/cartella/disco. inferiore dello schermo. Ingradisce/Riduce l’immagine.
PIC Modifica le regolazioni dello schermo. •••• Passa al secondo menù. Per ruotare l’immagine.
EQ Equalizzatore. PIC Modifica le regolazioni dello schermo.
VIDEO PLAYBACK
Foto precedente o successiva.
Recompact Menu. PICTURE-PLAYBACK
Avvia o mette in pausa la riproduzione.
LIST Back to Files-List Recompact Menu.
GOTO Inserisce il numero traccia da riprodurre.
Repeat Track/Folder/CD. LIST Back to Files-List
PIC Change Screen-Settings. PICTURE-PLAYBACK Enlarge/Reduce the Picture.
Select the requested file to visualize related Picture. To rotate the Picture.
To get the Menu on the screen, touch the bottom PIC Change Screen-Settings.
border of the screen.
•••• To procede to the second-Menu.
EQ Equalizer.
To get previous/next picture.
To Start / Interrupt reproduction.
GOTO Introduce Track-number for Reproduction.
13SMARTPHONE LINK IT/EN
SMARTPHONELINK SMARTPHONELINK
Questa funzione permette di visualizzare uno smar- This function allows you to display an Android/iOS
tphone Android/iOS nello schermo del VM069 smartphone on the screen of VM069.
E’ necessario verificare la compatibilità del proprio Before establishing connections, please check your
telefono prima di effettuare i collegamenti, inoltre al- phone compatibility . Some features will be available
cune funzionalità saranno disponibili a seconda della depending on the Android/iOS version.
versione Android/iOS. Select the operating system of your phone.
Selezionare il sistema operativo del vostro telefono.
ANDROID SMARTPHONELINK function
NO ANDROID Funzione SMARTPHONELINK • Enable “DEVELOPMENT OPTIONS “* by ticking
• Abilitare “OPZIONI SVILUPPATORE”* the USB DEBUG option in the
spuntando l’opzione USB DEBUG nel menù del phone’s menu.
telefono. • Connect the phone’s original USB cable to the
• Collegare il cavo USB originale del telefono alla front USB port of the VM069 by selecting the “tran-
porta USB anteriore del VM069 selezionando sfer file” option.
l’opzione “trasferisci file”. *For more information, please refer to your phone’s
*Per maggiori informazioni consultare il libretto instruction manual.
istruzioni del vostro telefono. You need to enable the audio by pairing your phone
È necessario abilitare l’audio accoppiando il telefo- via Bluetooth with the VM069 (see page 33).
no via Bluetooth con il VM069 (vedi pag. 15).
NOTA BENE: NOTE :
La duplicazione dello schermo non supporta tutte Screen duplication does not support on-demand
le applicazioni di streaming on demand compreso streaming applications, including NETFLIX.
NETFLIX. Sharing of all social applications is supported:
È supportata la condivisione di tutte le applicazioni TWITTER-FACEBOOK-INSTAGRAM-WHATSAPP
social: YOUTUBE and the main navigation applications such
TWITTER-FACEBOOK-INSTAGRAM-WHATSAPP as GOOGLE MAPS-WAZE.
YOUTUBE e le maggiori applicazioni per la navigazio-
ne tipo GOOGLE MAPS-WAZE.
14IMPOSTAZIONI BLUETOOTH • BLUETOOTH-SETTINGS IT/EN
PHONE-PAIRING
Possibility of coupling up to 5 mobile-phones.
Research through mobile-phone:
• Activate Bluetooth-function on the mobile-phone and
search for new devices
• Select VM069 from the List of Devices and digit Pass-
word 0000 on request.
When pairing has taken place, phone-name will
appear. Starting from the Bluetooth-Settings of the
mobile-phone, activate the automatic connection of
ACCOPPIAMENTO TELEFONO VM069. SINCRONIZZAZIONE RUBRICA
Research through VM069:
E’ possibile accoppiare fino a 5 telefoni. Press icon and select mobile-phone to be coupled. Premere per accedere alle impostazioni e
Ricerca dal telefono: Digit PIN-code 0000 on the mobile-phone. selezionare SINC.
• Attivare la funzione bluetooth sul telefono e ricerca- When pairing has taken place, phone-name will Automaticamente la rubrica del telefono verrà
re nuovi dispositivi. appear. Starting from the Bluetooth-Settings of the scaricata nella memoria dell’autoradio. Il tempo per
• Selezionare VM069 nella lista dispositivi, mobile-phone, activate the automatic connection of l’operazione varia in base al numero dei contatti.
inserire la password 0000 quando richiesta. VM069.
Ad accoppiamento avvenuto comparirà il nome del
telefono. Attivare nelle impostazioni bluetooth del PHONE-BOOK SYNCHRONIZATION
telefono la connessione automatica del dispositivo Press to enter the setting options and select
VM069. SYNC.
Ricerca dal VM069: The phone-book of your telephone will automati-
Premere l’icona e selezionare il telefono da accop- cally be downloaded into the car-radio’s memory.
piare una volta terminata la ricerca. The time required for this operation depends on the
Digitare il codice PIN 0000 sul telefono. number of contacts contained in the phone-book.
Ad accoppiamento avvenuto comparirà il nome del
telefono. Attivare nelle impostazioni
bluetooth del telefono la connessione automatica
del dispositivo VM069.
15FUNZIONI BLUETOOTH • BLUETOOTH-FUNCTIONS IT/EN
EFFETTUARE UNA CHIAMATA RICEVERE UNA CHIAMATA RIPRODUZIONE MUSICA BLUETOOTH
• Selezionare Bluetooth dal menù principale. All’arrivo di una chiamata lo schermo passa in moda- Se il telefono connesso supporta il profilo A2DP è
• Premere una delle icone presenti sullo schermo per lità bluetooth visualizzando il numero del chiamante possibile ascoltare i brani musicali.
chiamare da uno degli elenchi. e il nominativo se la rubrica è sincronizzata. Se il dispositivo supporta AVRCP sarà possibile
chiamate perse chiamate ricevute Premere per rispondere o per rifiutare la controllare i brani musicali direttamente dal touch
chiamate effettuate rubrica telefonica chiamata. screen.
(deve essere stata sincronizzata in precedenza). ATTENZIONE / Brano precedente/successivo.
chiamata dal tastierino numerico. All’attivazione della retrocamera, durante una chia- Avvia/interrompe la riproduzione.
Premere l’icona per inviare la chiamata. mata, si disattiva l’audio ma chi è all’ascolto continua EQ Equalizzatore.
Diversamente digitare il numero da chiamare diretta- a sentire. Disinserita la retromarcia si riattiva e potete
mente sul tastierino presente sullo schermo. continuare la conversazione. BLUETOOTH MUSIC PLAY
If the connected phone supports the A2DP-Profile,
STARTING A PHONE-CALL you can listen to music.
ANSWERING A PHONE-CALL If the device supports AVRCP, the musical tracks can
• Select Bluetooth from the Main Menu. When phone-call arrives, screen switches to Blue-
• Press one of the icons available on the screen, to be handled on the touch-screen directly.
tooth-mode and visualizes the caller’s phone-number / Previous/next Track.
choose requested Phone-List. and name, if phone-list has previously been synchro-
Calls lost Calls answered Start/interrupt reproduction.
nized. EQ Equalizer.
Calls started Phone-Book Press to answer or reject the Call.
(Previously synchronized) ATTENTION
Phone-calls from number-keys. When the rear-camera is activated, during a phone-call,
Press icon to start a phone-call. the sound turns off, but the person listening to you,
As an alternative, digit phone-number directly on the keeps hearing. Once the reverse gear has been disen-
number-keys available on the screen. gaged, the sound turns on again and you can keep your
phone-call.
16NAVIGAZIONE - INGRESSI AV - RETROCAMERA • NAVIGATION - AV INPUTS - REAR-CAMERA IT/EN
NAVIGAZIONE INGRESSI AV IN RETROCAMERA
Codice mappe: EUROPA NV980 - ITALIA NV970 E’ possibile visualizzare la riproduzione di due sor- E’ possibile collegare una retrocamera all’ingresso
Il VM069 è compatibile con la navigazione iGo 8 e genti esterne collegate agli ingressi AV IN 1 (frontale) specifico CAMERA (posteriore).
iGo Primo. e AV 2 (posteriore). Il VM069 visualizza automaticamente l’immagine del-
Inserire la SD card nello slot GPS. Premere l’icona corrispondente sul menù principale la telecamera collegandosi con la luce di retromarcia
Avviare il programma di navigazione tramite l’icona per scegliere la sorgente AV IN 1 o AV IN 2. (Vedi collegamenti pag. 3-4).
(Navigation) presente nel menù principale. Per visualizzare in qualunque momento l’immagine
Seguire il manuale d’uso della navigazione iGo della telecamera premere l’icona “CAMERA” nel menù
incluso nella sd card. INPUTS for AV IN principale.
You can reproduce from two external sources connect-
NAVIGATION ed to the Inputs AV IN 1 (front) and AV 2 (rear). REAR-CAMERA
Suitable Maps: EUROPE NV980 - ITALY NV970 From the Main Menu, choose between source AV IN 1 You can connect a rear-camera on the specific CAM-
VM069 is compatible with navigation-types iGo 8 and and AV IN 2, and press related icon. ERA-input (on the back). The VM069 offers the possi-
iGo Primo. bility of automatically visualizing the rear-camera, if
Introduce SD-card into the GPS-port. you connect the camera to the reverse-gear-lights (See
Start navigation-program by using the Navigation-icon connection-schemes page 3-4); in such case, the screen
available on the Main Menu. will show the rear-camera-pictures each time you put
Now follow the iGo-Navigations-Manual supplied with the reverse-gear.
the SD-card. The Rear-Camera can be visualized promptly, at any
time, by pressing the CAMERA-icon from the Main
Menu.
17CONNESSIONI E SINCRONIZZAZIONE INTERFACCIA COMANDI AL VOLANTE CAN-BUS IT/EN
IT/EN
CONNECTING AND SYNCHRONIZING THE CAN-BUS INTERFACE FOR STEERING-WHEEL COMMANDS
MARRONE-NERO/BROWN-BLACK KEY GND NERO/BLACK
VERDE/GREEN
4/070 - 4/073
ROSA/PINK
ARANCIONE-BIANCO / ORANGE-WHITE KEY A VIOLA/PURPLE
BIANCO-MARRONE / WHITE-BROWN KEY B MARRONE/BROWN
SINCRONIZZAZIONE LINEA CAN-BUS Effettuare i collegamenti con le interfacce 04070 o 04073. Alimentando l’interfaccia il led lampeggerà con colore rosso, un programma ad
auto apprendimento eseguirà in automatico la sincronizzazione e la selezione del corretto protocollo CAN-BUS per comandi al volante e servizi.
MEMORIZZAZIONE PROFILO AUTORADIO A sincronizzazione avvenuta, il led lampeggerà con colore verde e continuerà a lampeggiare fino a quando non si selezionerà il pro-
filo autoradio Phonocar VM041.
La selezione avverrà premendo 6 volte il tasto Volume+ ed il Led eseguirà 7 lampeggi verdi. Premere SEEK per memorizzare.
PROGRAMMAZIONE AUTORADIO Vedi pag. 22
RESET INTERFACCIA Senza togliere il circuito dall’alimentazione, premere il tasto PRG fino a quando led verde non si spegne. Il led lampeggerà di color Rosso per pochi secondi,
poi diventerà colore verde in attesa della selezione del nuovo modello di radio.
SYNCHRONIZING THE CAN-BUS-LINE Effect connections with Interfaces 04070 or 04073. When Interface receives current-supply, LED will flash Red and a self-learning program
will automatically start synchronizing the Steering-wheel and Services commands with the related correct CAN-BUS-protocol.
MEMORIZING CAR-RADIO PROFILE When synchronization has taken place, Led will flash Green. It will continue flashing until you select the radio-profile
Phonocar VM041.
Selection takes place by pressing 6times the key Volume+. Led will flash 7times Green. Press SEEK to memorize.
PROGRAMMING the CAR-RADIO page 22
RESET INTERFACE Without separating the circuit from the current-supply, press PRG-key until the Green Led switches-off. LED will then flash for some seconds Red, then turn
Green, until you select the model of the new car-radio.
Le istruzioni delle interfacce sono presenti anche sul nostro sito WWW.PHONOCAR.IT area manuali.
The Instructions-Manuals of our Interfaces are also available on our web-site WWW.PHONOCAR.IT Download-Manuals-Area.
18CONNESSIONI E SINCRONIZZAZIONE INTERFACCIA COMANDI AL VOLANTE PROTOCOLLO RESISTIVO IT/EN
IT/EN
CONNECTING AND SYNCHRONIZING THE RESISTIVE INTERFACE FOR STEERING-WHEEL COMMANDS
MARRONE-NERO/BROWN-BLACK KEY GND VERDE / GREEN
VERDE/GREEN
4/083 - 4/085
ROSA/PINK
ARANCIONE-BIANCO / ORANGE-WHITE KEY A ROSA / PINK
BIANCO-MARRONE / WHITE-BROWN KEY B GRIGIO / GREY
Il VM069 è dotato di Comandi al Volante Resistivi. In caso di incompatibilità, utilizzare le interfacce 04083 - 04085. Per i collegamenti ai connettori originali dell’auto seguire gli
schemi presenti sul manuale connessioni interfacce.
MEMORIZZAZONE DEI TASTI SUL VOLANTE Effettuare i collegamenti. Memorizzare le funzioni dei comandi al volante seguendo il manuale delle interfacce.
MEMORIZZAZIONE PROFILO AUTORADIO A sincronizzazione avvenuta, il led lampeggerà con colore verde e continuerà a lampeggiare fino a quando non si selezionerà il pro-
filo autoradio Phonocar VM041. La selezione avverrà premendo 4 volte il tasto Volume+ ed il Led eseguirà 5 lampeggi verdi.
Premere SEEK per memorizzare.
PROGRAMMAZIONE AUTORADIO Vedi pag. 22
RESET INTERFACCIA Staccare il connettore dalla centralina e tenendo premuto il tasto PRG, reinserire il connettore. Il LED della centralina inizierà a lampeggiare lentamente poi
velocemente a questo punto togliere la pressione dal tasto PRG. L’avvenuto RESET sarà confermato con un solo lampeggio di colore rosso del LED.
The VM069 is fitted with Resistive Steering-wheel Commands. In case of incompatibility, use interfaces 04083 - 04085. To connect to the Original car-connecters, stick to the
schemes shown on the Interface Connections-Manual.
MEMORIZING THE STEERING-WHEEL KEYS Effect the connections. Memorize the steering-wheel functions as stated on the Interface-Manual.
MEMORIZING THE CAR-RADIO PROFILE When synchronization has taken place, Led will flash Green. It will continue flashing until you select the radio-profile Phonocar VM041.
Selection takes place by pressing 4times the key Volume+. Led will flash 5times Green. Press SEEK to memorize.
PROGRAMMING THE CAR-RADIO page 22
RESET INTERFACE Separate the connector from the central-unit. Keep PRG-key pressed and re-introduce the connector. LED of central-unit will start flashing slowly and then
rapidly. At this point, lift finger from the PRG-key. RESET has successfully been carried out when LED flashes only one time Red.
19PROGRAMMAZIONE COMANDI AL VOLANTE SULL’AUTORADIO IT/EN
IT/EN
PROGRAMMING STEERING-WHEEL COMMANDS ON THE CAR-RADIO
La programmazione è uguale sia per i comandi Premere ognuno dei tasti KEY ed abbinare la funzio- Sullo schermo verrà richiesto di premere il comando
RESISTIVI, con o senza inerfaccia, che con i comandi ne desiderata. sul volante corrispondente alla funzione del tasto
CAN-BUS. Ad esempio premere KEY1 e successivamente KEY1 precedentemente abbinato (KEY1 VOLUME+).
Premere l’icona SWC nel menù principale, dove ver- Volume+. Premere il comando richiesto (VOLUME+) sul volan-
ranno visualizzati 6 tasti KEY a cui dovranno essere Sullo schermo verrà visualizzato il tasto KEY con a te. Sullo schermo verrà richiesto di premere il tasto
abbinate le sei funzioni che si vogliono gestire dai fianco la funzione scelta. KEY2 e così via per tutti gli altri tasti da program-
comandi al volante della vettura. Effettuare questa operazione per tutti i com mare. Al termine di tutti i comandi il VM069 tornerà
andi presenti sul volante e infine premere l’icona nella schermata iniziale. In caso di errore premere
Programming-procedure is always the same, no matter PAIR. l’icona RESET per azzerrare l’apprendimento dei
if RESISTIVE commands (with or without Interface) or comandi e ripartire con la programmazione.
CAN-BUS. Press each of those KEYS and attribute the various KEYS
Press SWC-icon from the Main Menu. 6 KEYS will now to the requested functions.
appear to be combined with the 6 functions you wish Exemple: press KEY1 and then Volume+. On the screen, you will be invited to press the key, on
to pilot from the steering-wheel of your car. The screen will show: KEY, with related type of function. the steering-wheel, combined with KEY1 (KEY1 VOL-
Repeat this procure for every single steering-wheel UME+). Consequently, press VOLUME+ on the steer-
command and, to finish, press PAIR.-icon. ing-wheel.
On the screen, you will be invited to press KEY2 and all
further keys to be programmed. When all commands
have been programmed, the VM069 will return to
the entry-page. In case of mistakes, press RESET-icon:
this will cancel the memorized data and you can start
programming from the beginning.
20CONNEXIONS • ANSCHLÜSSE FR/D
RST
ENTRÉE ANTÉRIEURE A / V
EINGANG FRONT A/V
FUSE AUX IN 1 R
RETROCAMERA / REAR-CAMERA
AUX IN 1 L
AUX IN VIDEO
USB
ANTENNA AM-FM
MICROFONO / MICROPHONE
ANTENNA GPS
1 GPS AERIAL 2
DIGITALER
EMPFÄNGER
DAB BUS ENTRÉE RÉCEPTEUR NUMÉRIQUE COD. VM222 SORTIE
1 SORTIES PRE – AMPLIFIEES
JAUNE/GELB
ROUGE/ROT
VIDEO OUT VIDEO / VIDEO-AUSGANG
DROIT / RECHTS
PRE-AMP-AUSGÄNGE AV IN
BLANCHE/WEISS GAUCHE / LINKS ENTRÉES AV
JAUNE/GELB
AV IN EINGANG AV
ENTRÉES VIDÉO / EINGANG VIDEO
BLUE/BLAU
AV IN
SUB WOOFER SORTIE SUB WOOFER / AUSGANG SUB-WOOFER
ROUGE/ROT
FRONT R ANTÉRIEURE DROITE / FRONT RECHTS
BLANCHE/WEISS
FRONT L ANTÉRIEURE GAUCHE / FRONT LINKS
ROUGE/ROT
REAR R POSTÉRIEURE DROITE / HECK RECHTS
BLANCHE/WEISS
REAR L POSTÉRIEURE GAUCHE / HECK LINKS
21CONNEXIONS • ANSCHLÜSSE FR/D
2
CONNEXIONS ET PROGRAMMATION VOIR PAG. 36-37
ANSCHLÜSSE UND PROGRAMMIERUNG SEITE 36-37
ORANGE-BLANC/ORANGE-WEISS
KEY A Ligne A Commandes au volant A-Leitung der Lenkrad-Steuerungen
MARRON-BLANC/BRAUN-WEISS
KEY B Ligne B Commandes au volant B-Leitung der Lenkrad-Steuerungen
MARRON-NOIR/BRAUN-SCHWARZ
KEY GND Masse Commandes au volant Masse für die Lenkrad-Steuerungen
VERT/GRÜN
BRAKE Frein de stationnement (branchement obligatoire) Handbremse (Anschluss unbedingt erforderlich)
ROSE/ROSA
REVERSE Activation caméra de recul Aktivierung der Rückfahr-Kamera
SORTIES HAUTS-PARLEURS GRIS/GRAU
FRONT R +
LAUTSPRECHER-AUSGÄNGE GRIS-NOIR/GRAU-SCHWARZ ANTÉRIEURE DROIT / FRONT RECHTS
FRONT R -
BLANCHE/WEISS
FRONT L + ANTÉRIEURE GAUCHE / FRONT LINKS
BLANCHE-NOIR/WEISS-SCHWARZ
MARRON
BRAUN
FRONT L -
POURPRE/LILA
REAR R + POSTÉRIEURE DROIT / HECK RECHTS
POURPRE-NOIR/LILA-SCHWARZ
REAR R -
VERT/GRÜN
REAR L + POSTÉRIEURE GAUCHE / HECK LINKS
VERT-NOIR/GRÜN-SCHWARZ
REAR L -
ALIMENTATION
STROM-ZUFUHR JAUNE/GELB
BATT + 12V Positif batterie +12V Batterie-Plus
ROUGE/ROT + 12V Après contact +12V Zündplus
ACC
NOIR NOIR/SCHWARZ
SCHWARZ GND Masse Masse
MARRON/BRAUN Illumination / Dimmer Beleuchtung / Dimmer
ILLUMI
BLUE/BLAU
AMP/ANT Remote Allumage antenne électrique Aktivierung der Elektro-Antenne
Sur certaines voitures, pendant l’allumage, le VM069 peut s’éteindre avant de se rallumer. Pour éviter cet inconvénient, brancher le temporisateur d’allumage 5/146.
Auf einigen Wagen-Modellen kann es vorkommen, dass beim Anlassen des Motors, der VM069 sich von selbst ausschaltet und dann wieder einschaltet. Diesen Umstand kann
man verhindern, indem man den Zeitgeber 5/146 anschließt.
22FONCTIONS • FUNKTIONEN FR/D
2 1
3
4
5
6
7
8
9
10
1 Slot Carte SD pour navigation 1. Öffnung für Navigations-SD
2 Senseur IR 2. IR-Sensor
3 Navigation 3. Navigation
4 Menu principal 4. Hauptmenü
5 Allumage/Extinction - Volume - Audio mis à zéro 5. Ein-/Ausschalten – Lautstärke – Stummschaltung
6 Luminosité écran 6. Bildschirm-Helligkeit
7 Reset 7. Reset
8 Slot Carte SD multimédia 8. Öffnung für Multimedia-SD
9 Port USB 9. USB-Öffnung
10 A/V AUX-IN 10. A/V AUX-IN
23MENÙ • MENÜ FR/D
Retourne au Menu suivant. Retourne au Menu pricipale.
À l’allumage de l’autoradio, le MENU principal apparaît.
Zurück zum folgende Menü Zurück zum vorhergehenden Menü
Avec les icônes sur l’écran on sélectionne la source ou la fonction désirée.
Va au Menu suivant
Beim Einschalten des Geräts erscheint das Haupt-MENÜ.
Mit den Ikonen auf dem Bildschirm wählt man die gewünschte Quelle und
Funktionen.
Zum nächsten Menü übergehen
Retourne au Menu précédent. Retourne au Menu pricipale.
Zurück zum früher Menü Zurück zum vorhergehenden Menü
24REGLAGES DE SYSTEME • SYSTEM-EINSTELLUNGEN FR/D
Appuyer l’icône Setup sur le panneau du menu principal pour modifier les réglages suivants: généraux, vidéo, son, Date et Heure, Langue, Bluetooth, DVD,
volume sources. / Auf dem Hauptmenü, die Ikone Setup wählen, um folgende Einstellungen zu ändern: Allgemein, Video, Klang, Datum und Uhrzeit, Spra-
che, Bluetooth, DVD, Quellen-Lautstärke.
ALLGEMEINE EINSTELLUNGEN
• REGION Wahl der Zugehörigkeits-Zone
• RADIO RANGE Wahl nationaler Sender
• BLACKOUT autom. Abschalten aktivieren,
nach 10/20 Sekunden Stillstand.
• DIMMER Bildschirm-Helligkeit regeln
• BEEP Tasten-Ton aktivieren/deaktivieren
• HINTERGRUND – Hintergrund ändern
• TASTATUR FARBEN – Farbe ändern
• CALIBRAZIONE Die Kalibrierung erfolgt durch
Antippen des Bildschirms nach vorgegebener VIDEO
Sequenz.
• STATIONNEMENT Active/Désactive la vision en mou-
vement des films ou vidéos.
ATTENTION: dans certains pays, il est sévèrement inter-
dit d’activer cette fonction, la vision doit être subordon-
REGLAGES GENERAUX
née au frein à main.
• REGION Sélectionne la zone d’appartenance.
• RADIO RANGE Sélectionne les stations nationaux. VIDEO
• BLACKOUT Active l’extinction automatique de • PARKEN Aktivierung/Deaktivierung der Filme-
l’écran après 10/20 secondes d’inactivité. Besichtigung während der Fahrt.
• DIMMER Règle la luminosité de l’écran. WICHTG: In bestimmten Ländern ist die Aktivierung
• BEEP Active/Désactive le son des touches der Freischalt-Funktion STRENG
• FOND - Changer de fond VERBOTEN. In diesem Fall, dafür sorgen, dass die
• COULEUR TOUCHES – Changer de couleur Filme-Besichtigung nur bei angezogener Handbrem-
• CALIBRAGE Le calibrage se fait en touchant se möglich ist.
l’écran selon la séquence indiquée.
25REGLAGES DE SYSTEME • SYSTEM-EINSTELLUNGEN FR/D
SON REGLAGE DATE ET HEURE REGLAGES LANGUE
• SUBWOOFER Active/Désactive la sortie pre subwoo- • Se placer sur le paramètre à modifier et faire les • OSD Change la langue des menus de système.
fer. changements.
• FILTRE Change coupure crossover subwoofer
80/120/160 Hz.
EINSTELLUNG VON DATUM / UHRZEIT SPRACHE EINSTELLEN
• Auf die gewünschte Position gehen und die notwendi- • OSD Sprache der System-Menüs einstellen.
KLANG gen Daten abändern.
• SUBWOOFER Aktivierung/Deaktivierung des
Subwoofer-Vorverstärker-Ausgangs
• FILTRO Trennfrequenz des Subwoofer-Filters
einstellen
80/120/160 Hz.
26REGLAGES DE SYSTEME • SYSTEM-EINSTELLUNGEN FR/D
REGLAGES BLUETOOTH RESET REGLAGES VOLUME
• BLUETOOTH Active/Désactive la fonction bluetooth. Reset Retour aux paramètres d’usine On peut régler le volume de chaque source afin
• AUTO CONNEXION Active/Désactive la connexion d’éviter des écarts d’intensité durant le passage
automatique du téléphone au VM069. d’une source à une autre.
RESET
• AUTO REPONSE Active/Désactive la réponse automa-
Reset Werkseinstellungen
tique d’un appel après le troisième bip
• ACC Règle le code de paramétrage à taper sur le LAUTSTÄRKE-REGELUNG
téléphone (code d’origine 0000). Die Lautstärke läßt sich für jede einzelne Quelle
spezifisch einstellen. Abrupte Niveau-Unterschiede
werden dadurch vermieden. Betreffende Quelle
wählen und gewünschte Lautstärke einstellen.
BLUETOOTH-EINSTELLUNGEN
• BLUETOOTH Bluetooth-Funktion
aktivieren/deaktivieren.
• AUTO CONNESSIONE Verbindungs-Automatik
Telefon/VM069 aktivieren/deaktivieren.
• AUTO RISPOSTA autom. Anruf-Beantwortung
nach 3 mal Klingeln, aktivieren/deaktivieren.
• ACC Koppelungs-Codenummer fürs Mobil-Tele
fon festlegen (Fabrik-Code-Nr: 0000).
27RADIO FR/D
FONCTIONS RADIO FONCTIONS RADIO
Retourne au menu principal. Réassemble le menu.
FM/AM Bande. Pour retourner au premier menu.
•••• Passe à d’autres fonctions. •RDS Active/Désactive la fonction RDS.
Recherche automatique stations/ Revient.
Change bande radio AM/FM. •AF Recherche station alternative.
Numérisation automatique principales stations de radio. •EON Active la radio à l’utilisation complète des informations RDS.
Programme la fréquence radio manuelle. •TA Active/Désactive les informations sur la circulation.
Egaliseur. • CT Ne pas activer.
Recherche automatique stations / Avance. PTY Montre la liste des programmes RDS.
AF Recherche station alternative.
Vol. 10 Régule le volume du TA
TA Annonces informations sur la circulation.
RADIO-FUNKTIONEN RADIO-FUNKTIONEN
Zurück zum Hauptmenü. Menü kompaktieren.
FM/AM Frequenz-Band. Zurück zum 1. Menü.
•••• Weitere Funktionen. • RDS Aktivierung/Deaktivierung der RDS-Funktion
Autom. Sender-Suche / Rückwärts.
Frequenz-Band wählen AM/FM. • AF Suche Alternativ-Sender
Scannen und automatische Speicherung • EON Das Radio verwertet komplett alle RDS-Infos.
Hauptradiostationen . • TA Aktivierung/Deaktivierung der Verkehrs-Informationen.
Radio-Frequenz manuell einstellen. • CT Nicht aktivieren.
Equalizer. • PTY Liste der RDS-Programme ausweisen.
Autom. Sender-Suche / Vorwärts.
Vol. 10 Reguliert die Lautstärke der TA
AF Suche Alternativ-Sender - TA Verkehrs-Ansagen.
28EGALISEUR • EQUALIZER REPRODUCTION • WIEDERGABE FR/D
EGALISEUR - LOUDNESS FADER - EQUILIBRAGE - SUB WOOFER FONCTIONS USB/SD CARD
• Appuyer l’icône pour modifier les réglages • Appuyer pour accéder aux réglages. Lorsqu’un support USB/SD est inséré, le contenu est
d’origine. A travers les icônes, on peut sélectionner 8 Utiliser les flèches que vous trouvez sur l’écran pour les visible sur l’écran.
modalités différentes d’équilibrage préréglées: USER- réglages du FADER, de l’ÉQUILIBRAGE et du SUB W. Si le support contient des chansons, la reproduction est
FLAT-POP-ROCK-CLASSIC JAZZ-TECHNO-OPTIMAL. automatique.
L’icône reporte sur OPTIMAL Sélectionner le type de fichier à reproduire à travers
• LOUD Active/Désactive l’exaltation des basses fré- FADER - BALANCE – SUB WOOFER l’icône correspondante.
quences.
• Drücken, um die Funktionen zu betreten. MUSIQUE VIDEO
Pfeiltasten auf dem Bildschirm verwenden, um
FADER, BALANCE und SUBWOOFER einzustellen. IMAGES TOUS LES FICHIERS
EQUALIZER - LOUDNESS
• Auf die Ikone drücken, um die Fabrik-Einstel-
lungen abzuändern. Anhand der Ikonen lassen sich USB/SD-FUNKTIONEN
8 verschiedene Equalizer-Modalitäten wählen: USER- Bei Eingeben einer USB-SD, wird der jeweilige Inhalt
FLAT-POP-ROCK-CLASSIC-JAZZ-TECHNO-OPTIMAL. auf dem Bildschirm ausgewiesen.
Die Ikone führt zurück zum OPTIMAL. Liegen Musikstücke vor, dann startet die Wiederga-
• LOUD Tief-Frequenzen-Unterstreichung aktivieren/ be ganz automatisch.
deaktivieren. Auf die entsprechende Ikone gehen, um die ge-
wünschte Datei abzuspielen.
MUSIK VIDEO
BILDER ALLE DATEIEN
29REPRODUCTION • WIEDERGABE USB-SD CARD FR/D
REPRODUCTION MUSIQUE REPRODUCTION MUSIQUE REPRODUCTION VIDEO
•••• Menu Entier Réassemble le menu. Touchez l’écran pour afficher le menu lorsque le video
LIST Retourne à la liste des fichiers. SHUFFLE Reproduction casuelle. est en cours de lecture.
Lance/Interrompt la reproduction. REPEAT Répète trace/dossier/disque. •••• Pour passer au second menu.
Trace suivante/précédente. EQ Egaliseur. EQ Egaliseur.
GOTO Insère le numéro de la trace à reproduire. Pour video précédent ou successif.
MUSIK-WIEDERGABE Pour lancer ou interrompre la reproduction.
•••• Menü-Ausweitung MUSIK-WIEDERGABE GOTO Insère le numéro de la trace
LIST Zurück zur Dateien-Liste. Menü kompaktieren. à reproduire.
Wiedergabe starten / unterbrechen. SHUFFLE Wahllose Wiedergabe.
Stück danach / davor. REPEAT Wiederhole Stück/Ordner VIDEO-WIEDERGABE
EQ Equalizer Bildschirm antasten, wenn man, während der Film-
GOTO Stück-Nummer zur Wiedergabe angeben. Wiedergabe, das Menü einblenden will.
•••• Sprung zum 2. Menü.
EQ Equalizer
Stück/Kapitel davor/danach
Wiedergabe starten / stoppen
GOTO Stück-Nummer zur Wiedergabe
angeben.
30REPRODUCTION • WIEDERGABE USB-SD CARD FR/D
RIPRODUZIONE VIDEO REPRODUCTION DES IMAGES REPRODUCTION DES IMAGES
Réassemble le menu. Sélectionner le fichier désiré pour visualiser l’image. Réassemble le menu.
LIST Retourne à la liste des fichiers. Pour faire apparaître le menu, appuyer la partie infé- LIST Retourne à la liste des fichiers.
Répétition video rieure de l’écran. Pour agrandir/réduire l’image.
PIC Modifie les réglages de l’écran. •••• Pour passer au second menu. Pour tourner l’image.
EQ Egaliseur. PIC PIC Modifie les réglages de l’écran.
VIDEO-WIEDERGABE
/ Pour image précédent ou successif.
Menü kompaktieren. BILD-WIEDERGABE
Pour lancer ou interrompre la reproduction.
LIST Zurück zur Dateien-Liste. Zurück zum 1. Menü.
GOTO Pour insérer le numéro de la trace à
REPEAT Wiederhole Stück/Ordner LIST Zurück zur Dateien-Liste.
reproduire.
PICBildschirm-Einstellungen ändern. Bild-Vergrößerung/ Verkleinern.
BILD-WIEDERGABE Bild drehen.
Bild erscheint, nachdem die gewünschte Datei ge- PIC PICBildschirm-Einstellungen ändern.
wählt wurde. Den unteren Bildschirm-Rand antasten,
um das Menü erscheinen zu lassen.
•••• Sprung zum 2. Menü.
EQ Equalizer
Stück/Kapitel davor/danach.
Wiedergabe starten / stoppen.
GOTO Bild zur Wiedergabe wählen.
31SMARTPHONES LINK FR/D
SMARTPHONE LINK SMARTPHONE LINK
Cette fonction permet de voir sur l’écran du VM069 les Mit dieser Funktion können Sie ein Android/iOS-Smar-
smartphones Android ou iOS tphone auf dem Bildschirm des VM069 anzeigen.
Avant les branchements, vérifier la compatibilité du Sie müssen die Kompatibilität Ihres Telefons überp-
portable ; certaines fonctions sont disponibles en rüfen, bevor Sie Verbindungen herstellen. Einige Fun-
fonction de la version Android / iOS. ktionen sind je nach Android/iOS-Version verfügbar.
Sélectionner le système d’exploitation du portable. Wählen Sie das Betriebssystem Ihres Telefons aus.
ANDROID Fonction SMARTPHONELINK ANDROID SMARTPHONELINK Funktion
NO • Activer « Options développeur »* en cliquant sur • Aktivieren Sie “ENTWICKLUNGSOPTIONEN “*”.
l’option USB DEBUG dans le menu du portable durch Aktivieren der Option USB DEBUG in dem
• Brancher le câble USB original du portable au port Menü des Telefons
USB antérieur du VM069 et sélectionner • Schließen Sie das Original-USB-Kabel Ihres
« transférer le fichier » Telefons an den vorderen USB-Anschluss des
*Pour plus d’informations, voir la notice d’utilisation VM069 an durch Auswahl von der Option “Datei
de votre portable. übertragen”.
L’audio doit être activé en paramétrant le portable *Weitere Informationen finden Sie in der Bedienung-
via bluetooth avec le VM069 (voir page 33) sanleitung Ihres Telefons.
Sie müssen Audio aktivieren, indem Sie Ihr Telefon
NB: Le dédoublement de l’écran n’est pas compatible über Bluetooth mit dem VM069 verbinden (siehe
avec les applications de streaming on Demand y Seite 33).
compris NETFLIX.
WICHTIGER HINWEIS
Le partage des applications pour réseau sociaux est Die Bildschirmduplikation unterstützt nicht alle
compatible: TWITTER-FACEBOOK-INSTAGRAM On-Demand-Streaming-Anwendungen, einschließlich
WHATSAPPYOUTUBE et les principales applications NETFLIX.
pour la navigation comme GOOGLE MAPS-WAZE.
Die gemeinsame Nutzung aller sozialen Anwendun-
gen wird unterstützt:
TWITTER-FACEBOOK-INSTAGRAM-WHATSAPP
YOUTUBE und die wichtigsten Navigationsanwendun-
gen wie GOOGLE MAPS-WAZE.
32REGLAGES BLUETOOTH • BLUETOOTH-EINSTELLUNGEN FR/D
MOBIL-TELEFON KOPPELUNG
Möglichkeit, bis max. 5 Mobil-Telefone zu koppeln.
Suche mittels Telefon:
• Auf dem Mobil-Telefon, Bluetooth-Funktion aktivie-
ren. Dann neue Vorrichtungen suchen.
• Aus der betreffenden Liste, die Vorrichtung VM069
wählen. Auf Anfrage, das Passwort 0000 eingeben.
Sobald die Koppelung erfolgt ist, erscheint der
Name des Mobil-Telefons. Innerhalb der Bluetooth-
Einstellungen des Mobil-Telefons, die automatische
PARAMETRAGE TELEPHONE Verbindung des VM069 aktivieren.. SYNCHRONISATION DU REPERTOIRE
Il est possible paramétrer jusqu’à 5 téléphones. Suche mittels VM069: Appuyer pour accéder aux réglages.
Recherche à partir du téléphone: Auf die Ikone drücken, anzukoppendes Mobil-Tele- Sélectionner SINC.
• Activer la fonction bluetooth sur le téléphone et fon suchen und bestätigen. Le répertoire du téléphone sera automatiquement
rechercher les nouveaux dispositifs. PIN 0000 auf dem Mobil-Telefon eingeben. téléchargé dans la mémoire de l’autoradio. Le temps
• Sélectionner VM069 dans la liste des dispositifs, Sobald die Koppelung erfolgt ist, erscheint der de l’opération vari en fonction du nombre des
Insérer le mot de passe 0000 quand demandé. Name des Mobil-Telefons. Auf dem Mobil-Telefon, in contacts.
Lorsque le paramétrage est fait, le nom du téléphone die Bluetooth-Einstellungen gehen und die autom.
apparaît. Activer dans les réglages bluetooth du télé- Verbindung zum VM069 aktivieren.
ÜBERNAHME DES TELEFON-REGISTERS
phone la connexion automatique du dispositif VM069. Taste drücken, um zu den Einstellungen zu
Recherche à partir du VM069: gelangen. SINC (Telefon-Register) wählen.
Appuyer l’icône et sélectionner le téléphone à paramé- Das Telefon-Register wird somit automatisch in das
trer une fois que la recherche est terminée. Autoradio eingespeichert. Die dazu in Anspruch
Taper le code PIN 0000 sur le téléphone. genommene Zeit richtet sich nach der Anzahl der
Une fois que le paramétrage est fait, le nom du télé- vorhandenen Telefon-Nummern.
phone apparaît. Activer dans les réglages bluetooth
du téléphone la connexion automatique du dispositif
VM069.
33REGLAGES BLUETOOTH • BLUETOOTH-EINSTELLUNGEN FR/D
EFFECTUER UN APPEL RECEVOIR UN APPEL REPRODUCTION MUSIQUE BLUETOOTH
• Sélectionner Bluetooth à partir du menu principal. A l’entrée d’un appel, l’écran va en modalité bluetooth Si le téléphone branché supporte le profil AD2P, c’est
• appuyer une des icônes présentes sur l’écran pour en visualisant le numéro de celui qui appelle, et le nom possible écouter les morceaux.
appeler à partir d’une des listes. si le répertoire est synchronisé. Si le dispositif supporte AVRCP, les morceaux pour-
Appels perdus appels reçus Appuyer pour répondre ou pour refuser l’appel. ront être contrôlés directement à partir de l’écran
Appels émis répertoire téléphonique (il doit ATTENTION À l’activation de la caméra de recul, durant tactile.
être précédemment synchronisé). un appel, le son est désactivé, mais la personne de l’au- / Chanson précédente / suivante.
Appel à partir du clavier numérique. tre côté continue à vous écouter. Une fois désengagée Lance / interrompe la reproduction.
Appuyer l’icône pour lancer l’appel. la marche arrière, le son est réactivé et vous pouvez EQ Equalizer
Autrement, taper le numéro à appeler directement sur continuer votre conversation
le clavier numérique que vous trouvez sur l’écran. BLUETOOTH-MUSIK-WIEDERGABE
Soweit das gekoppelte Telefon AD2P-kompatibel ist,
ANRUF STARTEN ANRUF BEANTWORTEN läßt sich dadurch Musik hören.
• Aus dem Haupt.Menü, Buetooth wählen. Sobald ein Anruf ansteht, schaltet der Bildschirm auf Wenn es AVRCP-kompatibel ist, dann lassen sich die
• Die gewünschte Ikone auf dem Bildschirm ank- Bluetooth und zeigt die Rufnummer an, ggf. auch einzelnen Musikstücke direkt auf dem touch-Screen
licken, um aus der betreffenden Telefonliste eine den Namen, wenn das Telefon-Register synchroni- bedienen.
Nummer zu wählen. siert worden ist. Taste drücken, um den Anruf / Stück davor / danach.
Verpasste Anrufe Erhaltene Anrufe in Empfang zu nehmen. Oder um den Anruf Wiedergabe Starten / Stoppen.
Gestartete Anrufe Telefon-Liste zurückzuweisen. EQ Equalizer
(diese muss man vorher synchronisiert haben) VORSICHT Wenn die Rückfahrkamera wird aktiviert
Anruf starten, durch Nummern-Tasten. während eines Anrufs, der Ton des Anrufs wird deak-
Ikone drücken, um Anruf zu starten. tiviert. Der Zuhörer hört aber immer wieder.
Die Telefon-Nummer kann man auch direkt, mittels Einst der Rückwärtsgang wird eingesetzt, wird
Nummern-Tastatur, auf dem Bildschirm eingeben. der Ton wieder aktiviert und Sie können Ihr Tele-
fongespräch fortsetzen.
34Puoi anche leggere