GATEWAY GW2IP - Access Security Products
←
→
Trascrizione del contenuto della pagina
Se il tuo browser non visualizza correttamente la pagina, ti preghiamo di leggere il contenuto della pagina quaggiù
GATEWAY GW2IP

Guida rapida GW2IP

Indice

[ITALIANO]
1. Collegamento alla rete LAN                                             3
2. Il sito http://find.farfisa.com e la configurazione                    3
3. Il sito https://cloud.farfisa.com e l’account utente                   6
4. App per dispositivi mobili                                             7

[ENGLISH]
1. Connection to LAN network                                              9
2. http://find.farfisa.com web site                                       9
3. The https://cloud.farfisa.com web site and user’s account management   12
4. Mobile devices app                                                     13

ACI srl Farfisa Intercoms
www.farfisa.com
                                                   2
Guida rapida GW2IP

                                    Breve guida all'utilizzo delle
                            app web e smart phone per il Gateway GW2IP

                                                                                                        ITALIANO
Nota preliminare:
La presente guida illustra la configurazione del Gateway GW2IP e l’utilizzo attraverso le app web e
smart phone dedicate. Per il collegamento del dispositivo al proprio impianto video citofonico
DUO e la sua corretta alimentazione fare riferimento alla documentazione che accompagna il
prodotto.

1. Collegamento alla rete LAN:
La configurazione IP di default del Gateway, sia per la rete cablata che WiFi, è “DHCP”: in questo
modo il dispositivo acquisisce l'indirizzo IP automaticamente dal proprio router. Una volta che il
Gateway è connesso alla propria rete si collegherà automaticamente al server cloud Farfisa,
questo stato è evidenziato dal led rosso frontale che lampeggia una volta ogni 4 secondi.
2. Il sito http://find.farfisa.com e la configurazione
Una volta che il Gateway segnali il corretto collegamento alla rete utilizzare il sito
http://find.farfisa.com per visualizzare il (i) Gateway connessi alla propria rete. Il (i) Gateway
rilevati verranno elencati nella sezione “Elenco dispositivi” insieme al relativo numero di serie ed
all'indirizzo IP assegnato. Se il Gateway non è in grado di connettersi al cloud non verrà
visualizzato in questa pagina, in questo caso verificare il corretto collegamento alla rete Internet.

Fare click sul pulsante        per
eseguire una nuova ricerca.
Nella sezione “Guida” sono
disponibili alcune indicazioni
per connettere il proprio
Gateway via Wi-fi attraverso la
funzione WPS.
Al fine di ottenere una
maggiore       affidabilità    nel
collegamento si suggerisce di
privilegiare la connessione
tramite cavo Ethernet.
Se più Gateway sono disponibili
nella stessa rete LAN è possibile
fare     click    sul     pulsante
“Identifica”, il led rosso del
Gateway relativo rimarrà acceso per 30 secondi.

ACI srl Farfisa Intercoms
www.farfisa.com
                                                  3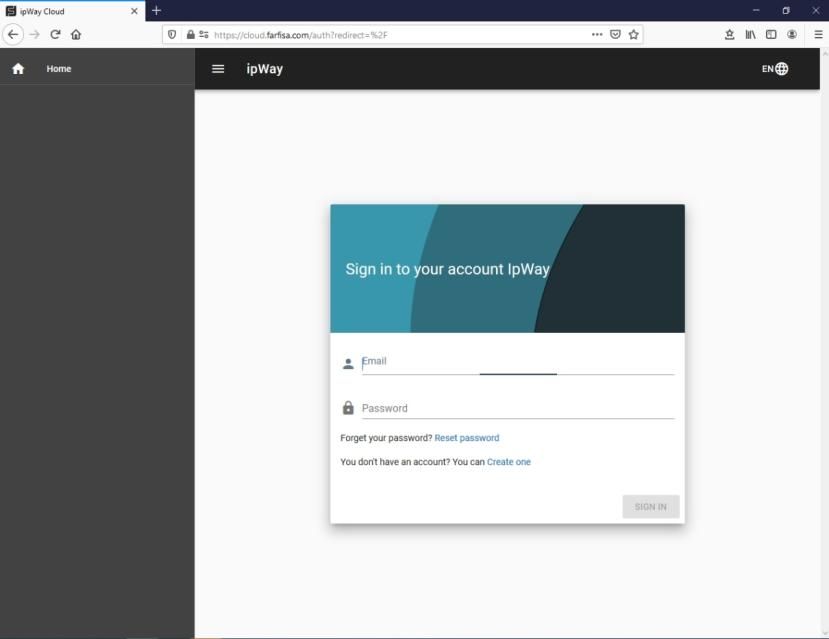
Guida rapida GW2IP
Fare click sul pulsante
“Connetti” per accedere alla
configurazione del Gateway.
I dati di accesso di default
sono:
nome utente: admin
password: 1234
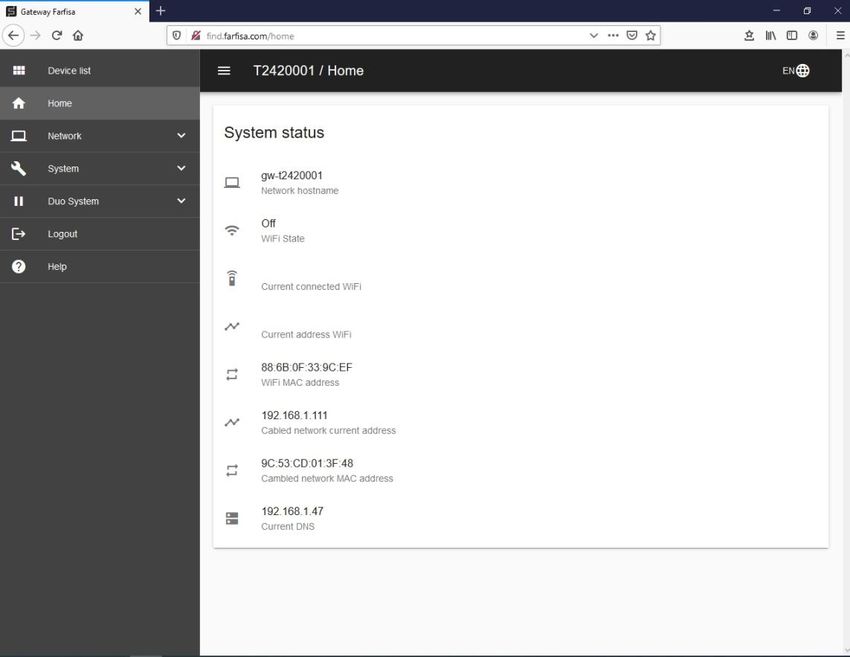
Il menu di configurazione sulla parte sinistra della pagina mette a disposizione varie sezioni:
Home. Visualizza lo
stato del sistema e
riassume la
configurazione dei
parametri principali del
dispositivo.
Network. Questa voce è
composta di due
sezioni:
o Cablata: relativa alla
configurazione dei
parametri di rete nel
caso di connessione via
cavo Ethernet RJ45. La
configurazione di
default è DHCP ma è
possibile cambiarla per
assegnare un indirizzo IP manualmente.
o Wireless: questa sezione è ulteriormente suddivisa in 2 parti:
- Wireless: per abilitare / disabilitare l'interfaccia wireless ed i relativi settaggi.
- WPS: per abilitare / disabilitare manualmente la funzione WPS che consente la
connessione automatica ad access point compatibili.
System. Anche questa voce è composta di due sezioni:
o Aggiorna: il Gateway effettuerà automaticamente una ricerca per eventuali aggiornamenti
disponibili e da qui sarà dunque possibile abilitarne il download e l'installazione automatici.
o Altre: attraverso questa sezione è possibile modificare la password di amministrazione del
dispositivo.
ACI srl Farfisa Intercoms
www.farfisa.com
4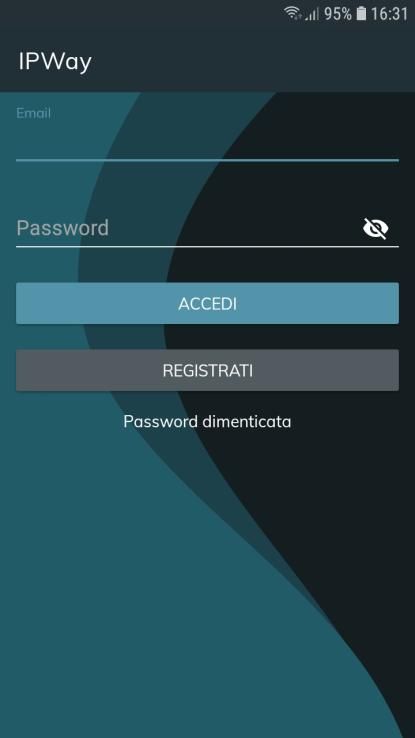
Guida rapida GW2IP
DUO system. Questa sezione consente di specificare la configurazione relativa ai dispositivi
presenti nell'impianto videocitofonico DUO:
o Unità abitative: qui è necessario specificare l'indirizzo DUO degli appartamenti degli utenti
che devono essere collegati al Gateway
- Fare click sul “+” in alto a destra per aggiungere una “Nuova unità abitativa”.
- Specificare un “Nome” e l’ “Indirizzo DUO” relativi a questo appartamento.
- Le voci “Posizione dell’unità abitativa” e “Note” sono opzionali.
- Fare click su “Aggiungi” per confermare.
- Una volta che un nuovo appartamento è stato creato fare click sull'icona busta
per inviate gli utenti: digitare l'indirizzo e-mail dell'utente che si vuole collegare a
questa unità abitativa e fare click su “Invita”.
- L'utente riceverà nel giro di pochi istanti un messaggio e-mail contenente un invito
a fare click sul link al sito web https://cloud.farfisa.com.
- Alla richiesta l'utente dovrà digitare i dettagli di accesso del proprio account, se
creato in precedenza, altrimenti sarà possibile fare click sul pulsante “Crea” per
crearne uno nuovo. Al primo accesso l'utente dovrà assegnare un nome personale
al Gateway (ad esempio: “Casa”, “Ufficio”, “Casa delle vacanze” e così via) per
poterlo identificare più facilmente. Fare riferimento alla sezione 3 per maggiori
dettagli sulla creazione dell'account utente.
- Se la richiesta di invito non viene confermata entro 24 ore sarà necessario inviare
nuovamente l’invito all’utente.
o Impianto: in questa sezione è necessario specificare l'indirizzo degli altri dispositivi DUO
presenti nell'impianto, in particolare:
- Posti esterni (sezione “Telecamere”): digitare qui l'indirizzo di almeno un posto
esterno connesso al sistema e da cui viene originata la chiamata o l’indirizzo(i) di un
modulatore video VM2521 a cui sono collegate telecamere di sorveglianza. Il nome
scelto qui comparirà anche nella schermata principale dell'app per poter accedere
alla visualizzazione del segnale video senza aver ricevuto la chiamata.
- Porte logiche di ingresso (sezione “Sensori”): introdurre qui l'indirizzo(i) di eventuali
porte di ingresso di attuatori 2281Q, se presenti e collegati ad opportuno sensore,
per la notifica dell’indicazione porta aperta / chiusa sull’app.
- Relè (sezione “Attuatori”): introdurre qui l'indirizzo di eventuali attuatori 2281Q o di
relè presenti sul posto esterno. In questo modo l’utente sarà in grado di attivare
remotamente, tramite app, i dispositivi controllati da questi attuatori.
o Impostazioni:
- “Indirizzo Gateway”: da valorizzare solo in caso di configurazioni di impianto
specifiche.
- “Have 12Vac power supply (Extra load)”: abilitare questa opzione nel caso in cui il
Gateway sia alimentato localmente (non attraverso il bus DUO) e collegato all’uscita
derivata di un distributore video DV242xQ .
o Logout: esce dalla configurazione.
ACI srl Farfisa Intercoms
www.farfisa.com
5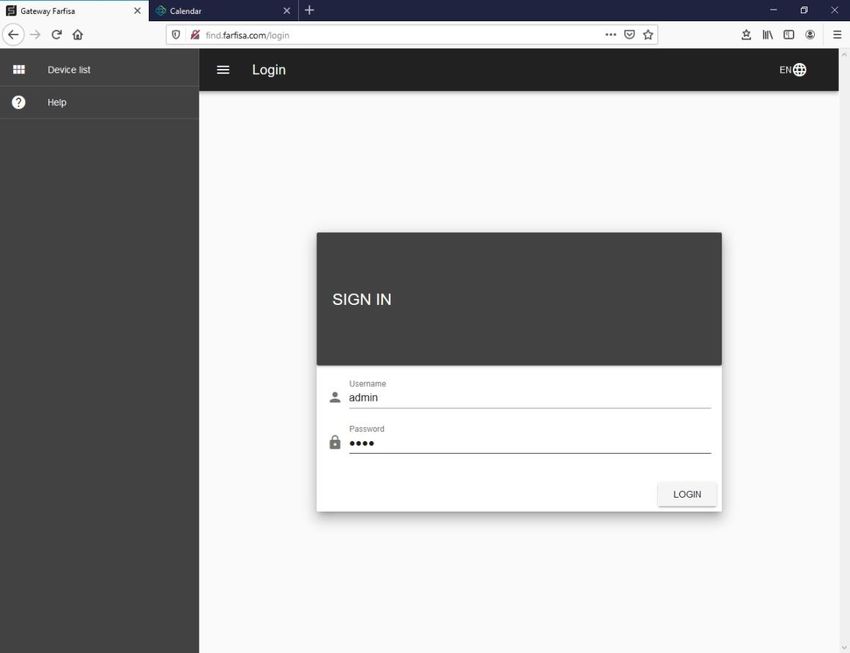
Guida rapida GW2IP

3. Il sito https://cloud.farfisa.com e l’account utente
Il sito web https://cloud.farfisa.com consente all'utente di gestire il proprio account, la propria
password, personalizzare alcune
funzioni del Gateway, oltre a
permettere di visualizzare il
segnale video proveniente dal
posto esterno e altre operazioni.
Ciascun utente che necessita il
collegamento al Gateway deve
disporre del proprio account.
E’ possibile creare un nuovo
account facendo click su “Creane
uno”, anche prima di aver ricevuto
l’invito all’utilizzo del Gateway. Per
la registrazione sono richieste
solamente un indirizzo e-mail e
una password. Per completare la
registrazione         è     necessario
introdurre il codice di sicurezza che
viene inviato entro pochi istanti dalla richiesta di registrazione. Il sistema non invia e-mail
pubblicitarie, ma l’indirizzo e-mail potrà essere utilizzato per il recupero della password.

                                                              Dopo aver introdotto il proprio
                                                              nome utente e la password fare
                                                              click su “Sign in”. La schermata
                                                              successiva visualizzerà il (i) Gateway
                                                              associati al proprio account. In
                                                              questo modo sarà possibile
                                                              visualizzare agilmente le immagini
                                                              provenienti da più impianti, anche
                                                              indipendenti tra loro.
                                                              Fare click su “Preview” per
                                                              visualizzare la pagina principale per
                                                              la connessione alla pulsantiera ,
                                                              abilitare/disabilitare              la
                                                              comunicazione audio bidirezionale /
                                                              e aprire la serratura.
                                                              Alla richiesta, acconsentire alla
pagina web di accedere ai dispositivi audio (microfono e altoparlanti) altrimenti non sarà possibile
parlare / ascoltare con il visitatore.

ACI srl Farfisa Intercoms
www.farfisa.com
                                                 6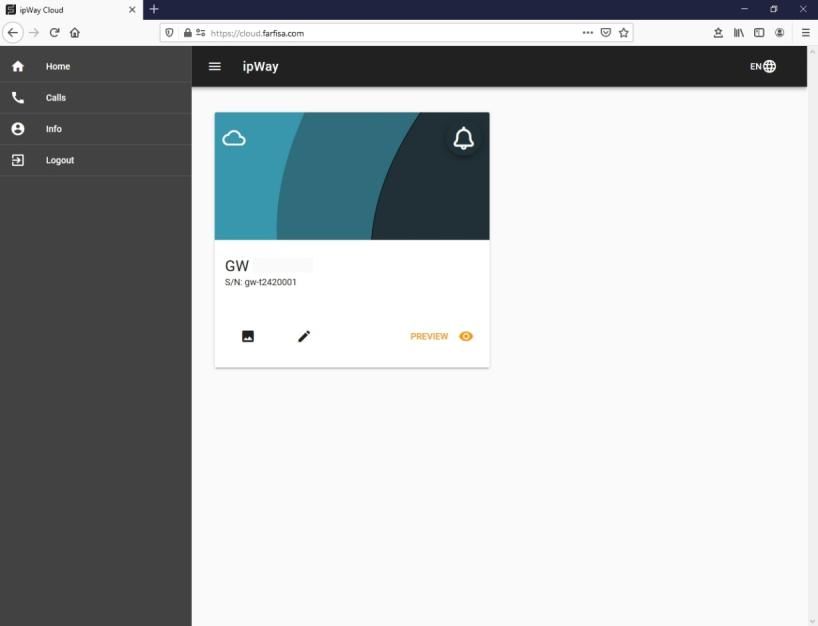
Guida rapida GW2IP

4. App per dispositivi mobili
L’app “IpWayCloud”è disponibile per i dispositivi Android e iOS nei rispettivi store:

                                       Android                           iOS

Dopo aver installato l’applicazione, utilizzare gli stessi dettagli dell'account creato in precedenza
per accedere, l'app mostrerà lo stesso nome assegnato al Gateway in occasione dell’invito e potrà
dunque accedere alla visualizzazione delle immagini del proprio impianto videocitofonico.

                            [Schermata di login, Lista dei dispositivi, Sezione “Visualizza”]

Al primo accesso acconsentire all'app di accedere all'utilizzo del microfono e della fotocamera
affinché l'app stessa possa funzionate correttamente.
La sezione “Visualizza” dispone di alcuni controlli di utilizzo comune: fare click sull’icona colorata
con il nome assegnato alle pulsantiere esterne (nell’immagine sopra “Farfisa”) o alle eventuali
telecamere di sorveglianza per visualizzare le immagini live provenienti da questi dispositivi per
controllo.
Non è necessario mantenere l’app in esecuzione per ricevere chiamate: all’arrivo di una chiamata
dal posto esterno l’applicazione mostrerà prima una notifica con l’invito a rispondere e, solo una
volta che l’utente abbia confermato la notifica, l’app si aprirà automaticamente consentendo la
visualizzazione delle immagini provenienti dalla pulsantiera.
Fare click sull'icona   per abilitare la connessione audio bidirezionale alla pulsantiera o fare click
sull'icona           per aprire direttamente la serratura.

ACI srl Farfisa Intercoms
www.farfisa.com
                                                           7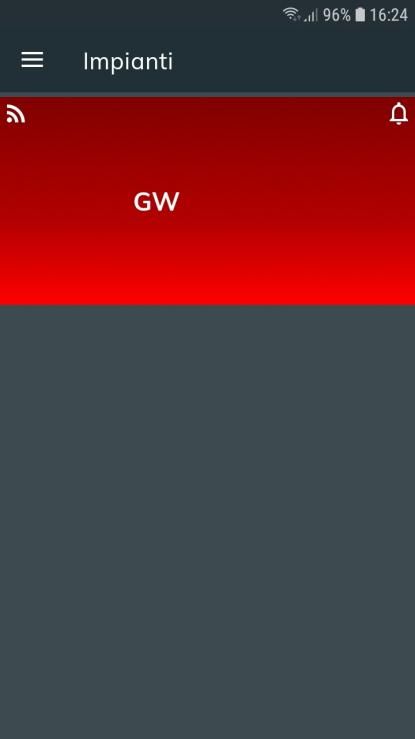
Guida rapida GW2IP
Fare click sul nome dei relè (Comandi) per attivare eventuali relè attuatori per servizi aggiuntivi
remotamente.
In alternativa è possibile ignorare la chiamata che comunque verrà memorizzata insieme ad alcuni
fotogrammi nella sezione “Eventi”.
[La schermate “Eventi” ed “Impostazioni”]
La sezione “Eventi” elenca le chiamate effettuate dalla pulsantiera all’interno associato all’utente,
incluse quelle “Perse” e quelle “Risposte”. E' possibile fare click su ciascun evento per visualizzare
alcune immagini relative a ciascun evento catturate dal dispositivo. Queste informazioni vengono
cancellate automaticamente dopo 30 giorni.
La sezione “Impostazioni” consente di assegnare / modificare il nome assegnato al Gateway, così
come un'immagine identificativa dell'impianto. L'opzione “Non disturbare” disabiliterà le notifiche
di chiamata dal Gateway così che non verranno ricevute più chiamate dal sistema.
Note
L’arrivo della notifica è solitamente istantaneo, tuttavia la velocità di accesso e di ricezione
delle immagini una volta cliccato su “Accetta”, dipende dalle prestazioni del telefono, dal
suo sistema operativo nonché dalla velocità e dalla copertura della rete.
ACI srl Farfisa Intercoms
www.farfisa.com
8GW2IP quick guide
Quick guide to web and smart phone app
for GW2IP Gateway use
Preliminary note:
ENGLISH
This guide shows the GW2IP Gateway configuration and use through the web and smart phone
apps. For device connection to the DUO video intercom system and device’s power supply please
refer to product’s installation manual.
1. Connection to LAN network
The Gateway’s IP factory default setting, for both cabled and wireless interfaces, is “DHCP”: in this
way it will acquire automatically the IP address from the router. Once the Gateway is connected to
network, it will automatically make a link to Farfisa’s cloud server, this status is highlighted by the
frontal red led which blinks once every 4 seconds.
2. http://find.farfisa.com web site
Once the Gateway is correctly connected to the network click on http://find.farfisa.com to search
for Gateway within the LAN. The discovered Gateway(s) will be displayed under “Device list”,
showing also their serial number and IP address. If the Gateway is not able to connect the cloud
server it will be not displayed on this page, in this case check again the connection to Internet.
Click on to refresh the search
operation.
In “Help” section there some tips
to connect Gateway via Wi-fi in
case the access point / router
supports WPS function.
To achieve a higher connection
stability it is suggested to privilege
the Ethernet connection.
If more than one Gateway is
available within the same network
it is possible to click on “Identify”
button, this will turn on the red led
of the Gateway for about 30
seconds.
ACI srl Farfisa Intercoms
www.farfisa.com
9GW2IP quick guide
Click on “Connect” button to
login and access Gateway’s
configuration. The default login
data are:
Username: admin
Password: 1234
The setting menu on the left has various sections:
Home. It lists the system
status and summarize the
main settings of the
device.
Network. It has 2 sections:
o Cabled: for network
settings in case of
connection via RJ45
Ethernet cable. Default
setting is for DHCP but it is
possible to change to set
the IP address manually.
o Wireless: this section is
further divided in 2 parts:
- Wireless: to enable /
disable the wireless
interface and related
settings
- WPS: to manually enable / disable WPS feature for automatic connection to compatible
access points or routers.
System. Also this part has 2 sections:
o Update: the Gateway will automatically check for available updates and it will be possible
to enable their download and automatic installation from here.
o Others: here it is possible to change administrator’s password.
DUO system. This section allows to set configuration related to DUO system:
o Housing units: here it is required to specify the DUO addresses related to the user of the
video intercom system who must be linked to the Gateway:
ACI srl Farfisa Intercoms
www.farfisa.com
10GW2IP quick guide
- Click the “+” on top right corner to add a new “New housing Unit”.
- Assign a “Name” and the DUO address related to this apartment.
- “Location” and “Note” are optional.
- Click “Add” to confirm.
- Once the new apartment is created click on the envelope icon to invite users:
just type the e-mail address of the user you wish to link and click on “Invite”.
- The user will receive in a very short time an invitation by e-mail with a link to the
web site https://cloud.farfisa.com.
- Now the user has to type his account details, if previously created, otherwise it is
possible to click on “Create” to make a new one. The first time the user connects its
Gateway the system will asks to set a name for it (for example: “My house”, “Office”,
“House for vacation” and so on). Refer to section 3. for more details about account
creation.
- If the user does not accept the invitation within 24 hours it will be required to send
the invitation once again.
o Resources: here it is required to specify the addresses of the other devices connected to
the DUO bus such as:
- Door panels (section “Cameras”): input at least an address of the door panel
connected to the system and originating the call or the address(es) of video modulator
VM2521 for eventual external CCTV cameras. This name will be showed also on the
main window of the app for video checking even without a call.
- Input ports (section “Sensors”): input here the address(es) of eventual input ports
of smart relay 2281Q, if any connected to suitable sensors, to get the notification on
the app about door open / closed.
- Relays (section “Actuators”): input here the address of eventual smart relay 2281Q
or the address of the additional relay built-in door panel. This will allow the end user to
operate the devices connected to these relays remotely by app.
o Settings:
- “Gateway address”: to be filled only in case of special system configurations.
- “Have 12Vac power supply (Extra load)”: enable this option in case the Gateway is
installed with external power supply (not via DUO bus) and connected to a derived
output of a DV242xQ video distributor.
o Logout: exits Gateway’s configuration.
ACI srl Farfisa Intercoms
www.farfisa.com
11GW2IP quick guide
3. The https://cloud.farfisa.com web site and user’s account management
This web site allows the end user to
manage his own account, password,
personalise some functions of the
Gateway, beside displaying the video
signal coming from the door panel
and other operations.
Every user who needs the
connection to Gateway must have
his own account.
It is possible to create a new account
by clicking on “Create one”, even
before receiving the invite to
Gateway’s use. The registration
requires only a valid e-mail address
and a password. To complete the
registration it is required to input
the security code which is sent as soon as the user applies for the registration. The system does
not send advertising e-mails but the address can be used for password recovery.
After input account name and
password click on “Login”. The next
window will display the name of the
Gateway(s) bound to the user, listed
by name. By this selection it will be
possible to display pictures coming
from different systems, even
independent each other.
Click on “Preview” to display
interface page to connect the door
panel , enable / disable bidirectional
audio communication / and release
the door.
Allows the web page to access audio
devices (microphone and speaker)
otherwise it will be not possible to
talk / hear the visitor.
ACI srl Farfisa Intercoms
www.farfisa.com
12GW2IP quick guide
4. Mobile devices app
The mobile app “IpWayCloud” is available for Android and iOS devices on related stores:
Android iOS
After app installation use the same account details created previously to login: the user will be
able to see the same Gateway name and display the pictures of related door panel as well.
[Login page, List of devices, Monitoring window]
At first access allow the app to access audio devices and camera to work properly.
The main window is “Monitoring” and it has some controls for the user operations: click on the
icon with the assigned name of the door panel (on the above picture “Farfisa”) or on camera name
to display the live pictures coming from it.
It is not required to keep the app always running to receive calls: in case of a call from the door
panel the application will display a notification with the request to answer firstly. Then, only if the
user confirms, the app will open automatically displaying the video coming from the external
panel.
Click on the icon to enable bidirectional audio connection to the panel or click on the to
enable door release.
Click on the names of relays (Controls) to operate relay’s activation remotely for additional
services.
Otherwise it is possible to ignore the call, however it will be stored together with some pictures on
the list of “Events” section.
ACI srl Farfisa Intercoms
www.farfisa.com
13GW2IP quick guide
[“Events” and “Settings” window]
The section “Events” lists the calls performed by the panel, including “Missed Calls” and
“Answered calls”. It is possible to click on each event to display some pictures captured by the
device. These data will be automatically erased by the system after 30 days.
The section “Settings” allows to set a personal name for the Gateway device, as well as a picture,
for example showing the location of the system. While the option “Do not disturb” disables the
call notifications from the Gateway so that the user’s app will not ring any more in case of an
incoming call.
Note
The call notification is usually immediate, however the quickness of access to app and
pictures’ display once tap on “Accept”, strictly depends on mobile phone performances, its
operating system, network bandwidth and coverage.
ACI srl Farfisa Intercoms
www.farfisa.com
14Puoi anche leggere